Scction
V GENEBAL SEBVICING INFORMATION NloLlel
3575A
35754'a
2629
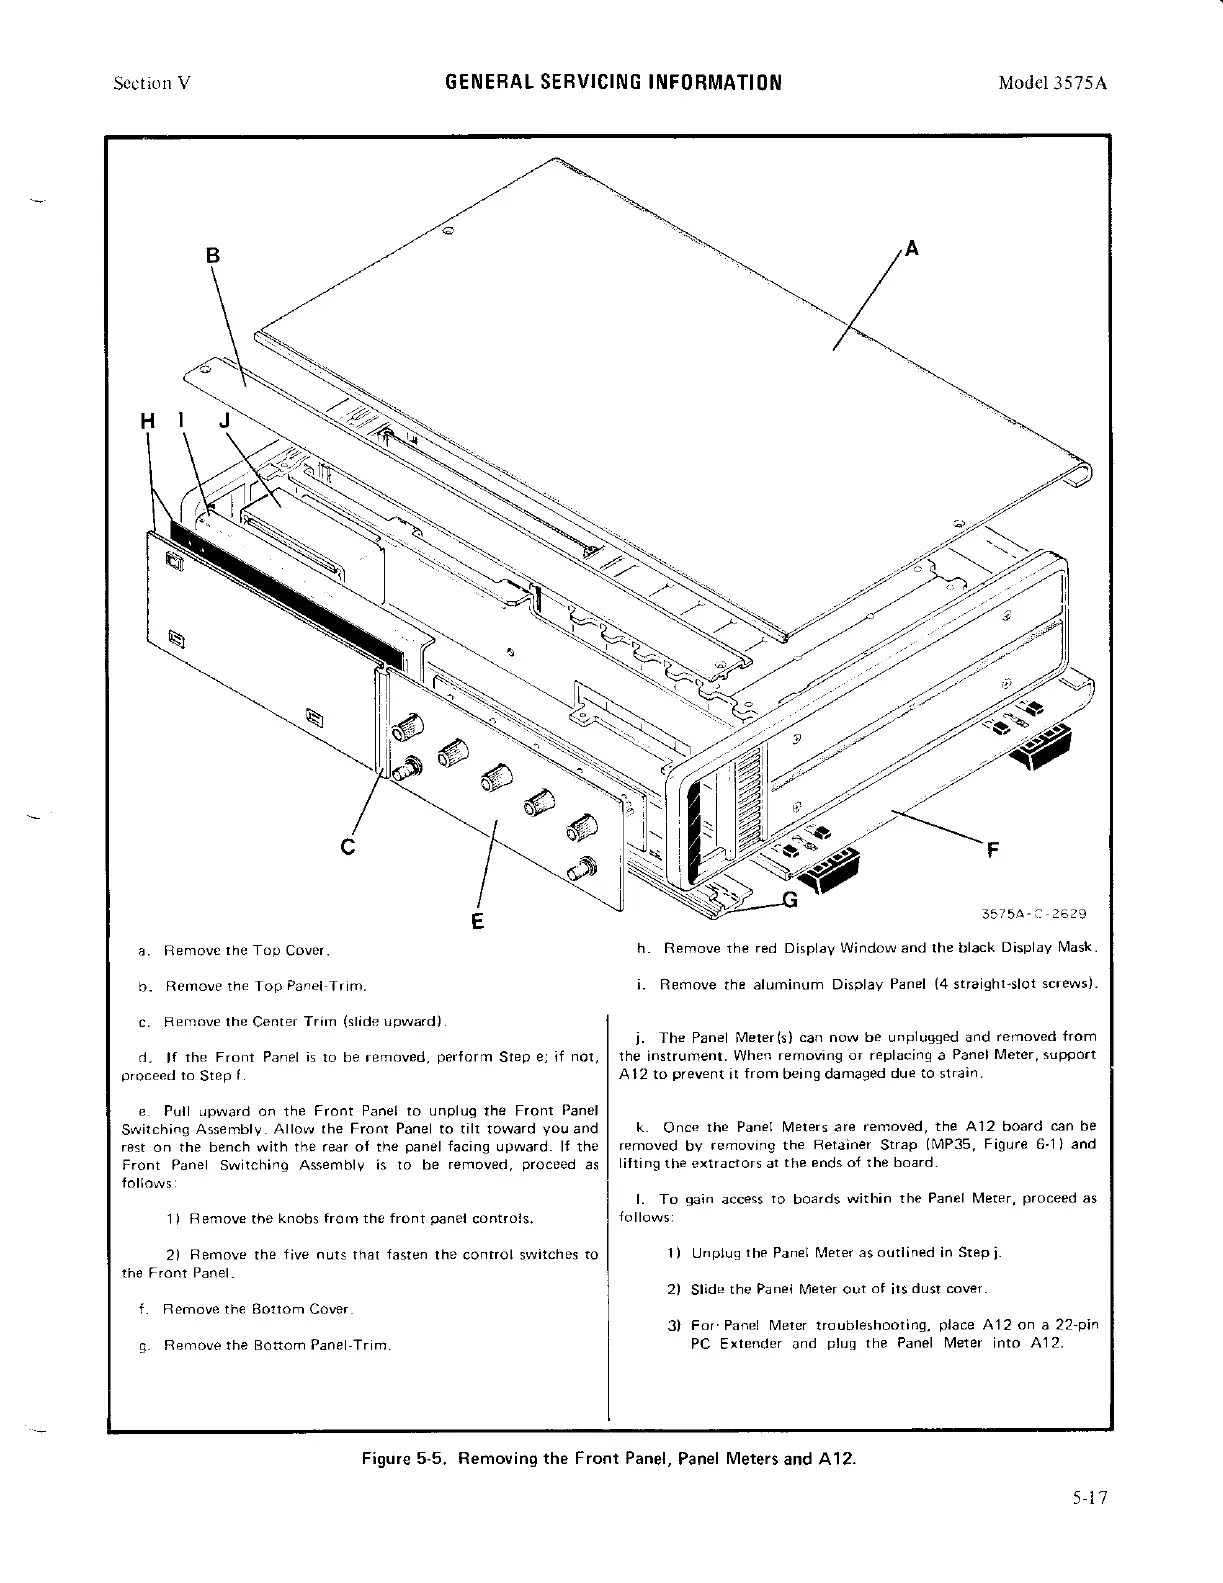
a. Remove
the Top
Cover.
tr. Remove the Top
Panel
Trim.
h. Remove the
red
Display
W;ndo!1/ and the black
Display N4ask.
i. Remove the aluminum Dasplay
Panel
(4
straighi-slot
screws).
c. Remove the Center
Trim
(sllde
upward).
d.
lf
ihe Front Panel
is
ro be removed,
perform
Step
e; if not,
proceed
io
step
f.
e
Pull lrpward on the
Front Panel to unplug the Front
Panel
Swirchinq
Assemblv.
Allow the Front Panel to till toward
you
and
rest
on the bench
with the re3r of the
panel
facing
upward. lf the
Front
Panel
Switchinq Assernbly
is to be
removed,
proceed
as
1) Remove the
knobs from the front
panel
controls.
2) Remove the
five nuts
that
fasten
the control swilches
to
f.
Remove
the Eortom
Cover
g.
Remove the Bottom
Panel
Trim.
j.
The Panel Nneter(s)
can now be unplussed and
removed from
the instrument. When
removang or replacinq a
Panel Meter, support
Al2 ro
prpvpnl
rr
from
berng damdged
due to
\lrai4.
k
Once
the Panel Meters are
removed, the A12 board
can be
removed
by
removing the Retainer Strap
(MP35,
Fiqure
6-lland
Lifting the extractors ai
the ends of the board.
l. To
gain
access
to
boards
withan the Panel N,4eter,
proceed
as
1
)
Unplus
ihe
Panel N4eter
3s outiined in Step
i.
2) slide the Panel Merer out
of
its
dust cover.
3l
For Panel Meter troubleshooiing,
place
A12 on a 22
pin
PC Extender and
pluq
the Panel Meter
into
A12.
Figr-rre 5-5. Removing the Front Panel,
Panel
Meters
and A12.
5.1'7