UNINET IMAGING INC. • HP 5500 CARTRIDGE REMANUFACTURING INSTRUCTIONS
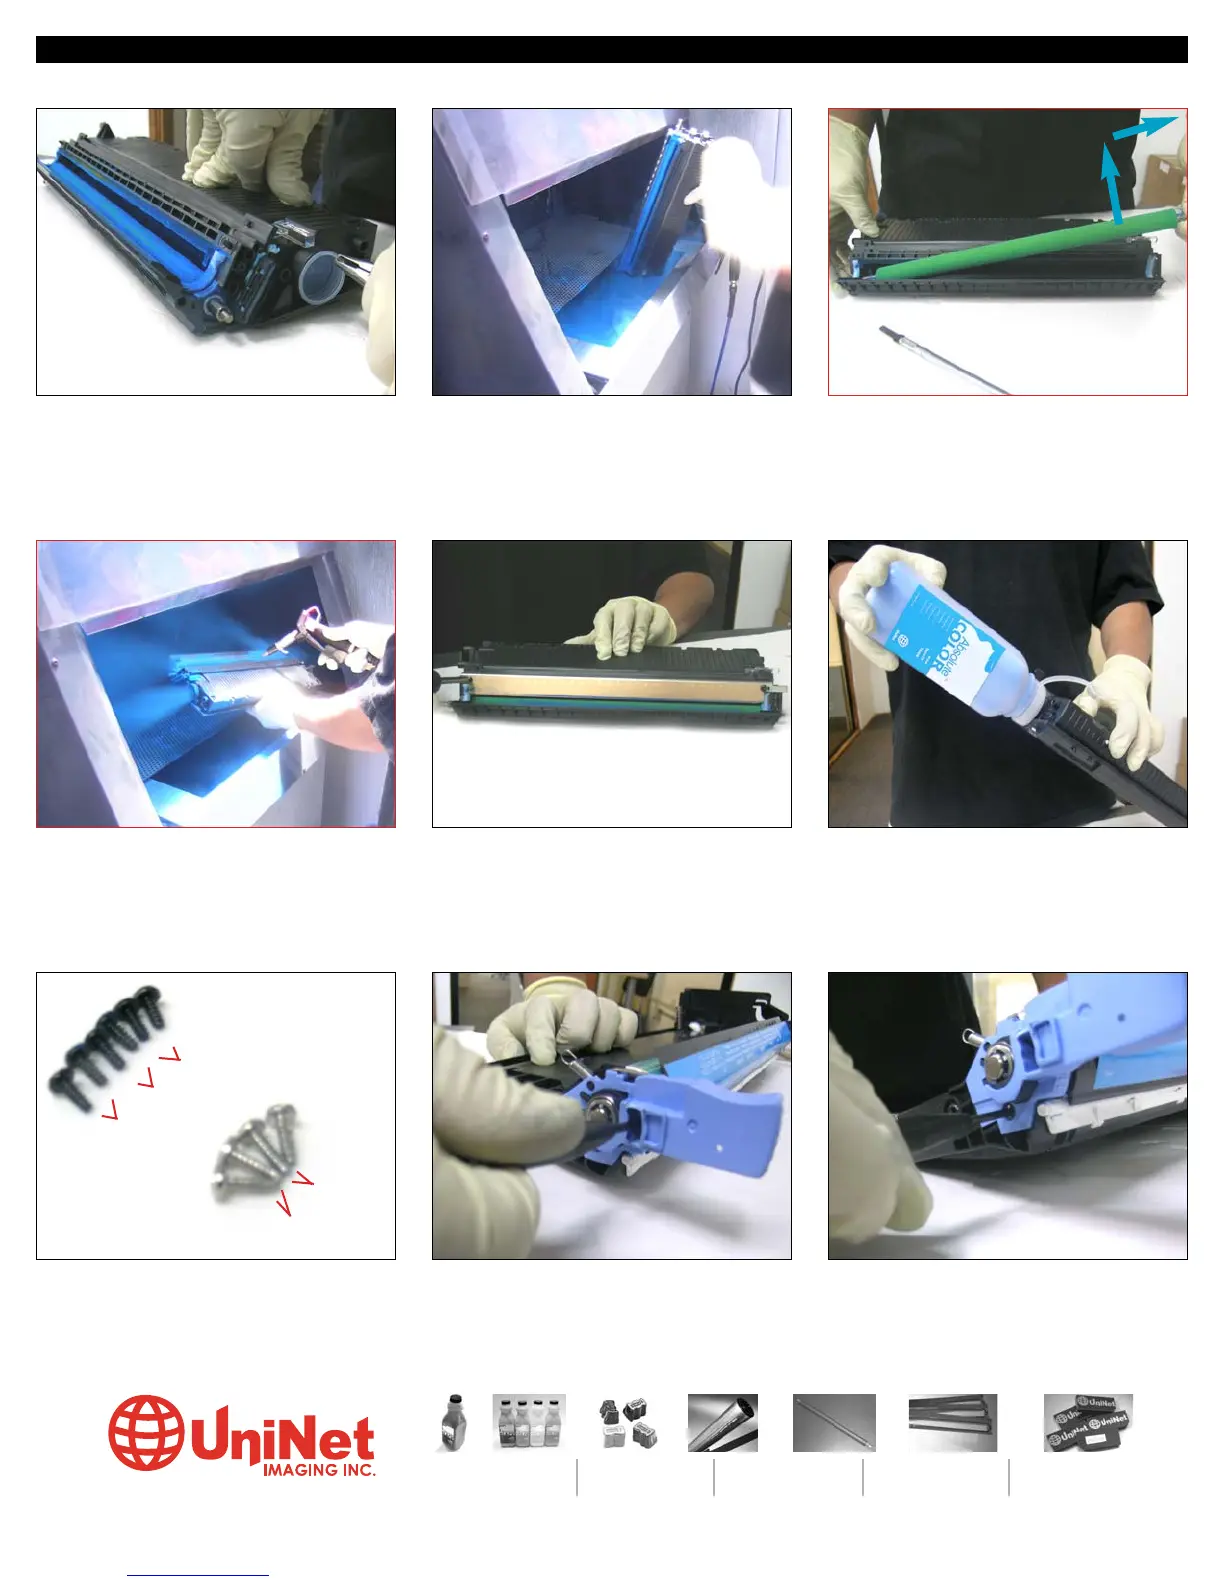
36. Clean the cartridge again with the
roller removed.
37. Now you are ready to reinstall all com-
ponents.
38. Refill toner.
39. You should have six small black screws
and four long silver gear side end cap
screws.
40. To disassemble the drum unit, first remove the two screws on the blue cartridge instal-
lation handle on the gearless side as shown.
End Cap
End Cap
Support Plate
Support Plate
Doctor Blade
34. Empty residual toner and clean car-
tridge using air pressure.
33. Remove the Toner fill plug.
35. Lift and slide the supply roller out as
shown.
11124 Washington Blvd., Culver City, California U.S.A. 90232 Ph: 310 280-9620 • Fx: 310 838-7294 • techsupport@uninetimaging.com
© 2005 Uninet Imaging Inc. All Trademark names are property of their respective owners. Product brand names mentioned are intended to show compatibility only. Uninet Imaging does not guarantee or warrant downloaded information.
USA
+310-280-9620
+310-838-7294
Ph:
Fx:
JAPAN
+81-3-44-55-2789
+310-838-7294
EUROPE
+34-93-757-1335
+34-93-741-4166
BRAZIL
+55-11-4822-3033
+55-11-4822-3353
ARGENTINA
+54-11-4574-3706
+54-11-4574-3706
www.uninetimaging.com