NOTE:
You should only ungroup one disk at a time. Before you
ungroup a disk, verify that leveling is not in progress and
that sufficient fr ee space is available. After you ungroup the
disk, verify the status of the disk group before continuing.
For more information about leveling and free space, see the
HP StorageWorks Enterprise Virtual Array best practices
document.
a. Click Ungro
up.
b. Click Ungro
up in bac kground.
CAUTION:
When selecting Ungroup in background, a dialog box
is displayed indicating the Operation succeeded. This
indicates that the ungroup operation has been initiated.
You can monitor the progress of the ungroup on the Disk
Drive Properties window.
c. Click the Disk Drive tab and monitor the ungroup progress.
When the ungroup is complete, continue with the next step.
• If you are running XCS 6.000 or later, monitor the
Migration progress field (Figure 5).
• If you are running an earlier version of XCS or any
version of VCS, monitor the Requested usage field
and the Actual usage field. Both fields will display
Ungrouped when the process is complete.
NOTE:
The u
ngrouping process may take up to several hours to
complete. The time depends on the capacity of the disk
and the level of storage system activity.
7. Click Remove to prepare the disk for removal. The status
indicators on the disk will begin flashing to help you locate the
disk. You can now remove the disk as described in Removing
adisk.
NOTE:
Certain hard disk failures result in a status of
Drive u nmated
.
If you are running XCS 5.xxx or earlier and HP Command
View EVA 5.x or earlier, the
Drive unmated
status disables
the Remove button. In this situation, you can remove the disk
immediately from the enclosure. The fault indicator will be on
to help locate the failed disk.
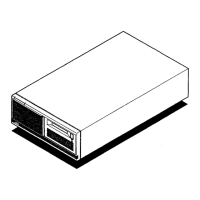
1
2
3
Figure 3 Disk
status indicators
1. Ac ti vi t y
2. Online 3. Fault
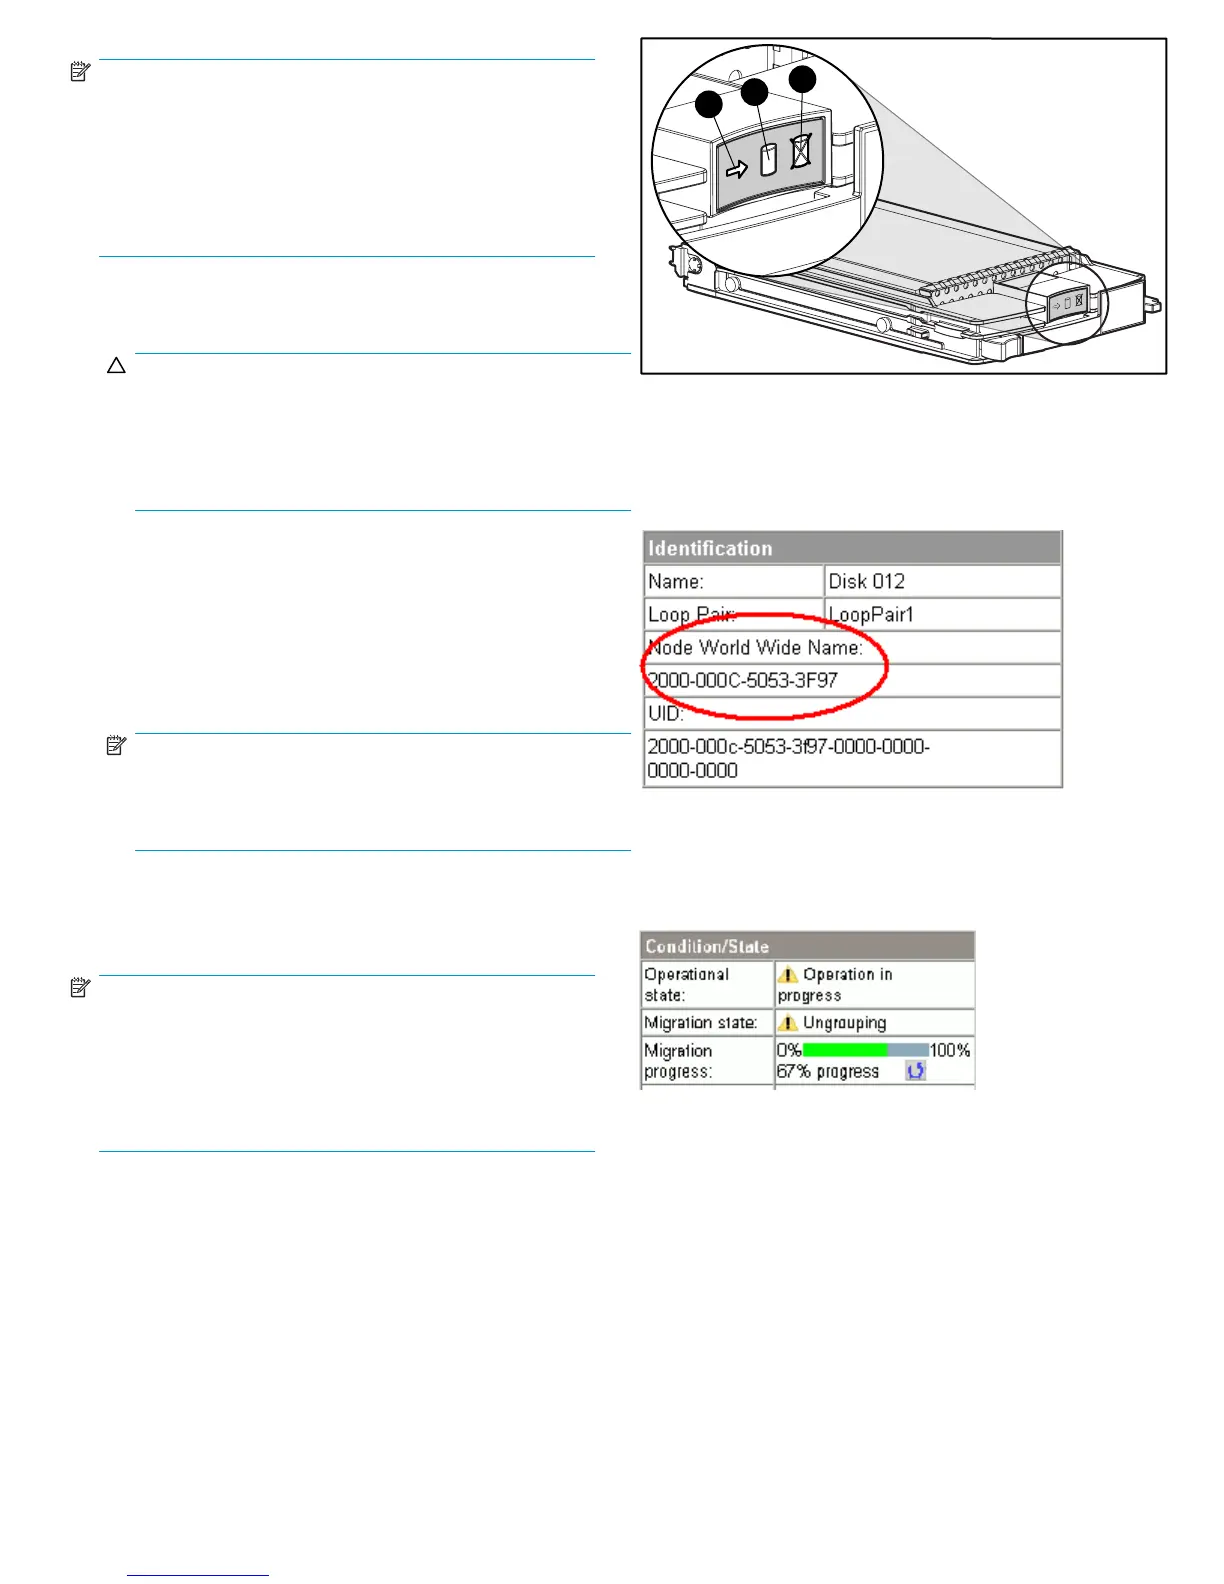
Figure 4 Checking Node World Wide Name
Figure 5 Monitoring ungroup progress
Page 3

 Loading...