7
Rear and side components
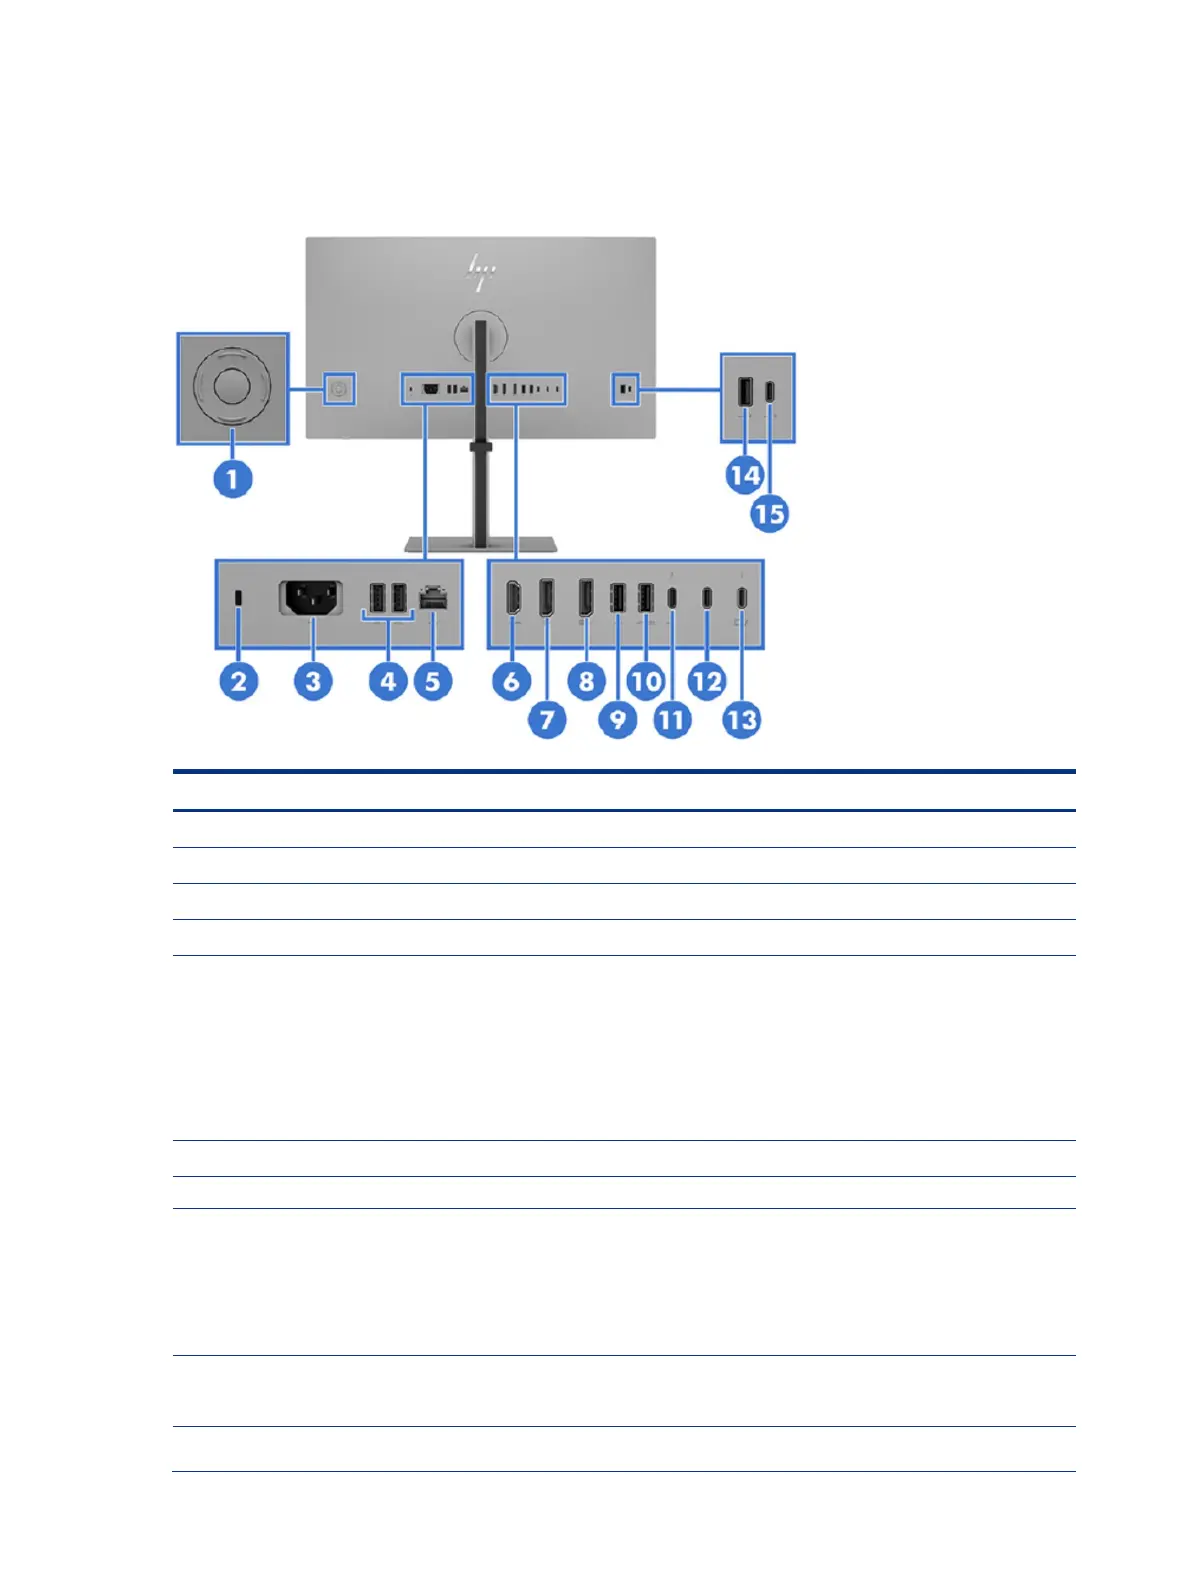
To identify the components on the rear of the monitor, use this illustration and table.
Table 2-3 Rear components and their descriptions
Press to open the OSD settings.
Connects an optional security cable.
Connects your monitor to a power outlet.
Connect a USB cable to a peripheral device, such as a keyboard, mouse, or USB hard drive.
Network (RJ-45) data rate via USB Type-C max speed is 1000 Mbps
● Green (left): The network is connected.
● Amber (right): Activity is occurring on the network.
NOTE: Supports IT Manageability, Out-of-band Wake on Lan (WOL) , Out-of-band Mac
Address Passthrough (MAPT), and PXE boot (HP models only). The functionality may vary
with PC settings.
NOTE: This network port is fully energy efficient according to IEEE standards (IEEE
802.3az-2010) as long as all connected devices support this feature.
Connects the HDMI cable to a source device such as a computer.
Connects the DisplayPort cable to a source device such as a computer.
DisplayPort OUT connector
Connects the monitor to another monitor for multistreaming.
NOTE: If you need to remove the DisplayPort cable from the DisplayPort OUT connector,
you should first remove the following cables in the order shown:
1. HDMI cable (if connected)
2. DisplayPort cable from the DisplayPort IN port (if connected
3. DisplayPort cable from the DisplayPort OUT port
Connects a USB cable to a peripheral device, such as a keyboard, mouse, or USB hard drive.
NOTE: This port also serves as the dedicated port for the Text-to-Speech (TTS) adapter
(camera model only).
USB Type-A port (includes
KVM connection)
Connects a USB cable to a peripheral device, such as a keyboard, mouse, or USB hard drive,
and charges peripheral devices. This is the dedicated USB Type-A port for KVM functions. It
 Loading...