EasyManuals Logo

HP dc7800 series User Manual

HP dc7800 series
49 pages
To Next Page IconTo Next Page
To Previous Page IconTo Previous Page
Page #18 background imageLoading...
Page #18 background image
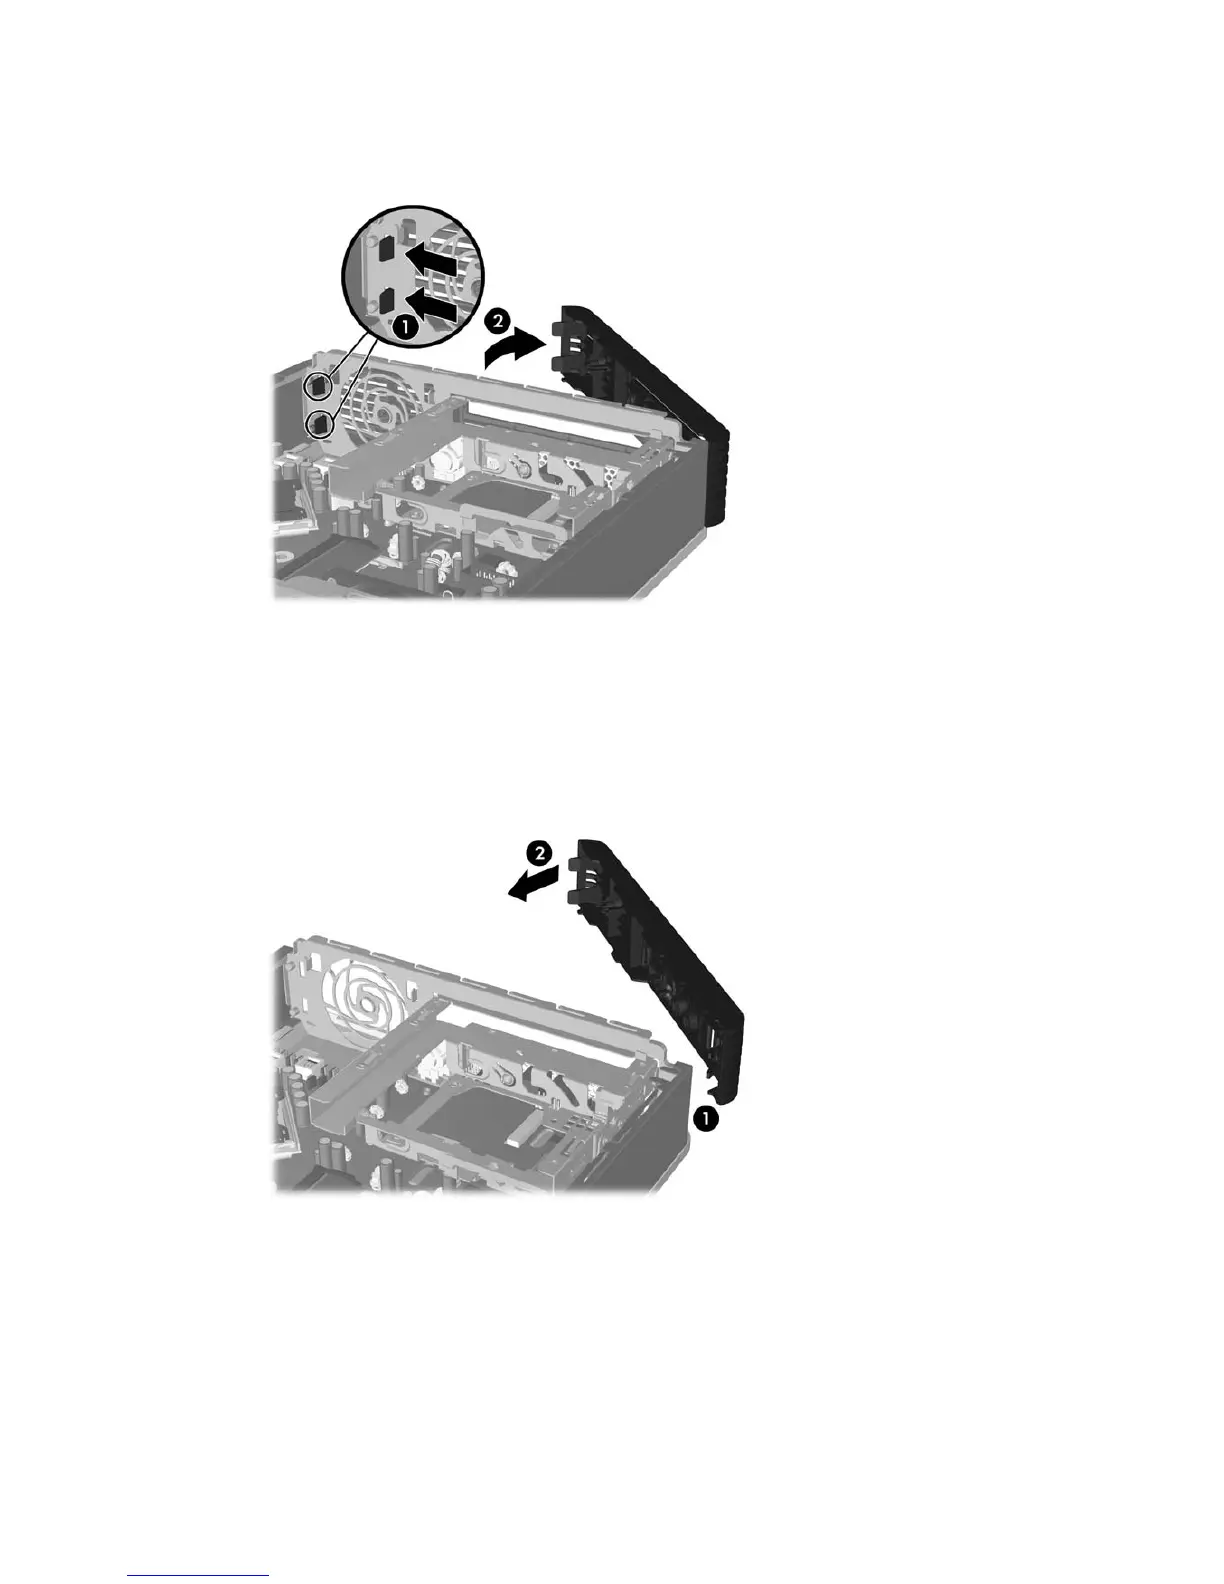
8. Press the two release tabs on the inside of the bezel towards the right side of the computer (1) and
rotate the bezel off from right to left (2).
Figure 2-3 Removing the Front Bezel
9. Replace the fan shroud.
To replace the front bezel:
1. Slide the hooks on the left side of the bezel into the slots on the chassis (1) then press the right
side of the bezel onto the chassis so that the latches snap in place (2).
Figure 2-4 Replacing the Front Bezel
2. Replace the access panel.
3. If the computer was on a stand, replace the stand.
4. Reconnect the power cord and turn on the computer.
5. Lock any security devices that were disengaged when the access panel was removed.
12 Chapter 2 Hardware Upgrades ENWW

Questions and Answers:

Question and Answer IconNeed help?

Do you have a question about the HP dc7800 series and is the answer not in the manual?

HP dc7800 series Specifications

General IconGeneral
ChipsetIntel Q35 Express
MemoryUp to 8 GB DDR2 SDRAM
AudioIntegrated High Definition Audio
Processor OptionsIntel Core 2 Duo
GraphicsIntel Graphics Media Accelerator 3100
Optical DriveDVD-ROM
NetworkIntegrated Intel Gigabit Ethernet
PortsUSB 2.0
Expansion SlotsPCI, PCIe x1, PCIe x16
Operating SystemWindows Vista, Windows XP
Power Supply240W
Form FactorSmall Form Factor (SFF), Convertible Minitower (CMT)

Related product manuals