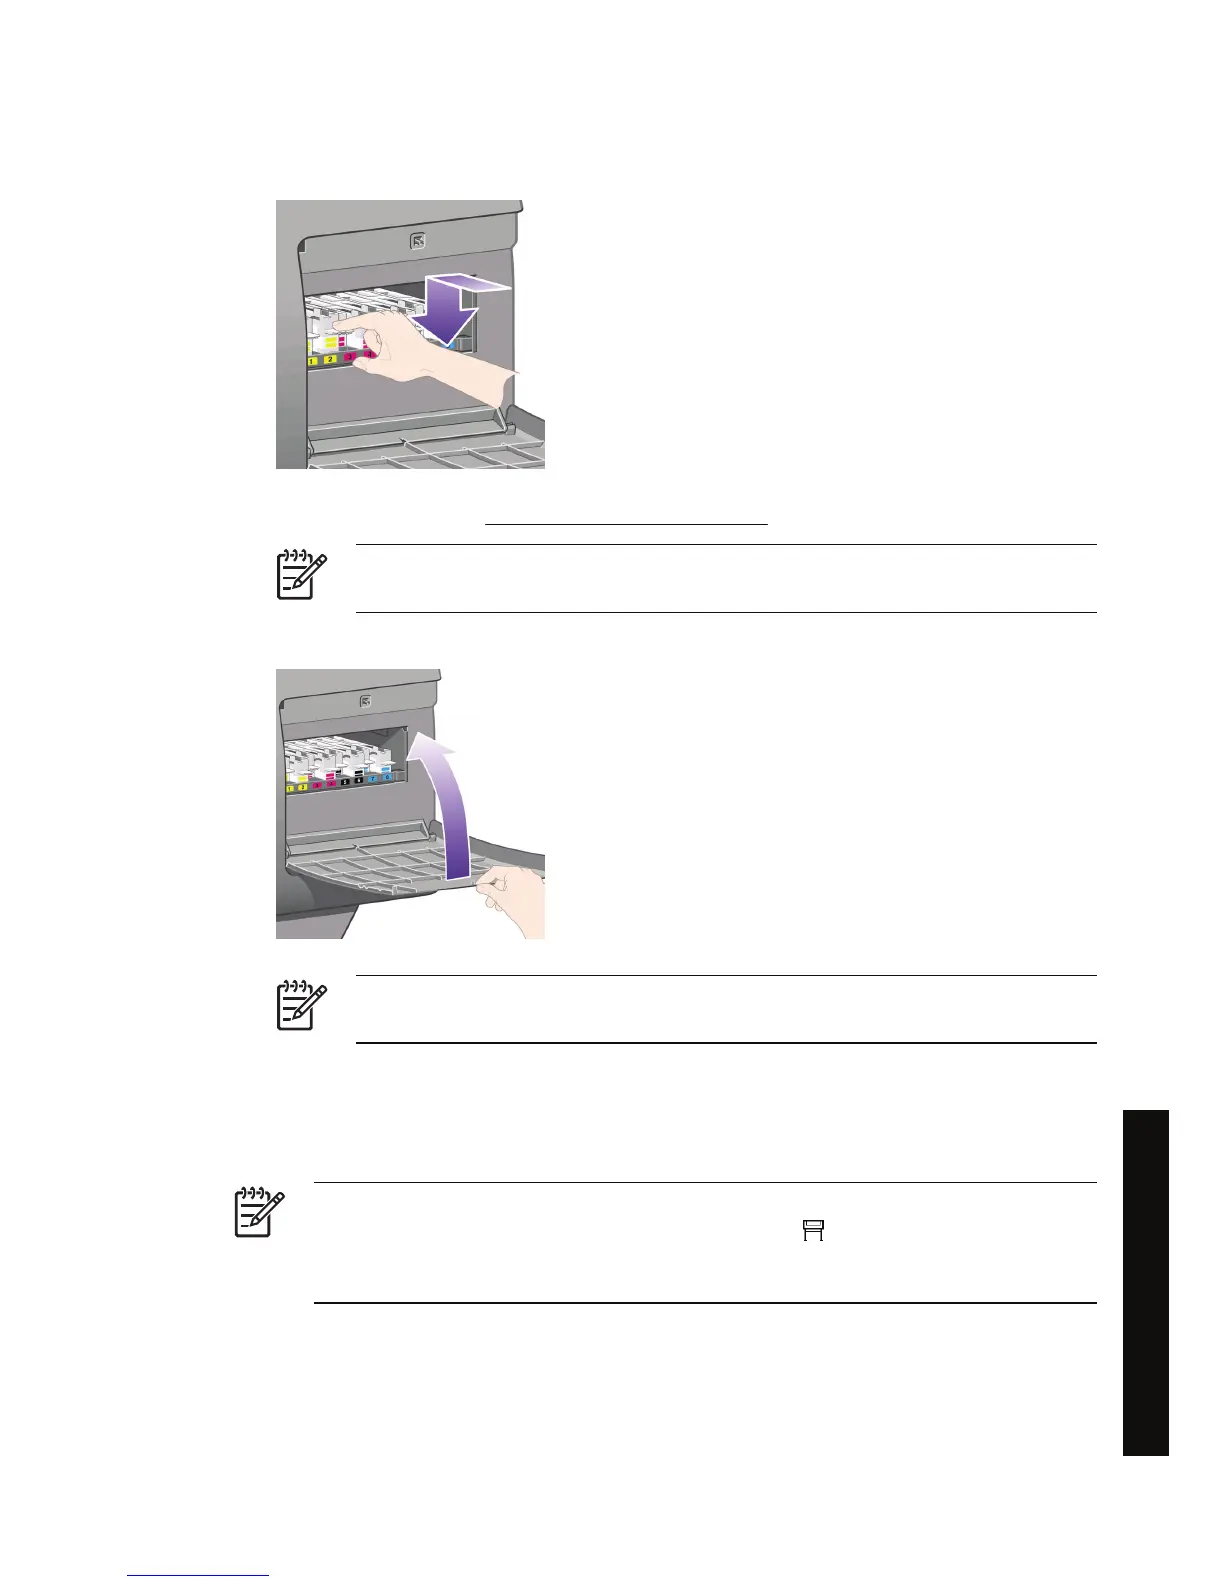
2. When the printhead cleaner has been pushed all the way in, press inwards and downwards as
indicated by the arrow shown here, until it clicks into place.
If you have difficulty, see I cannot insert a printhead cleaner.
NOTE The front panel will not show the new printhead cleaner until the right-hand door
is closed.
3. When you have inserted the printhead cleaner(s) into the printer, close the door.
NOTE The printer needs all the ink cartridges, printheads, and printhead cleaners to be
installed before it can continue.
4. If no paper is loaded, the front panel will instruct you to load some.
Whenever you insert a new printhead and cleaner, the printer will normally perform a printhead
alignment and color calibration. Both are recommended for best print quality. In some cases, you may
decide to postpone printhead alignment until after some further printing has been done.
NOTE If you prefer to save some time at the expense of print quality, you can turn off these
automatic procedures from the front panel, by selecting the
icon, then Printer
configuration > Auto printhead alignment > Off and Printer configuration > Color
calibration > Off.
ENWW Insert a printhead cleaner 87
How do I... (ink system topics)
 Loading...
