Entering the Service Calibrations Menu 165
Service Calibrations
If these conditions are not met, a warning will be displayed on the Front Panel and you will need to
restart the Calibration from step 1.
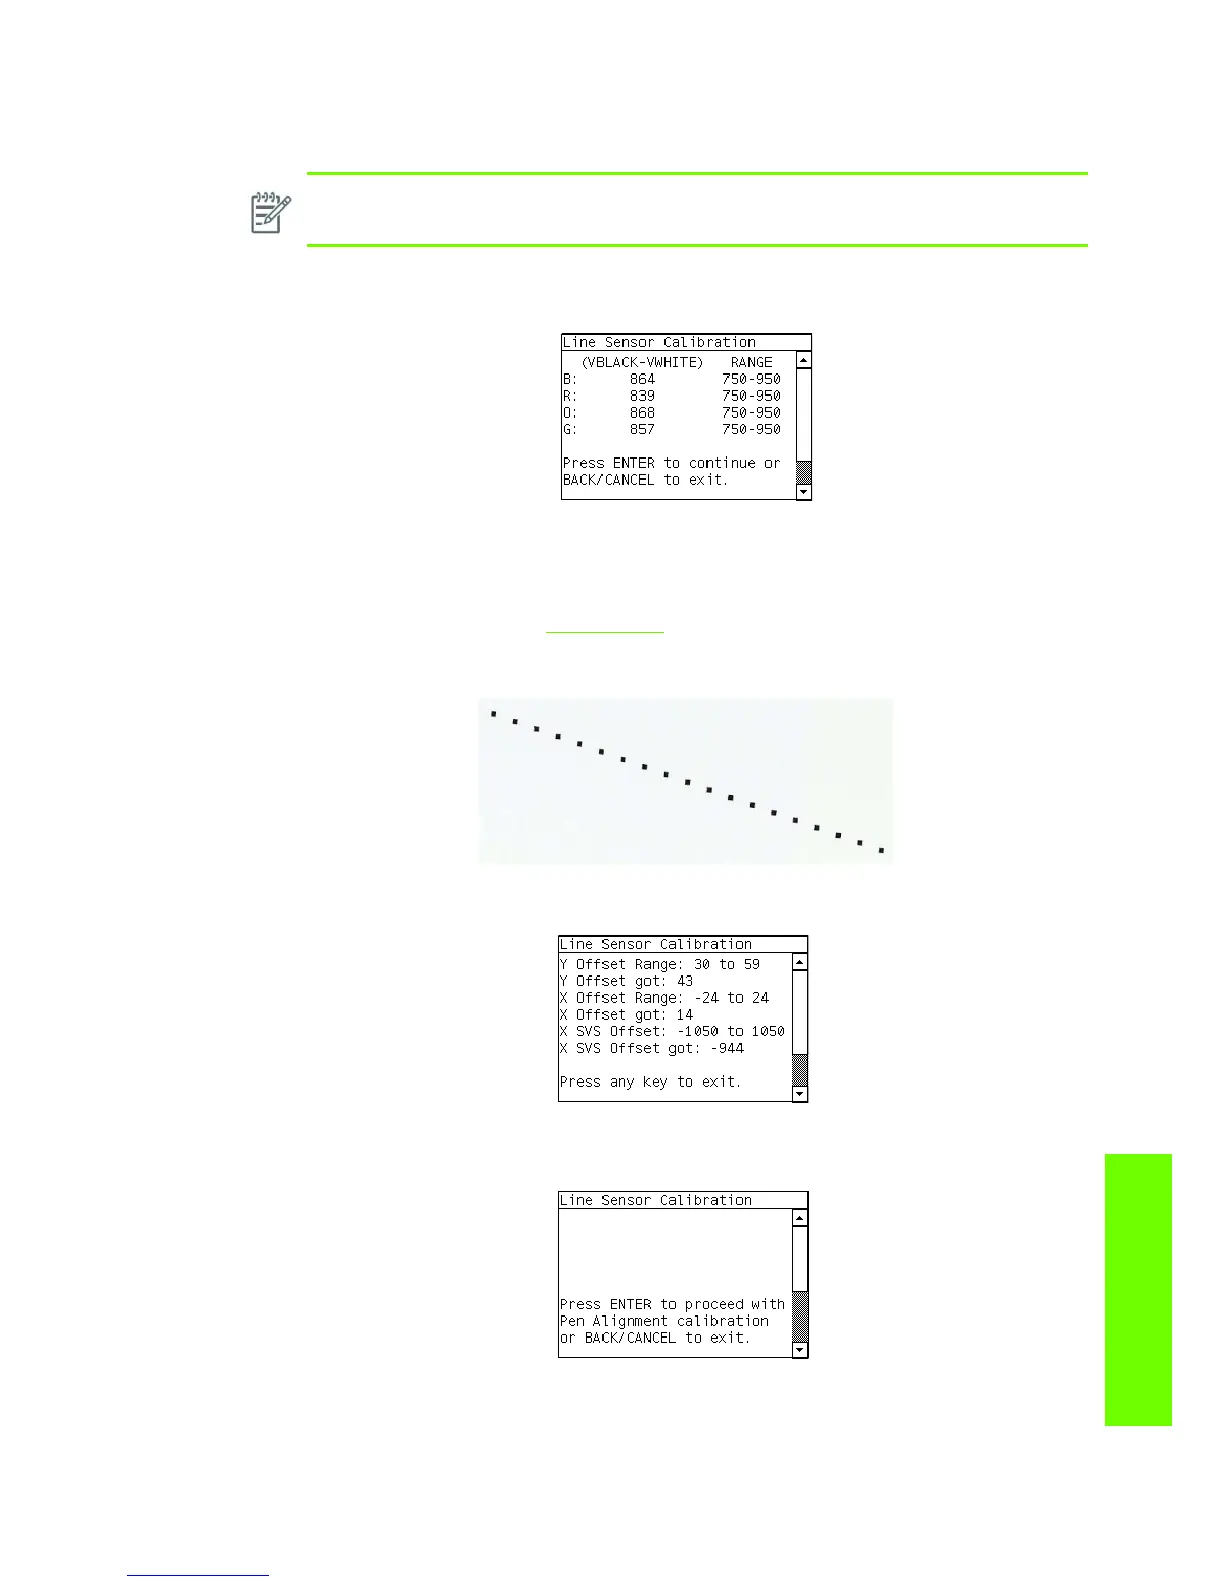
4. The Printer will start to calibrate the Line Sensor. Once the Line Sensor has been calibrated, the
results will be displayed on the Front Panel. Press Enter to continue or press Back or Cancel to exit
the calibration.
If the values are not within the range specified, an error will appear on the Front Panel. In this case,
try the following:
• Try the Scan-Axis Calibration again.
• Replace the Line Sensor ⇒ See page 390.
5. The Printer will start to calibrate the Line Sensor position to the Black Printhead. It will print a line of
black dots and then scan them:
6. Once the Line Sensor has been calibrated, the results will be displayed on the Front Panel. Press
Enter to finish the calibration or press Back or Cancel to exit the calibration.
7. The Printer will now perform the Printhead Alignment. When the following message appears on the
front panel, you must select whether you would like to continue with the calibration by pressing the
Enter key. Press Back or Cancel to exit the calibration.
NOTE: Make sure you keep your hands away from the Print Platen as the Carriage will be
moving at high speed and you could injure yourself or damage the Carriage Assembly.
 Loading...