Removing and replacing a hard drive
NOTE: Back up the hard drive before you remove it so that you can transfer the data to the new hard drive.
1. Remove the access panel.
For instructions, see Removing the access panel on page 17.
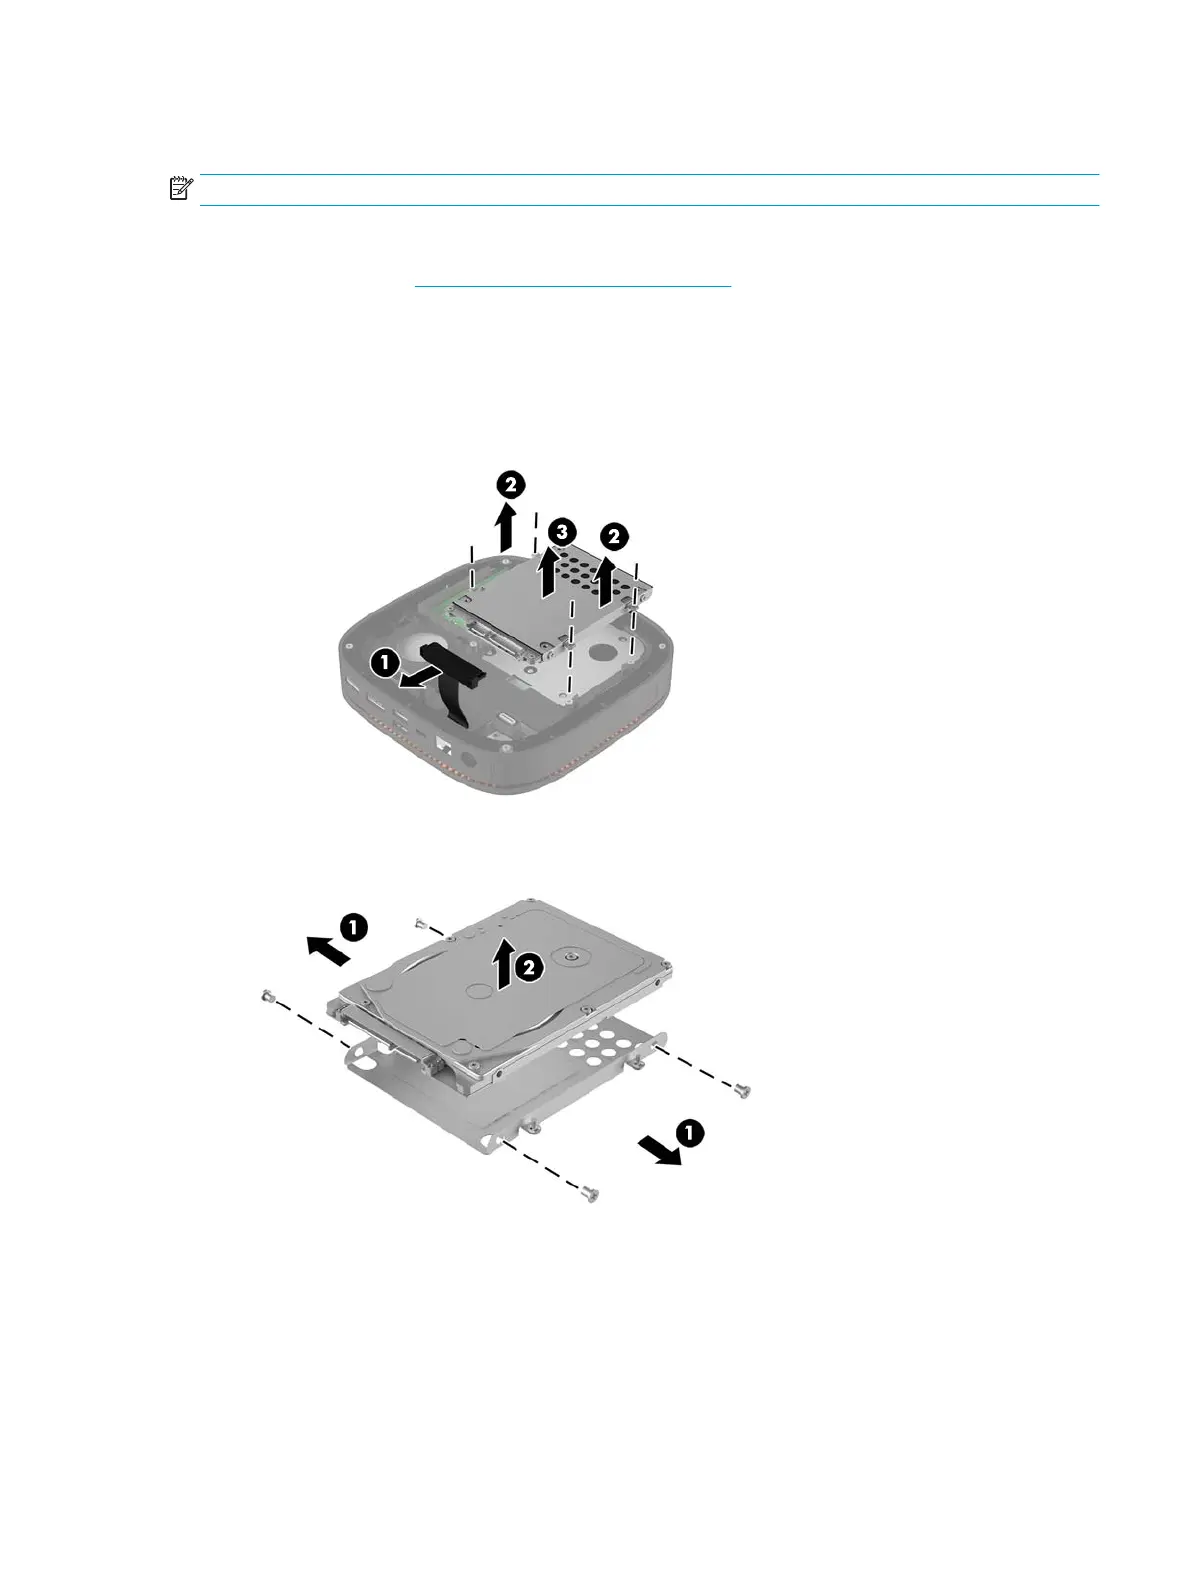
2. Pull the tab (1) to disconnect the hard drive power-and-data cable from the hard drive.
3. Remove the 4 screws (2) attaching the hard drive cage to the board and lift the cage (3) out of the
chassis.
4. Remove the screws (1) securing the hard drive in the cage and lift the hard drive (2) out of the cage.
5. Position the new hard drive over the drive cage with the hard drive connectors at the end with the
thermal patch and the circuit board side facing the closed side of the drive cage.
6. Set the new hard drive (1) into the cage. Be sure the label side of the hard drive is visible.
Removing and replacing a hard drive 23