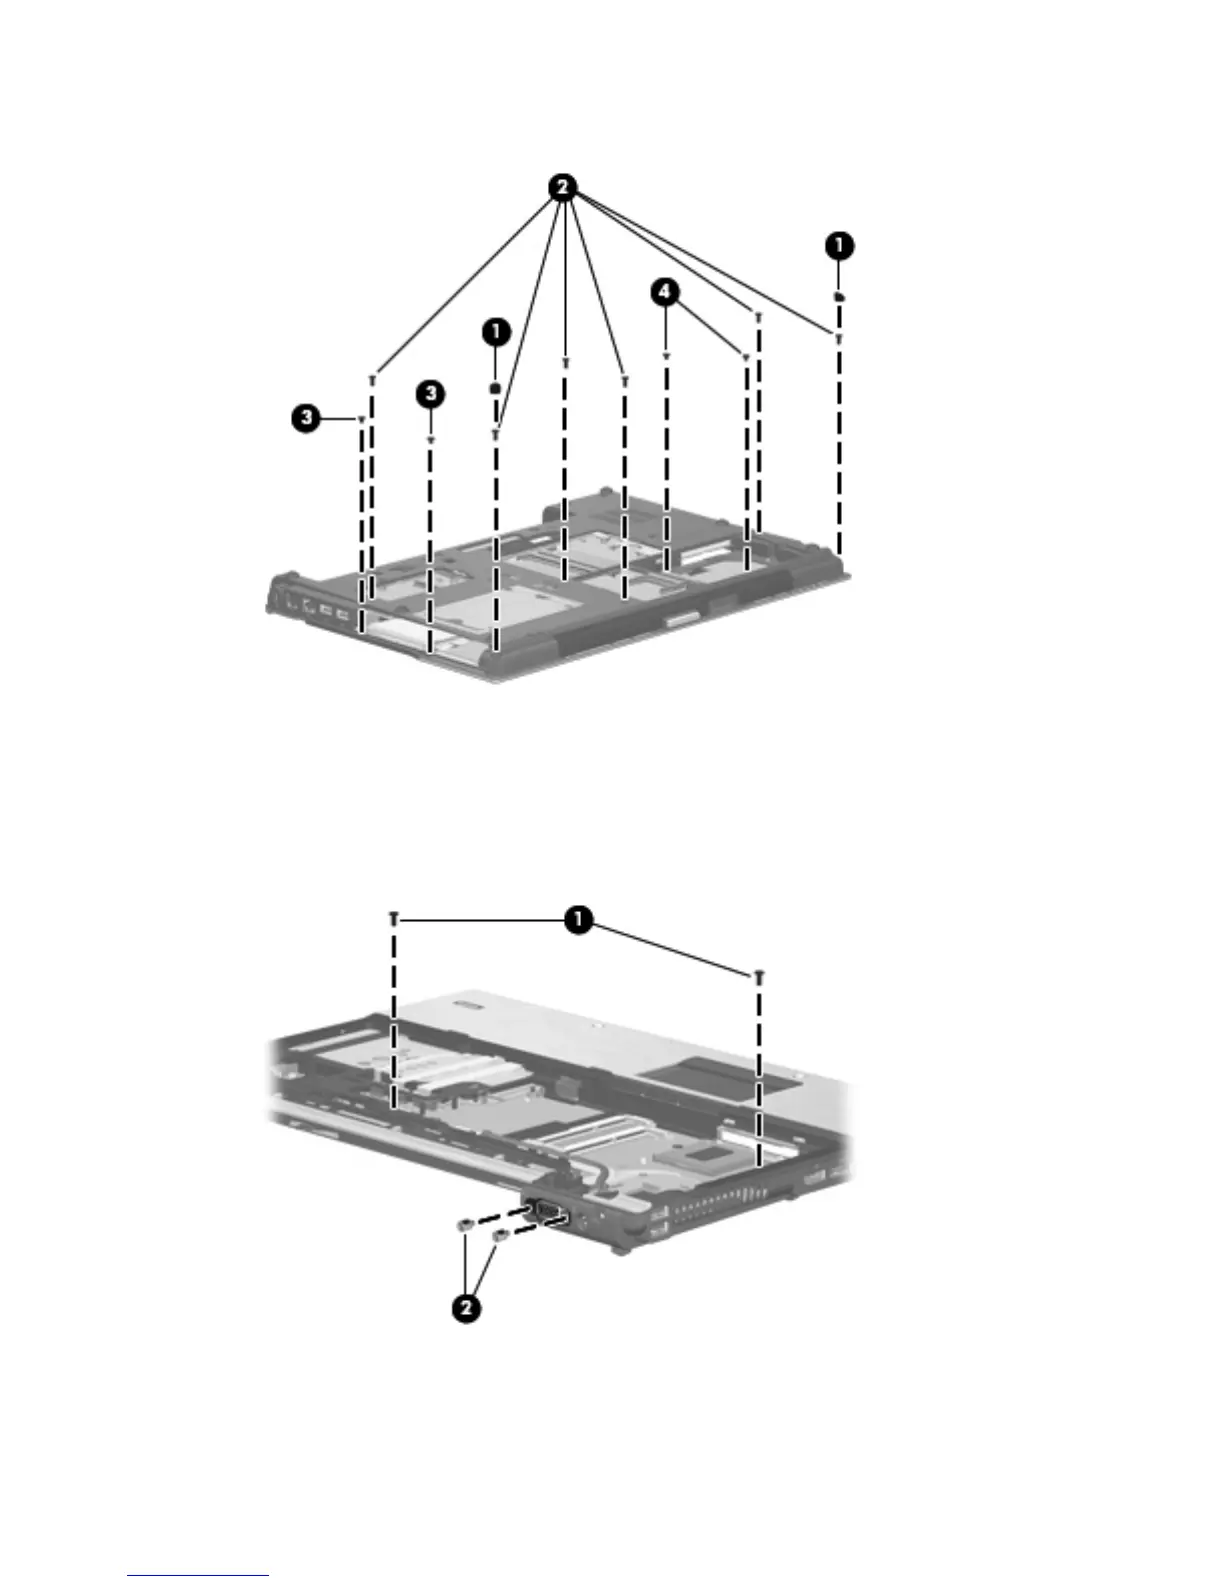
5. Remove the two Phillips PM2.0x3.0 screws (4) from the hard drive bay.
6. Turn the computer right-side up, with the rear toward you.
7. Remove the two Torx T8M2.5×6.0 screws (1) from the top of the top cover.
8. Close the computer and turn the rear toward you.
9. Remove the two HM2.5×6.0 screw locks (2) that secure the top cover to the computer.
Component replacement procedures 89
 Loading...