Removal and replacement procedures
Maintenance and Service Guide 4–9
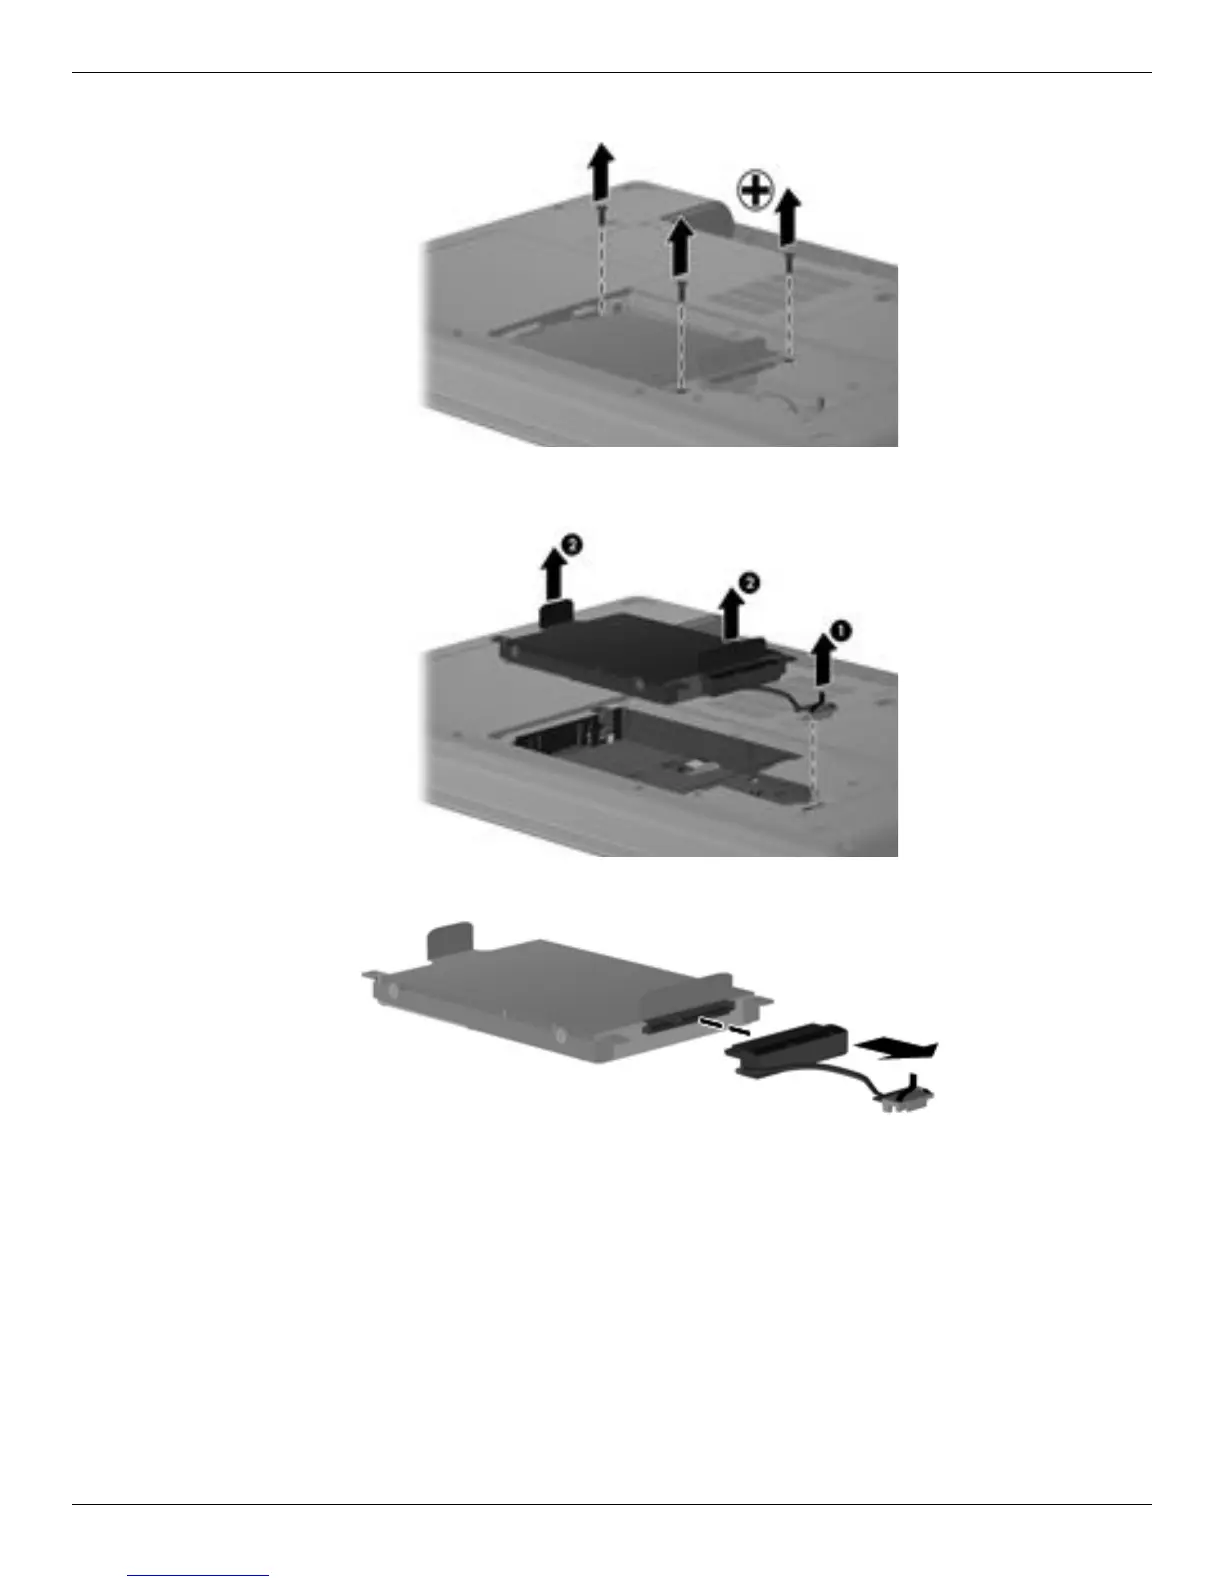
3. Remove the three Phillips PM2.5×5.0 screws that secure the hard drive to the computer.
4. Grasp the tab on the hard drive cable connector 1, and lift up to disconnect the cable from the system board.
5. Grasp the Mylar tabs 2 on the hard drive, and then lift the hard drive from the hard drive bay.
6. If you must remove the hard drive cable, disconnect it from the hard drive.
7. To remove the hard drive bracket, remove the two Phillips PM3.0×3.5 hard drive bracket screws 1 from each
side of the hard drive.
8. Grasp the 2 attached Mylar tabs and pull the bracket 2 straight up to remove it from the hard drive.
 Loading...