EasyManuals Logo

HP G72-100 - Notebook PC Maintenance And Service Guide

HP G72-100 - Notebook PC
128 pages
To Next Page IconTo Next Page
To Previous Page IconTo Previous Page
Page #88 background imageLoading...
Page #88 background image
4–50 Maintenance and Service Guide
Removal and replacement procedures
Steps 5 through 8 apply only to computer models equipped with graphics subsystems having discrete memory.
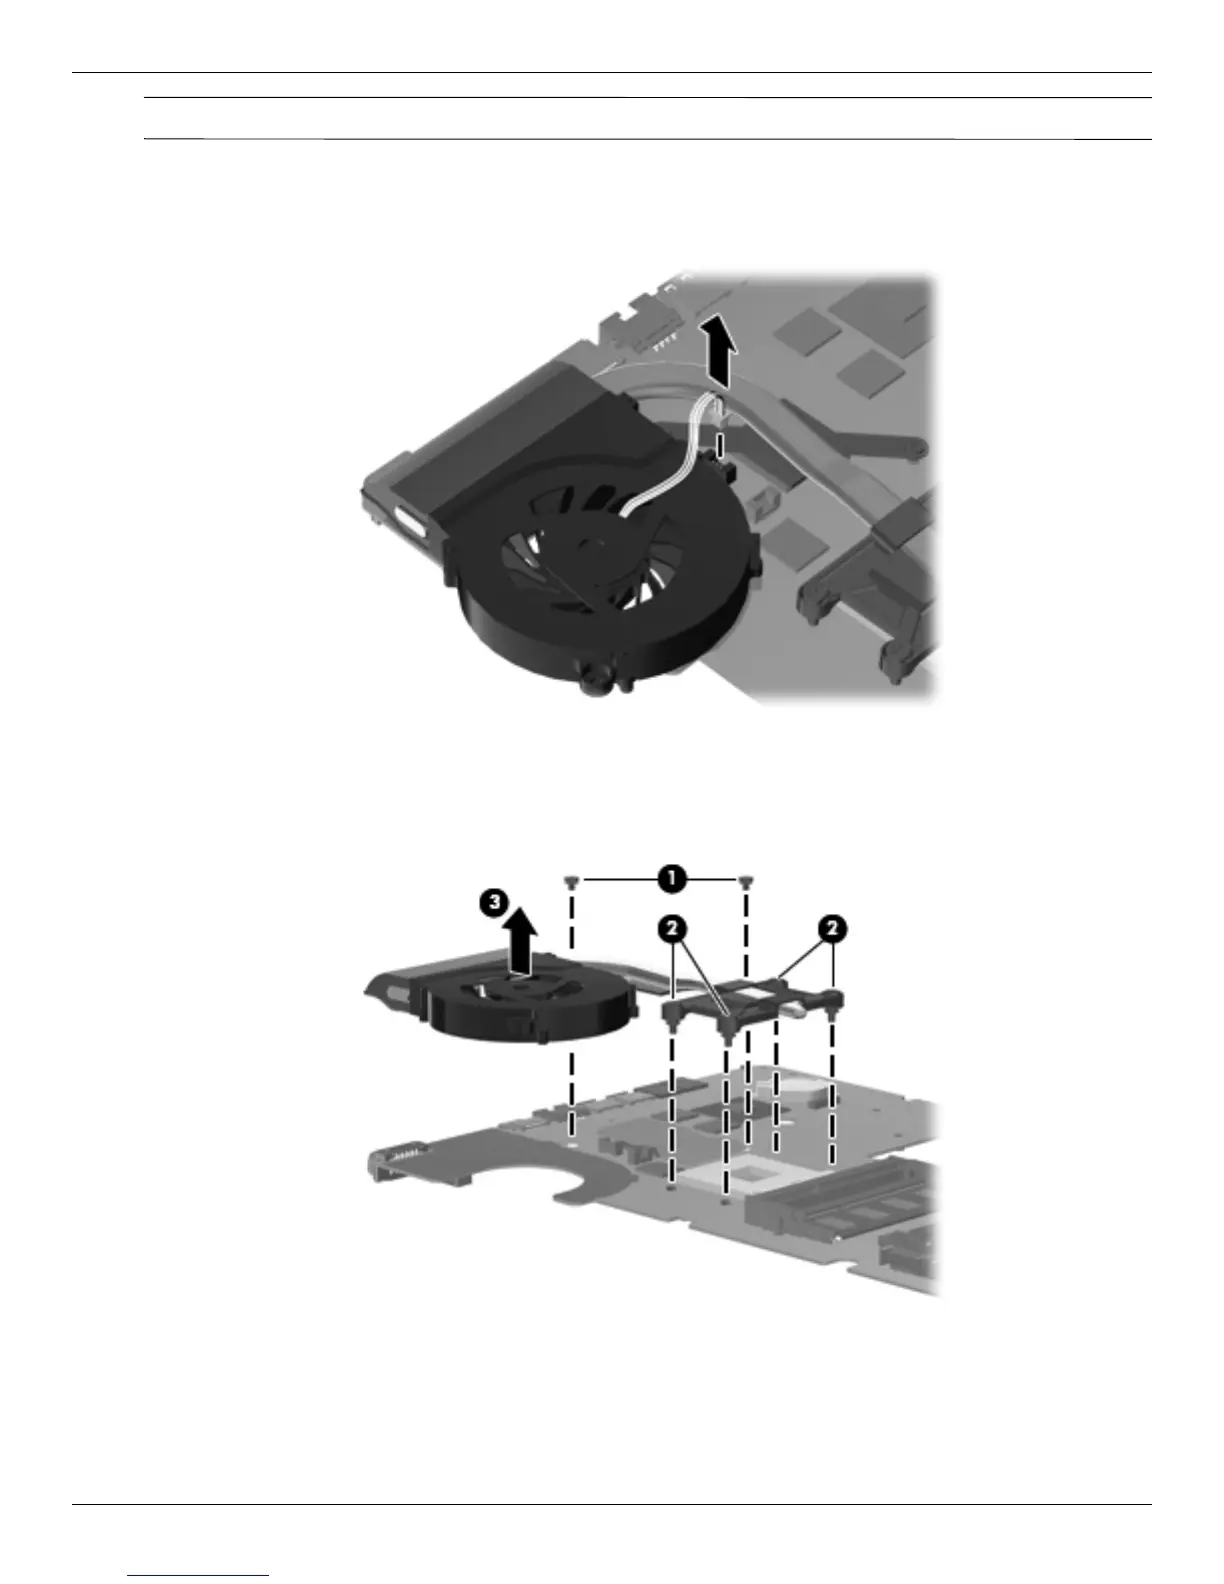
5. Turn the system board right-side up, with the front toward you.
6. Disconnect the fan cable from the system board.
7. Loosen the two Phillips captive screws 1 and four Phillips spring-loaded captive screws 2 in the sequence
shown on the heat sink.
8. Remove the fan/heat sink assembly 3 by lifting it straight up.
Reverse this procedure to install the fan/heat sink assembly.

Table of Contents

Other manuals for HP G72-100 - Notebook PC

Questions and Answers:

Question and Answer IconNeed help?

Do you have a question about the HP G72-100 - Notebook PC and is the answer not in the manual?

HP G72-100 - Notebook PC Specifications

General IconGeneral
BrandHP
ModelG72-100 - Notebook PC
CategoryLaptop
LanguageEnglish

Related product manuals