ENWW
start guide
15
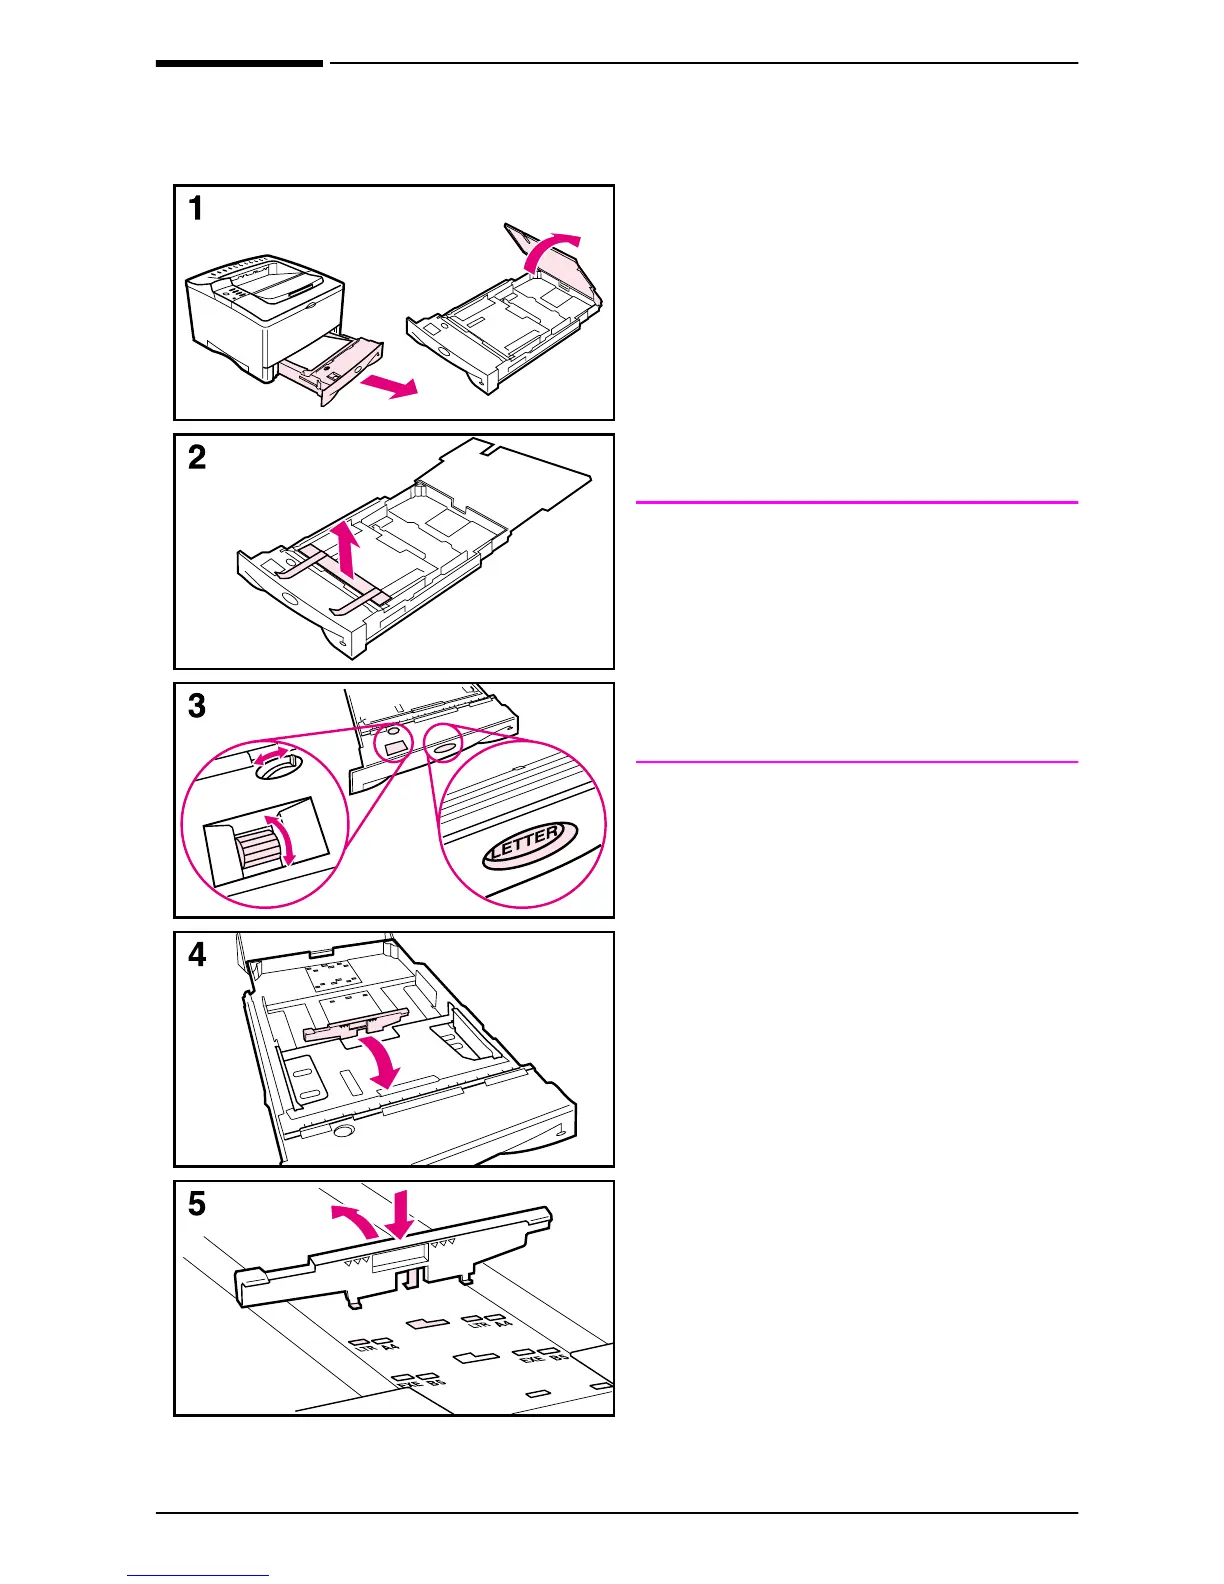
Step 7. Load Tray 2
1
Pull Tray 2 out of the printer and
raise the tray cover.
2
Remove the packing cardboard and
tape.
3
Set the dial in the tray to the desired
setting so the printer will read the
correct size of paper. Use the toggle
switch to gain access to more sizes.
Note
The paper size indicated by the dial in
the tray must match the size of paper
loaded in the tray. If these sizes do not
match, the paper might jam or other
errors might occur.
Setting the dial adjusts the printer’s
sensors, not the guides inside the tray.
4
To reposition the rear blue guide, tilt
it toward the front of the tray and
remove it.
5
Align the rear guide with the desired
paper size. With the guide angled
slightly toward the front of the tray,
insert it into the appropriate holes.
Rotate the rear guide upright until it
snaps into place.
Continued on the next page.
 Loading...