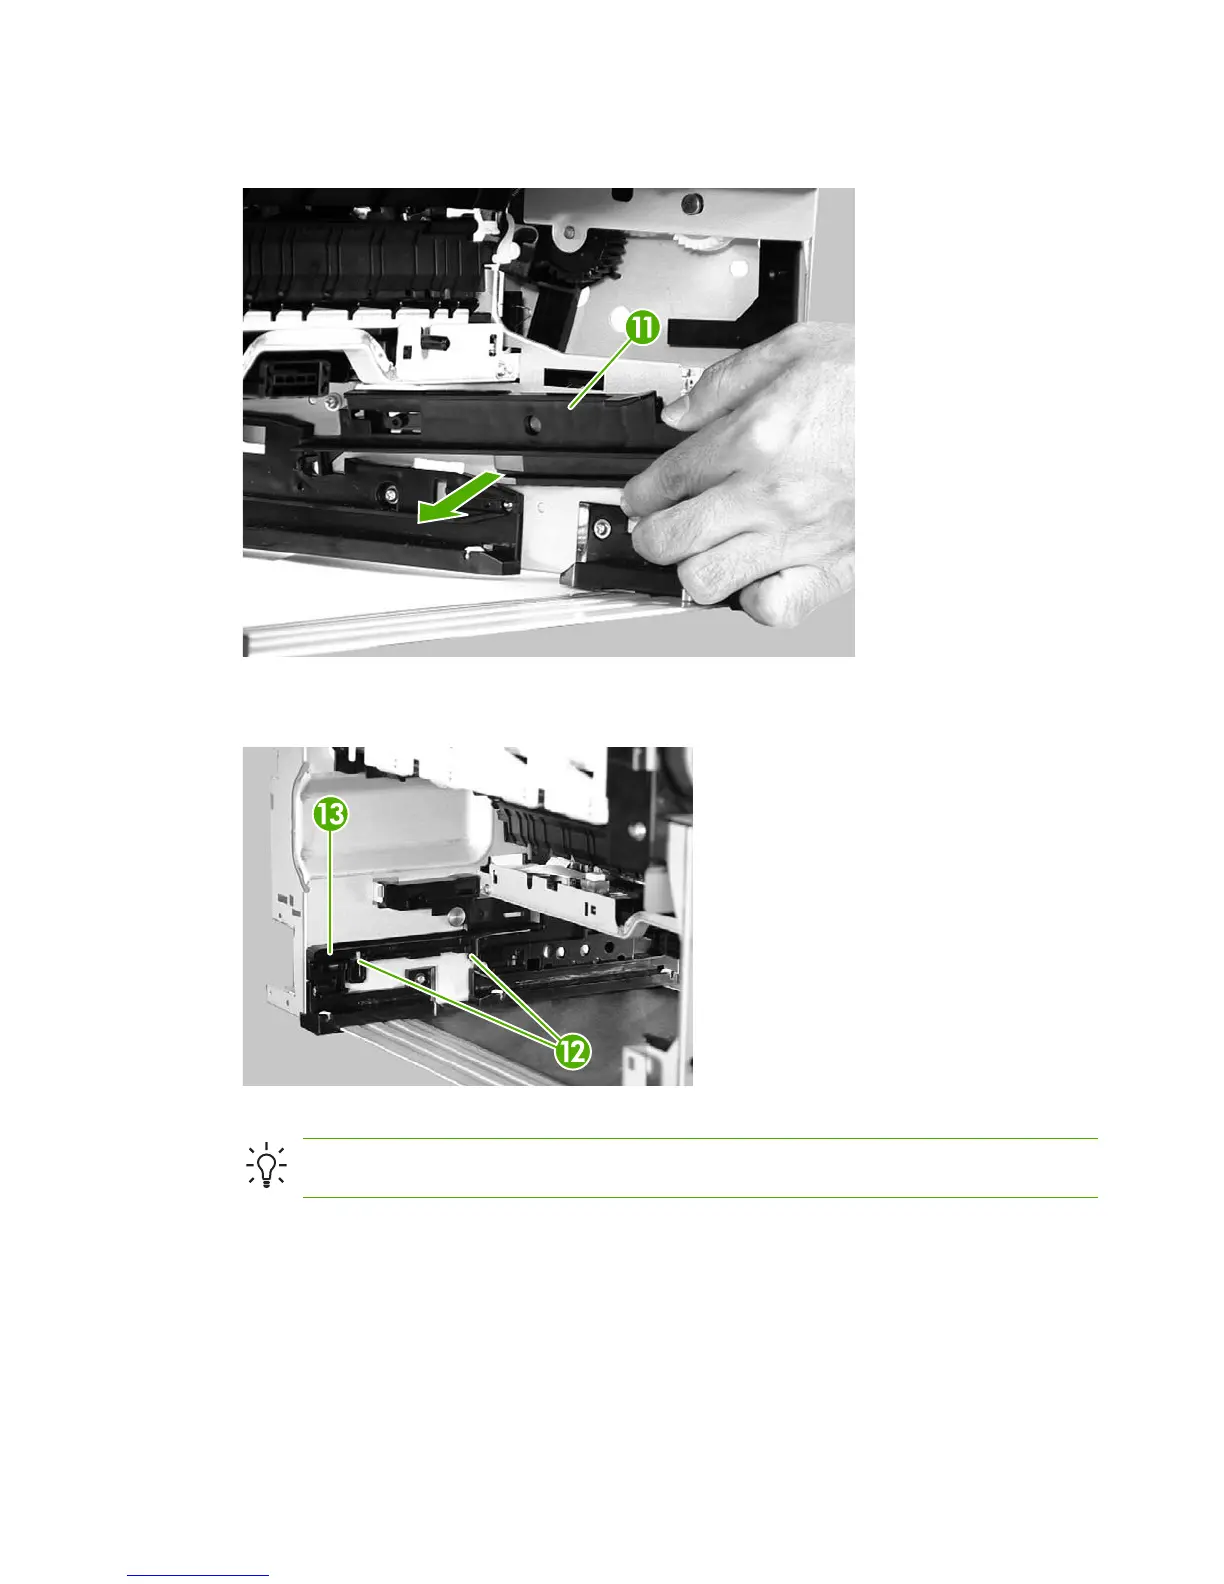
10. From the back lower left of the printer, slightly turn the mounting guide (callout 11) upward and
move it to the left to remove it.
Figure 5-139 Removing the high-voltage power supply (8 of 17)
11. Unhook two claws (callout 12) on the right side of the printer and remove the guide (callout 13).
Figure 5-140 Removing the high-voltage power supply (9 of 17)
Hint When you reinstall, install the rear claw and then the front claw.
146 Chapter 5 Removal and replacement ENWW
 Loading...