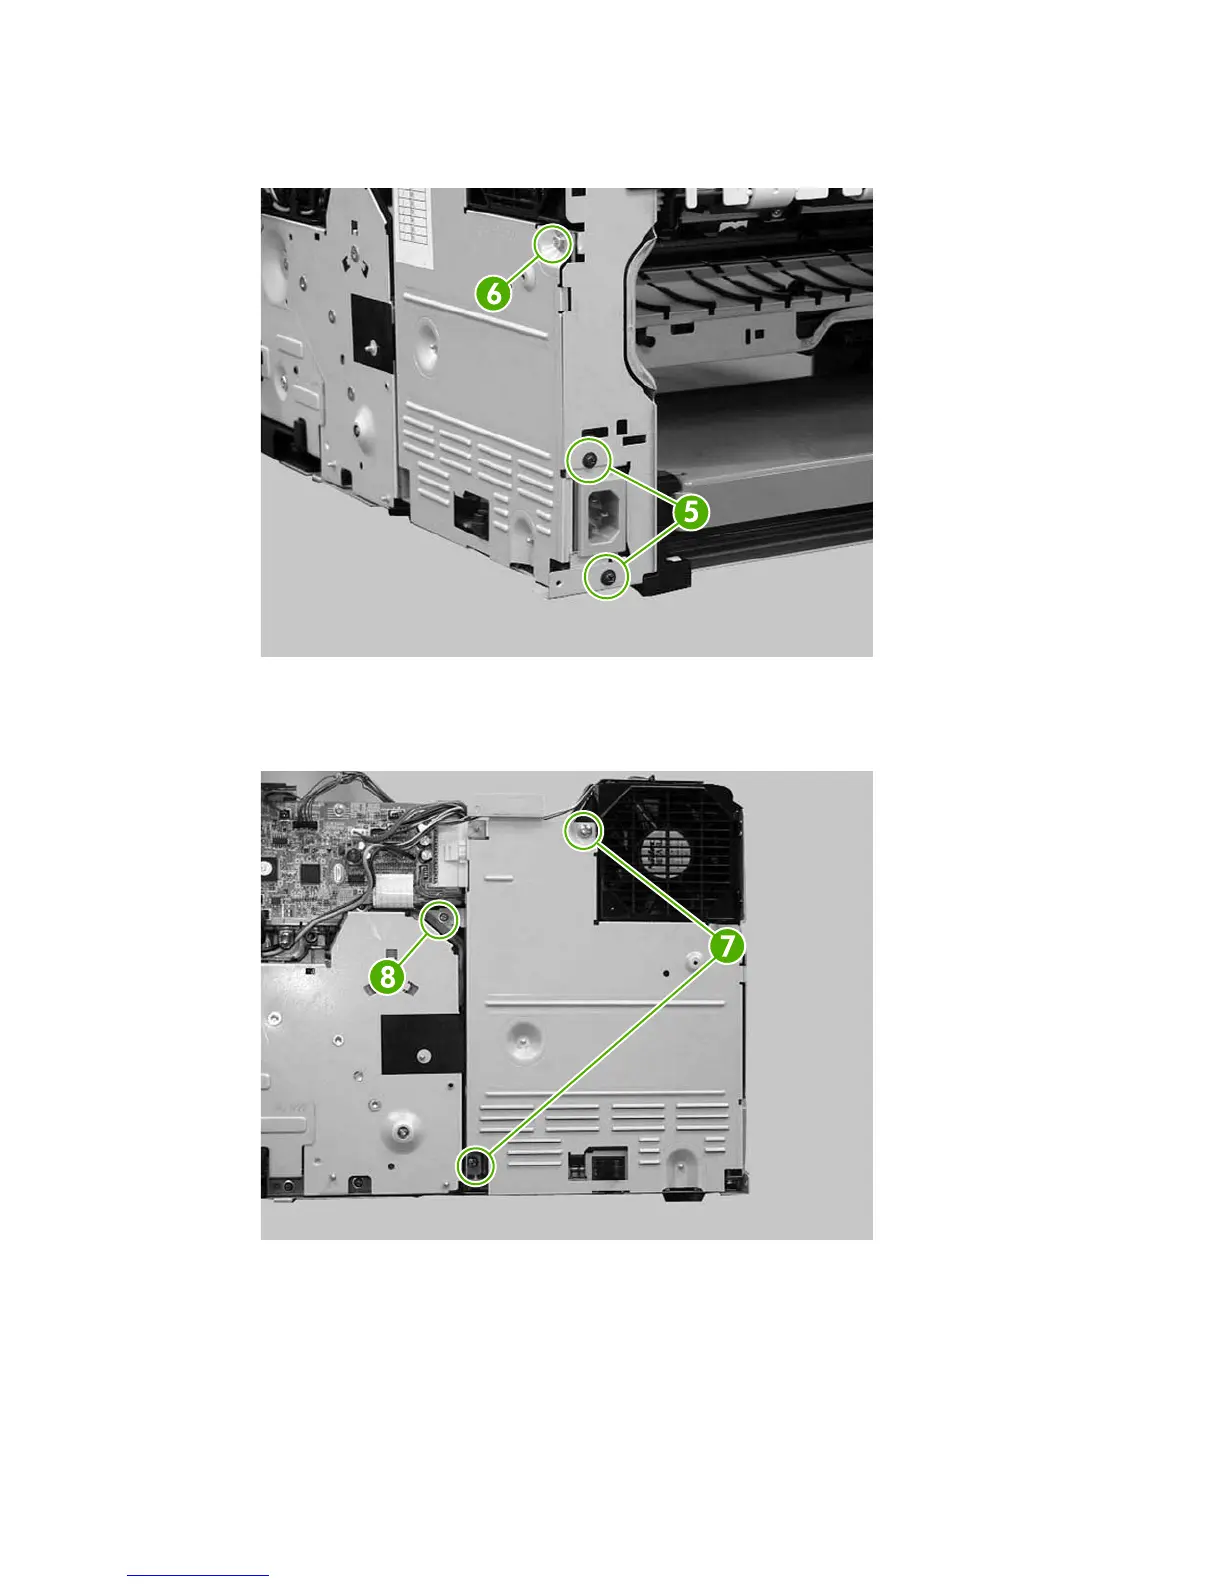
5. From the back of the printer, remove two black screws (callout 5) and remove one screw with a
washer (callout 6).
Figure 5-152 Removing the low-voltage power supply PCA (4 of 6)
6. From the right side of the printer, remove two self-tapping screws (callout 7) and one additional
screw (callout 8).
Figure 5-153 Removing the low-voltage power supply PCA (5 of 6)
ENWW Printed circuit assemblies (PCAs) 153
 Loading...