To reinstall:
The Fuser Pressure Plate is kept in place by four locking mechanisms in each
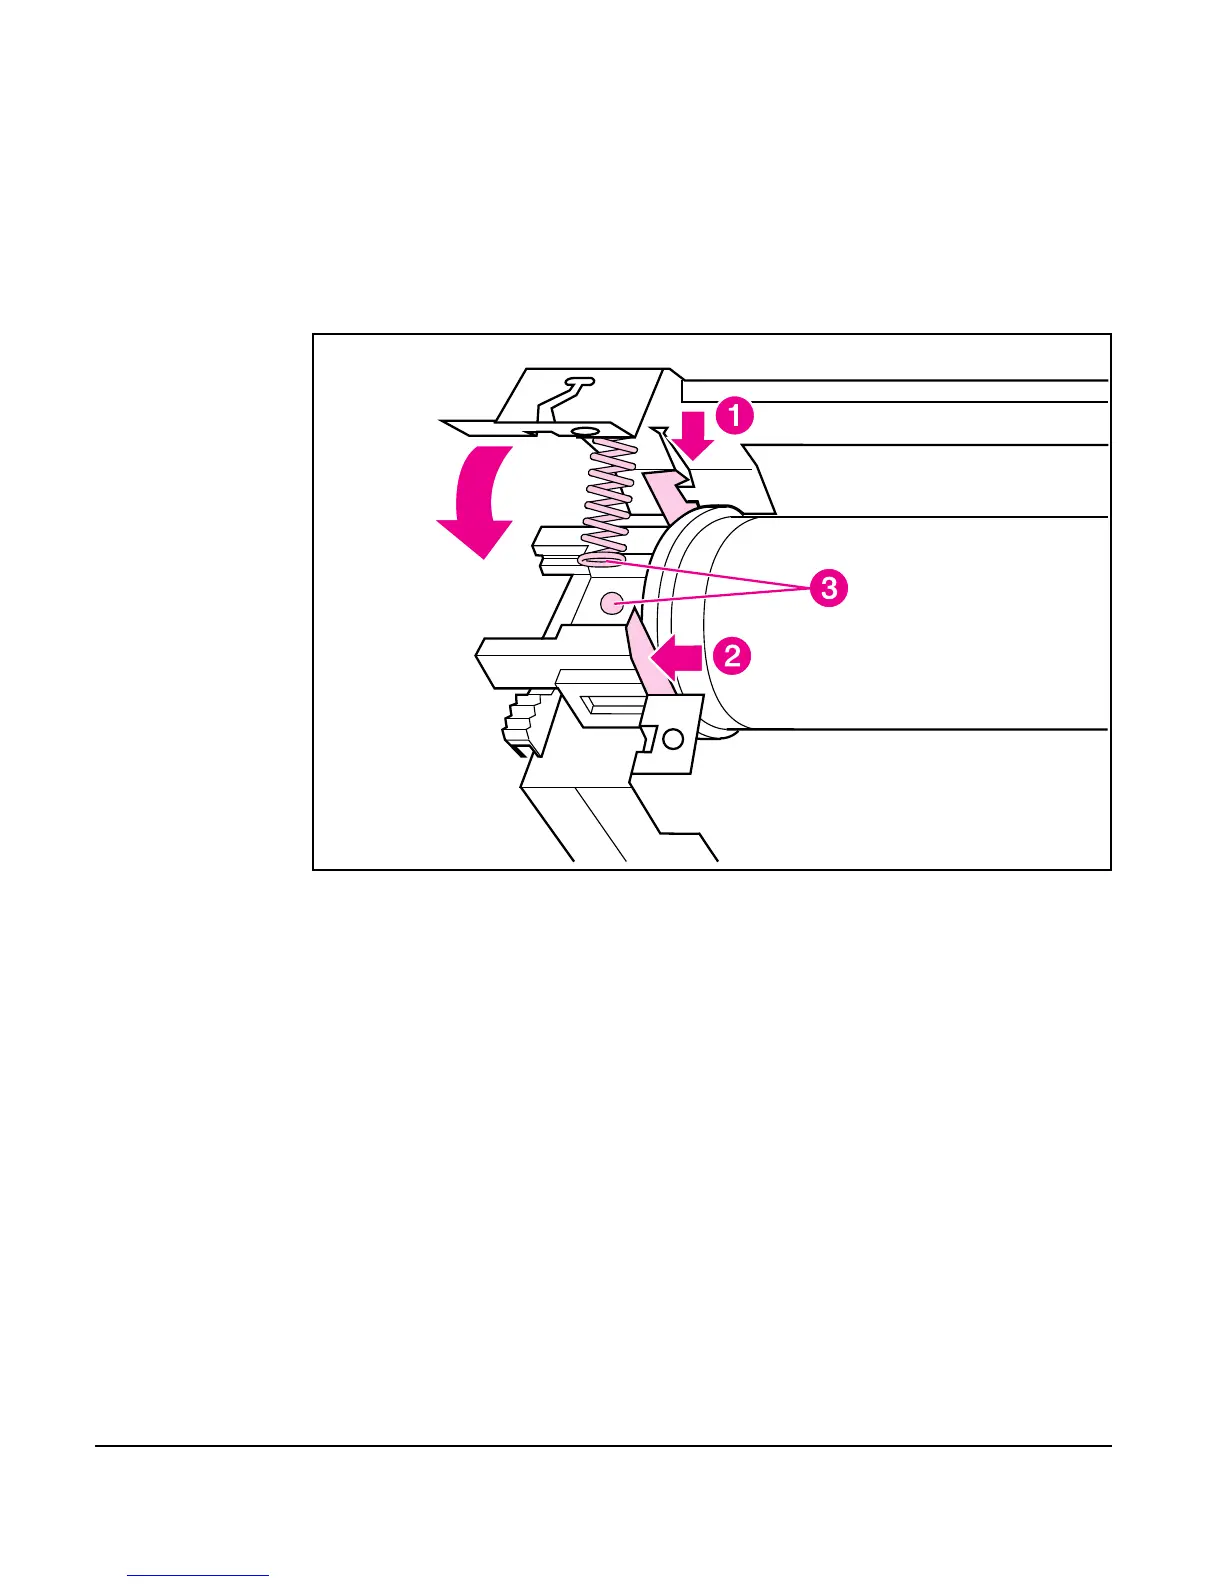
corner. Place the rear slits in the plate over the rear brackets that hold the Fusing
Assembly (Figure 6-12, callout 1). Lower the plate over the retaining clips, pressing
on both sides of the Fuser Pressure Plate (Figure 6-12, callout, 2). It is important
that the spring is placed over the positioning pin (callout 3) because inadequate
pressure will cause fusing problems. Replace the screws.
Fuser Pressure Plate Replacement
Figure 6-12
6 - 16 Removal and Replacement
 Loading...