Fuser
NOTE: The fuser can be removed without removing the scanner assembly and the upper-cover assembly.
However, it might be easier to access some of the connectors with these components removed.
Before proceeding, remove the following components:
●
Right cover. See Right cover on page 25.
●
Scanner assembly. See Scanner assembly on page 17.
●
Rear-upper cover. See Rear-upper cover on page 28.
●
Rear door. See Rear door on page 30.
●
Rear-lower cover. See Rear-lower cover and rear-door links on page 32.
●
Upper-cover assembly. See Upper-cover assembly on page 42.
●
Left cover. See Left cover on page 45.
Remove the fuser
WARNING! The fuser might be very hot. After turning off the product power, allow the fuser to cool for at
least 5 minutes before removing it.
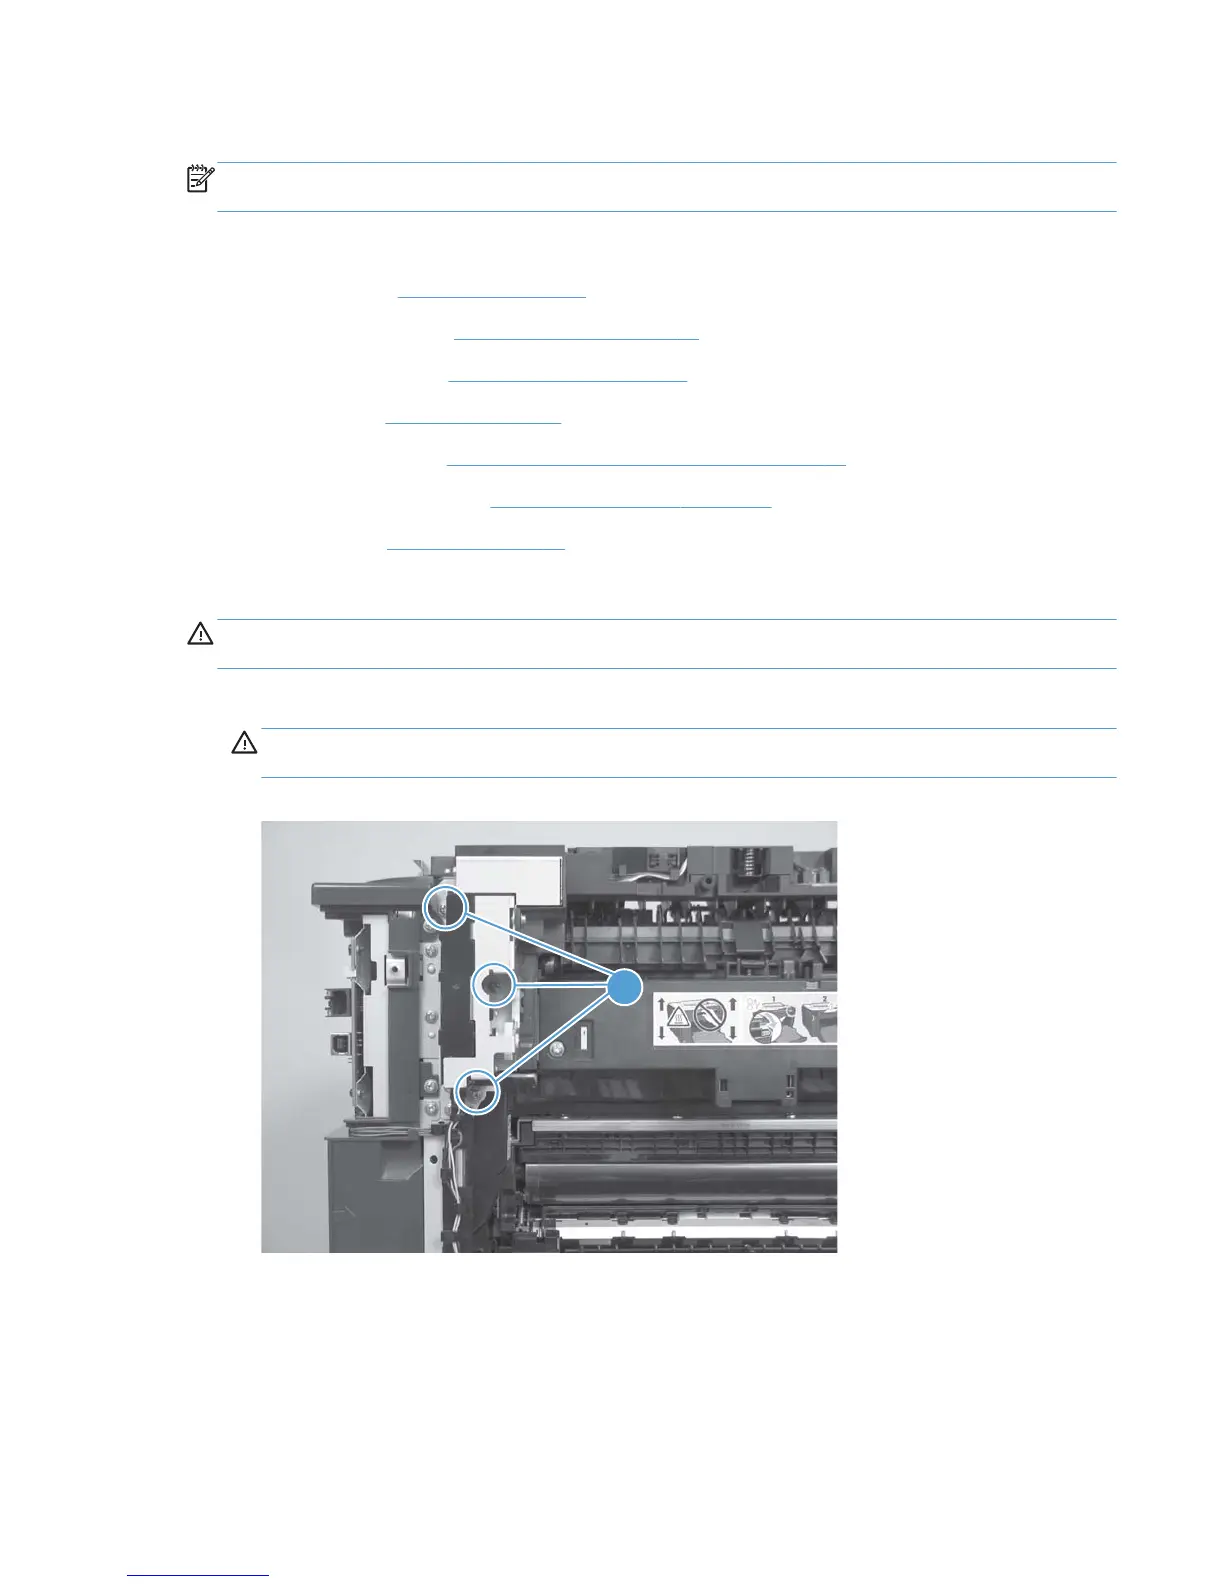
1. Remove three screws (callout 1) and separate the duplex-reverse drive assembly from the product.
CAUTION: The duplex-reverse drive assembly is still attached to the product. Carefully set the
assembly out of the way.
Figure 1-118 Remove the fuser (1 of 8)
 Loading...