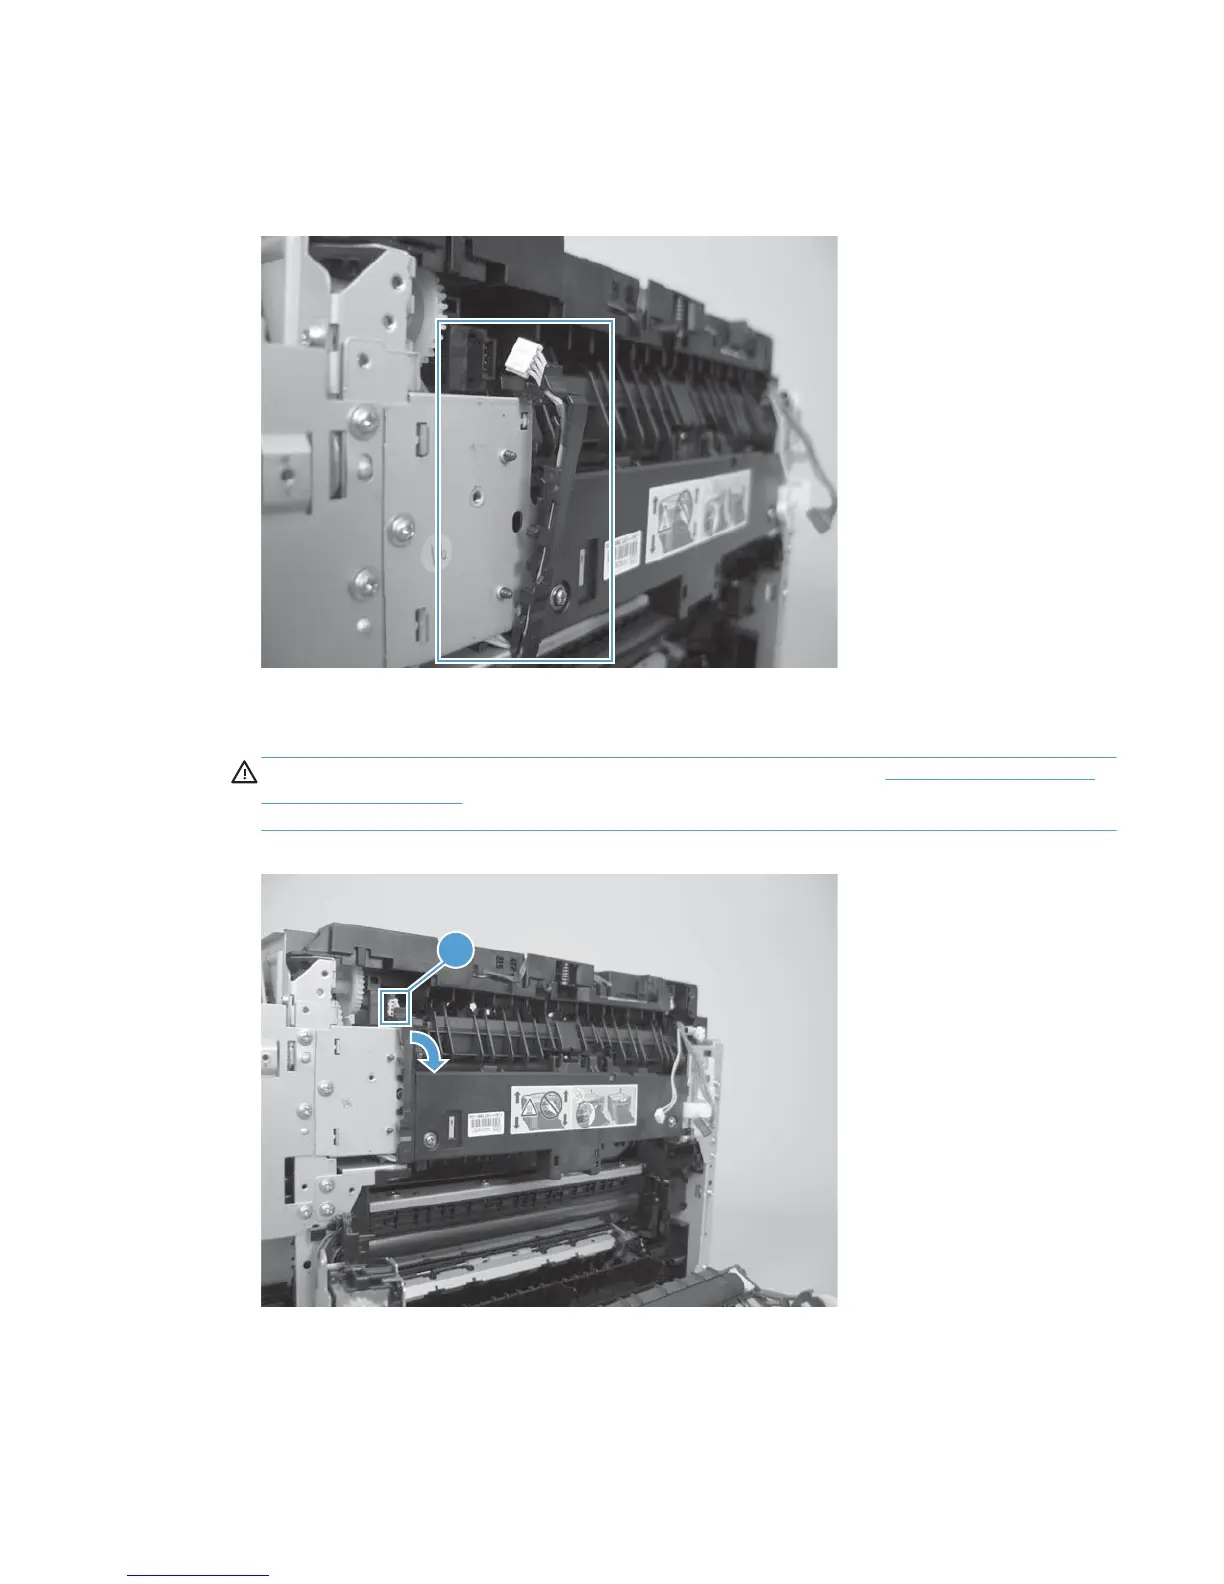
4. In the following step, the connector and guide will be separated from the fuser. You must not use too
much force and damage the lower portion of the guide. If the guide is damaged, the fuser must be
replaced.
Figure 1-121 Remove the fuser (4 of 8)
5. Carefully disconnect one connector (callout 1) and then rotate the connector and the top portion of the
guide away from the fuser.
CAUTION: Do not separate the connector and guide more than is shown in Figure 1-121 Remove the
fuser (4 of 8) on page 89. If the guide is damaged, you must replace the fuser. Do not damage the
connector.
Figure 1-122 Remove the fuser (5 of 8)
 Loading...