2. Slide the PCA loose, then remove the third connector from the right with red, yellow, and black wires.
TIP: The PCA can be dislodged when disconnecting the connector. To secure the PCA, carefully push it
towards the inside of the product to clear the mounting tabs near the rib assembly (callout 2 shows the
PCA correctly positioned under the tabs). Slide the PCA towards the rib assembly to position the edge of
the PCA under the mounting tabs.
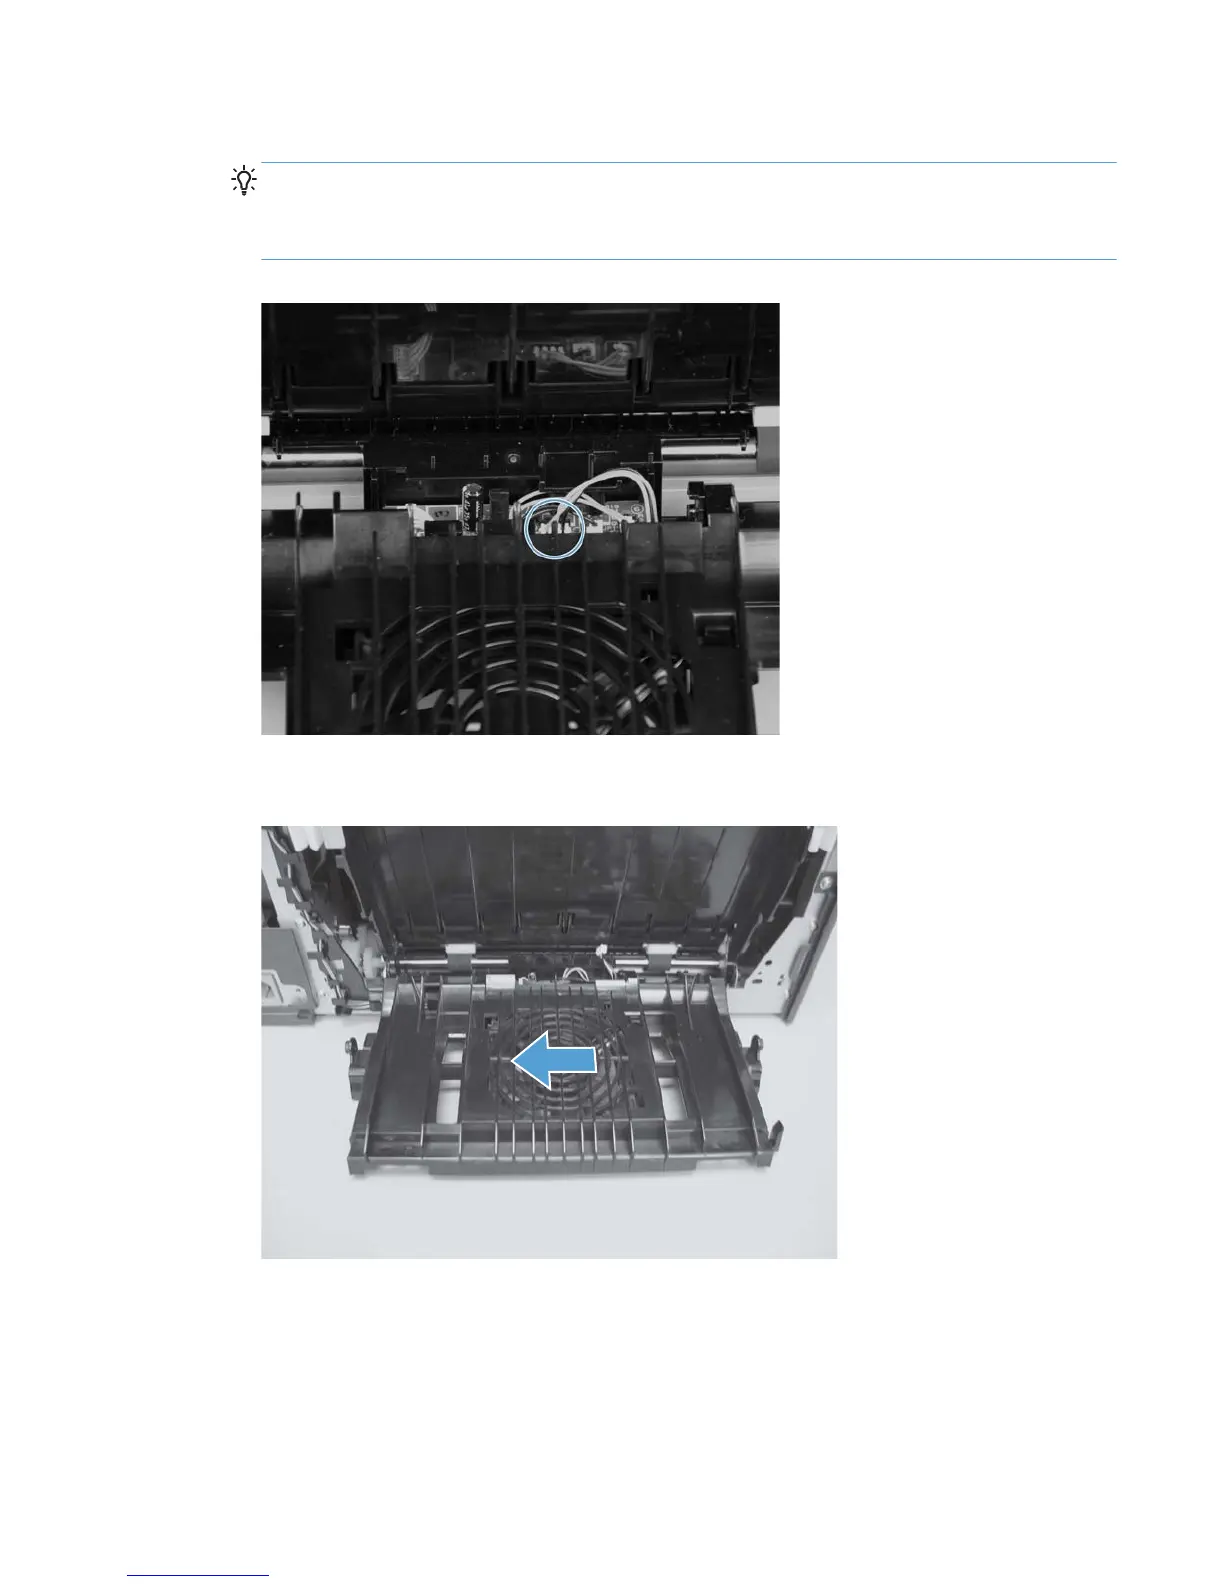
Figure 1-42 Remove the rear-door rib assembly (2 of 3)
3. Slide the assembly toward the power cable side of the product to release the hinge pin.
Figure 1-43 Remove the rear-door rib assembly (2 of 3)
ENWW Removal and replacement procedures 37
 Loading...