hp officejet 4100 series
chapter 9
66
clean the exterior
Use a soft, damp, lint-free cloth to wipe dust, smudges, and stains off the case.
The interior of the unit does not require cleaning. Keep fluids away from the
interior of the unit as well as the front panel.
work with print cartridges
To ensure the best print quality from your HP Officejet, you will need to perform
some simple maintenance procedures, and when prompted by a front-panel
message, replace the print cartridges.
This section contains the following topics:
• print a self-test report
• handle print cartridges
• replace the print cartridges
• align the print cartridges
• clean the print cartridges
• clean the print cartridge contacts
print a self-test report
If you are experiencing problems with printing, before cleaning or replacing the
print cartridges, you should print a Self-Test Report. This report provides useful
information about your print cartridges, including status information.
1 Press Setup.
2 Press 1, then press 4.
This selects Print Report, and then selects Self-Test Report.
3 Press Start Black or Start Color.
A Self-Test Report is printed for your HP Officejet.
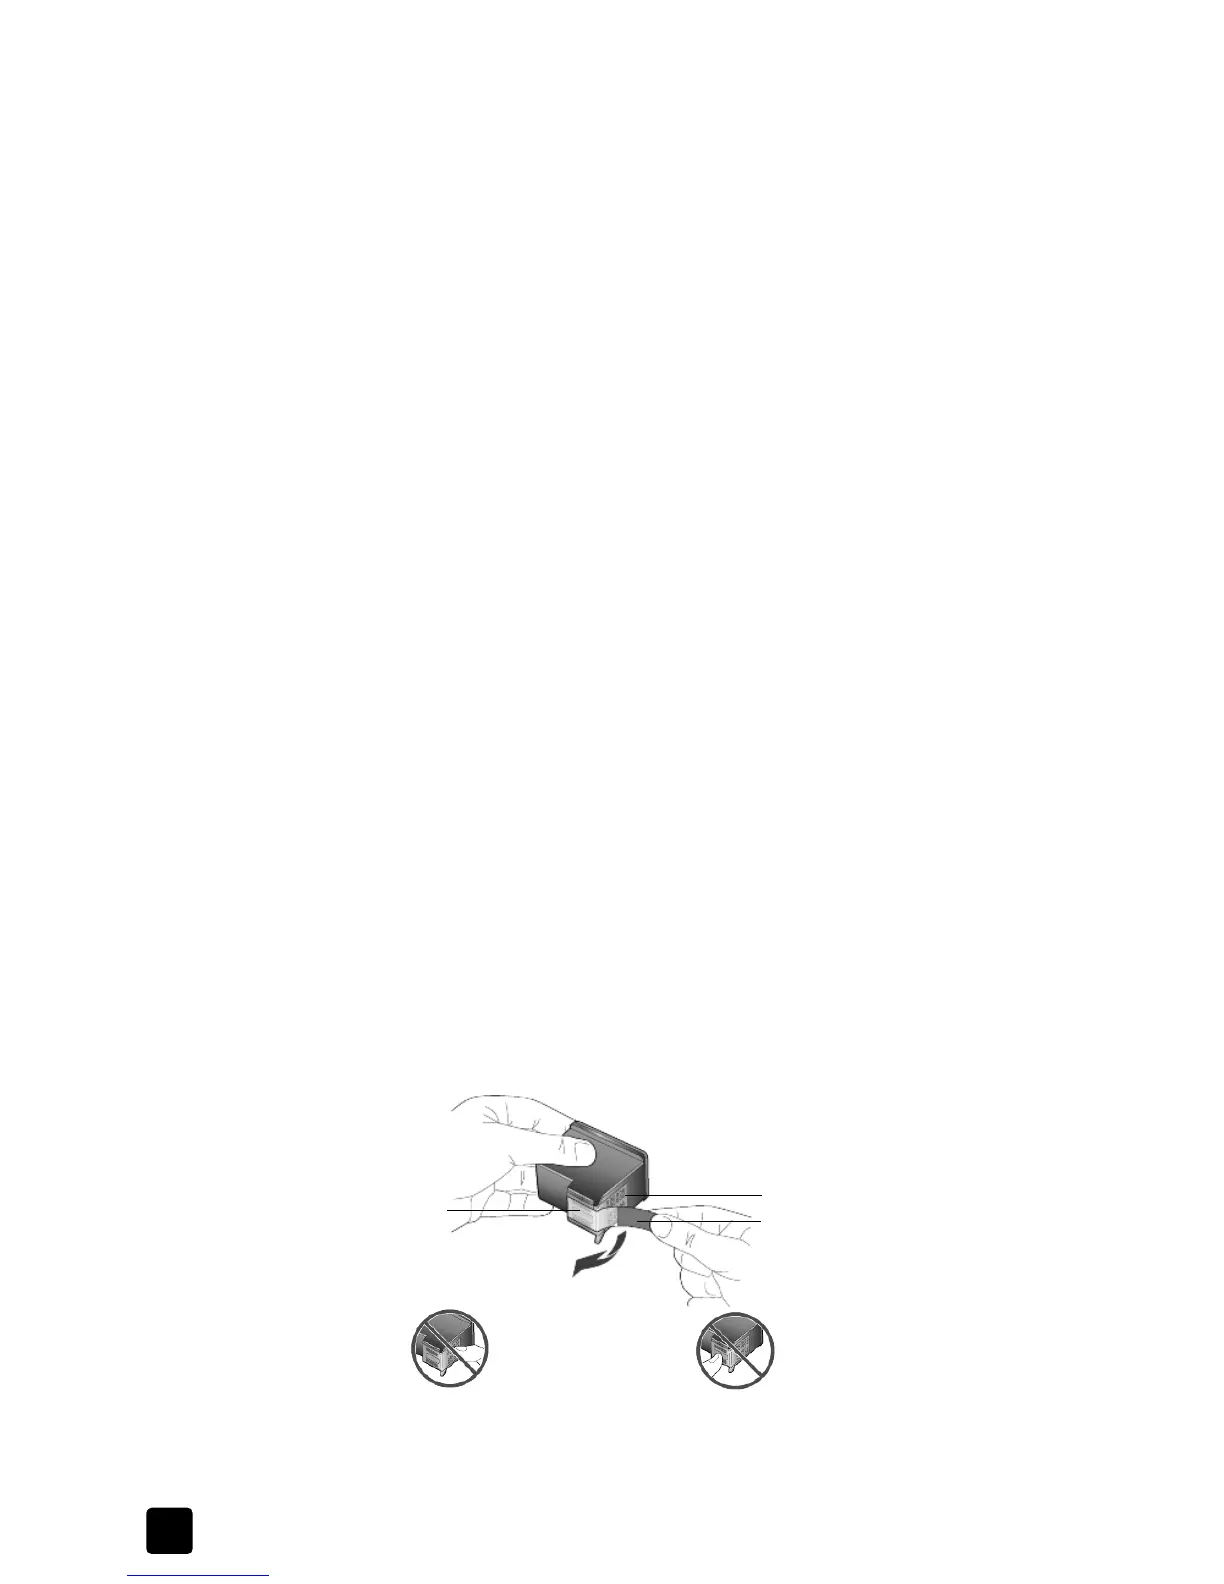
handle print cartridges
Before you replace or clean a print cartridge, you should know the part names
and how to handle the print cartridge.
Plastic tape
(must be removed)
Copper contacts
Ink nozzles
under tape
Do not touch the copper contacts or the ink nozzles
 Loading...