Removal and replacement procedures 34
3.
Remove the access panel ("Access panel" on page 25).
4. Remove all hard drives ("Hard drive" on page 26).
5. Remove all hard drive blanks ("Hard drive blank" on page 26).
6. Remove the hard drive backplane ("Hard drive backplane" on page 32).
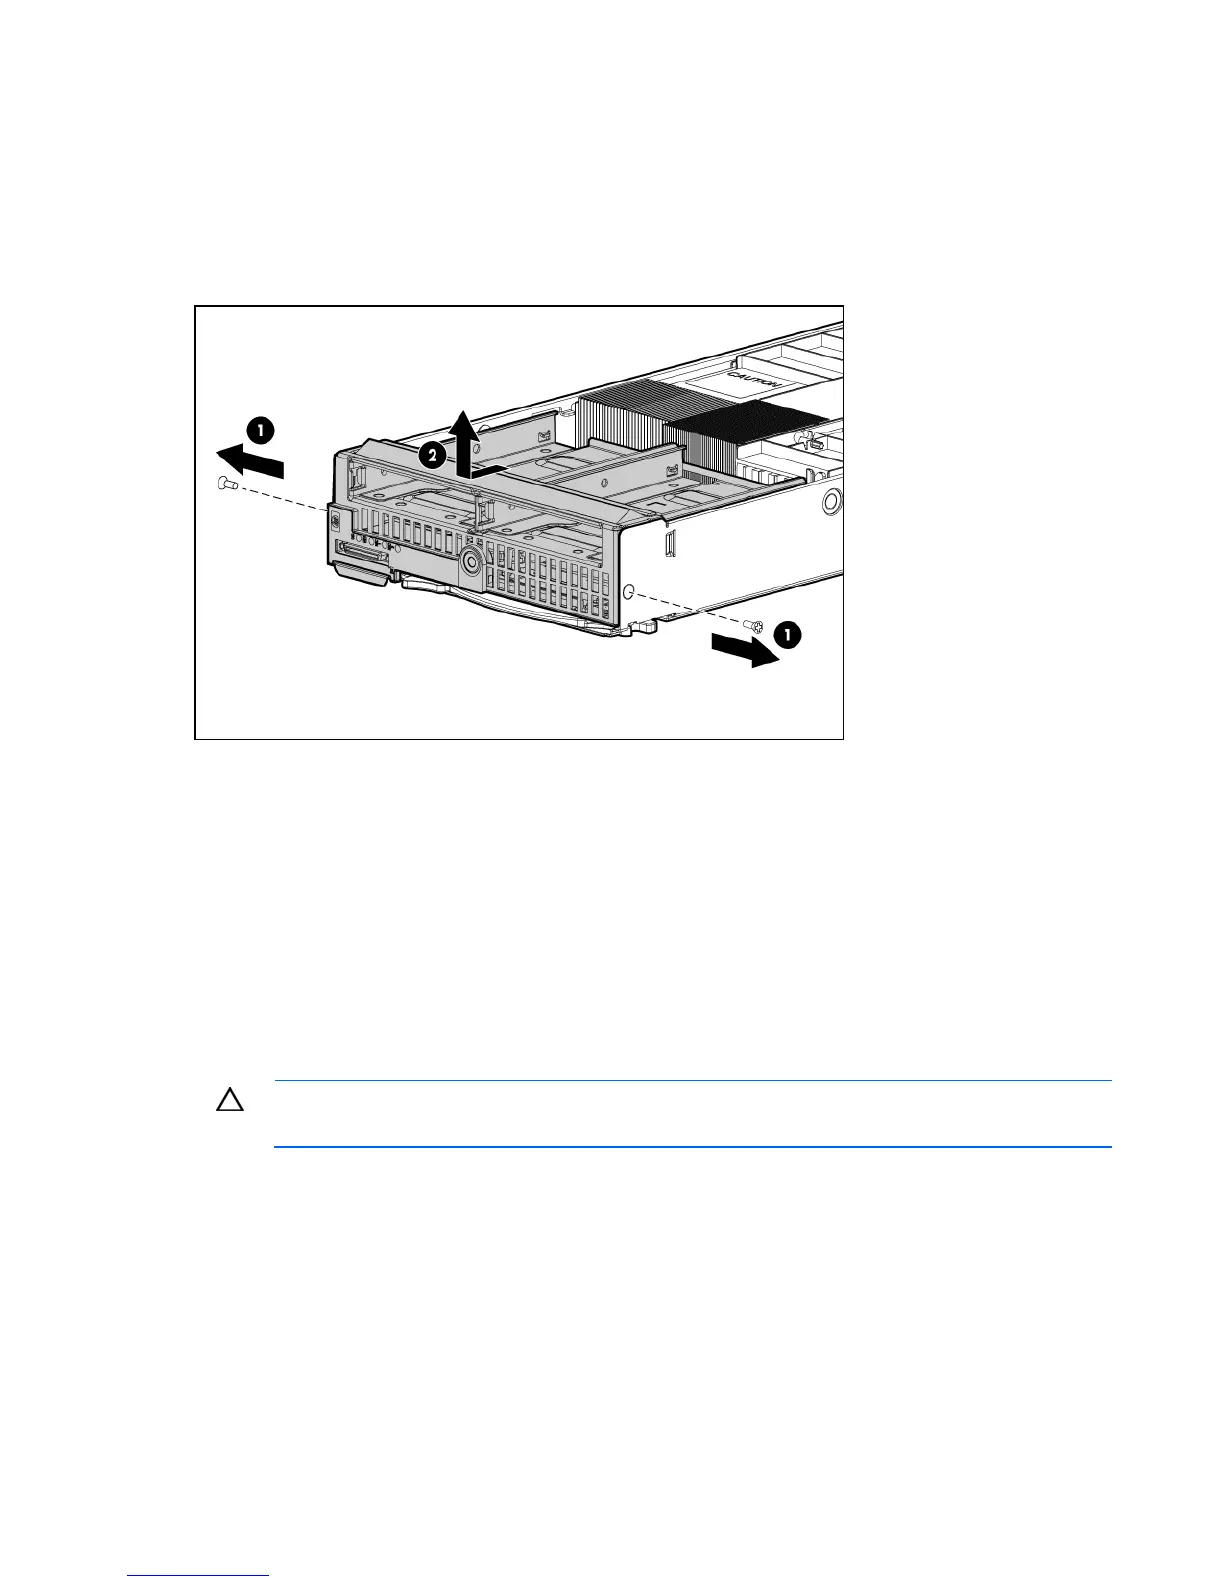
7. Remove the two T-15 screws from the front panel/hard drive cage assembly.
8. Remove the front panel/hard drive cage assembly.
To replace the component, reverse the removal procedure.
Battery-backed write cache procedures
Two types of procedures are provided for the BBWC option:
• Removal and replacement of failed components:
o Removing the cache module (on page 34)
o Removing the battery pack (on page 35)
• Recovery of cached data from a failed server blade ("Recovering data from the battery-backed write
cache" on page 36)
CAUTION: Do not detach the cable that connects the battery pack to the cache module.
Detaching the cable causes any unsaved data in the cache module to be lost.
Removing the cache module
To remove the component:
1. Power down the server blade (on page 23).
2. Remove the server blade (on page 24).
3. Remove the access panel ("Access panel" on page 25).
4. Remove all hard drives ("Hard drive" on page 26).
 Loading...