18
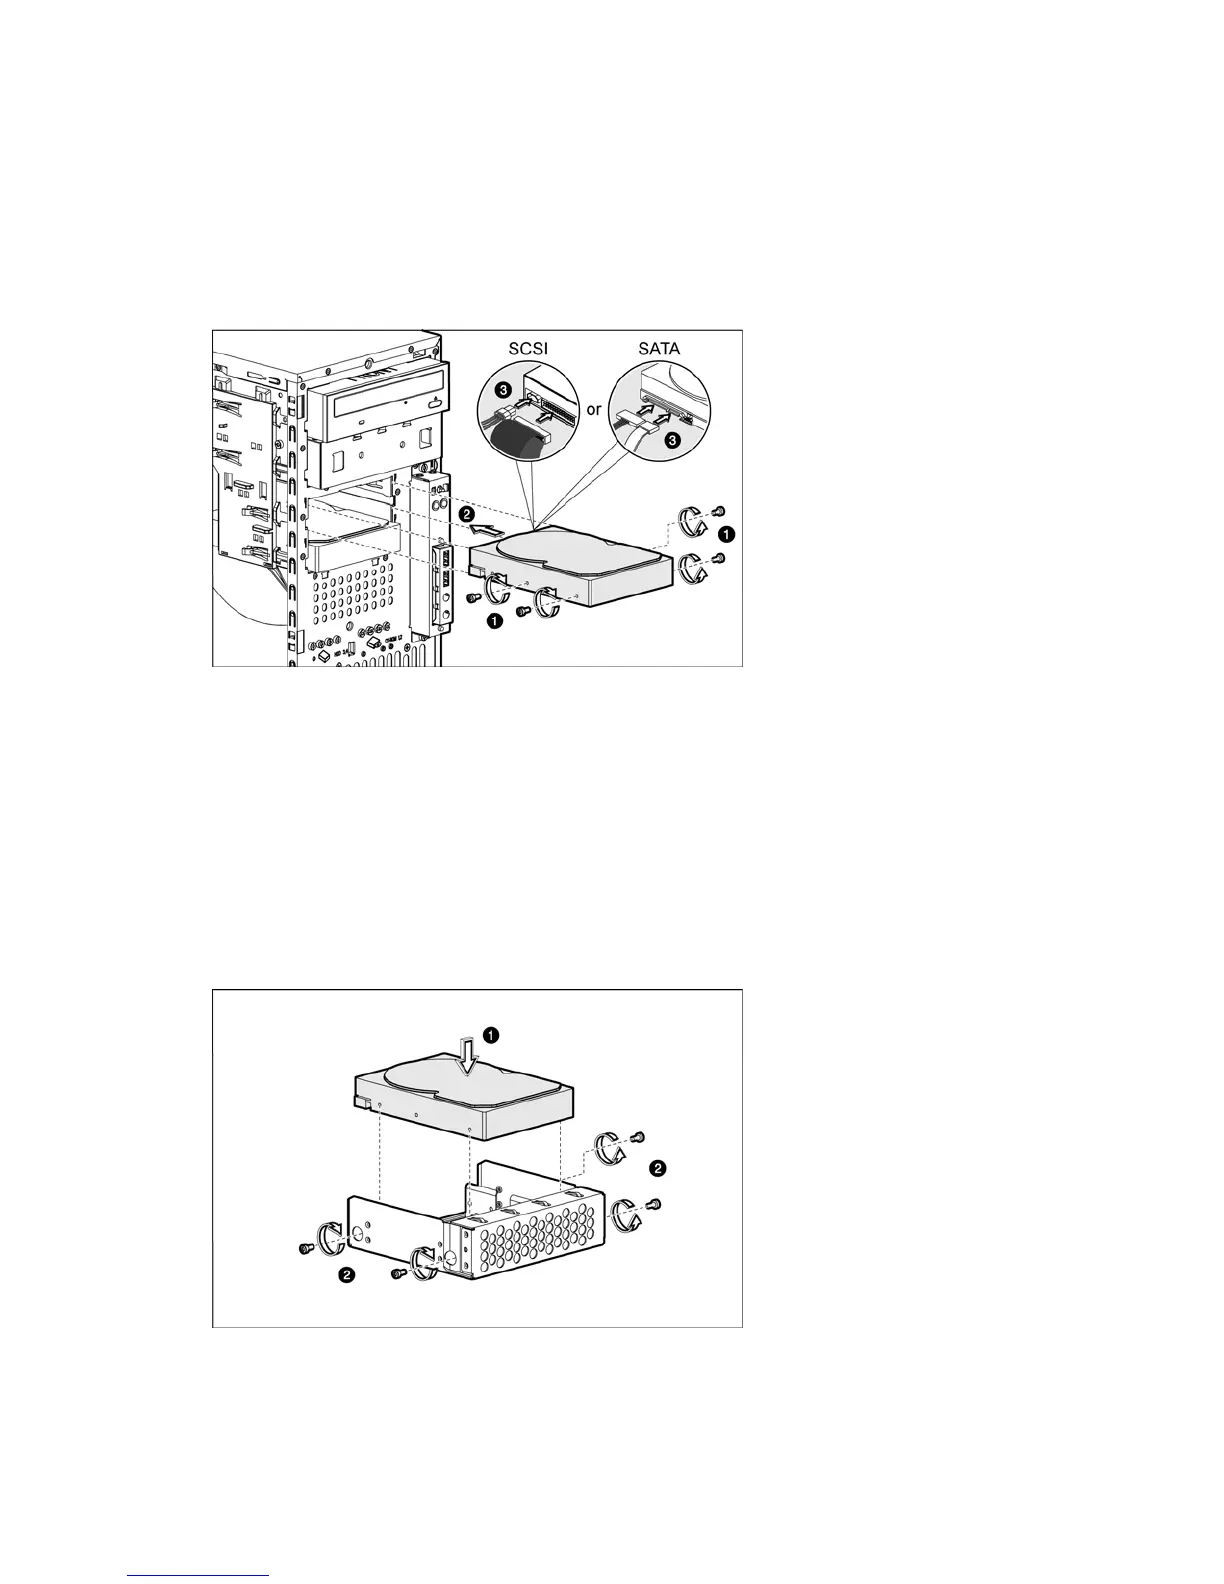
6. Install the new hard drive into the bay:
a. Insert the four drive screws (two on each side) into the hard drive.
b. Slide the new hard drive into the selected bay until it clicks into place.
c. If you are installing a SATA hard drive, connect the data and power cables from the system board to
the back of the hard drive and connect the power cable from the power supply to the back of the hard
drive.
d. If you are installing a SCSI hard drive, connect the data cable from the SCSI PCI expansion card to the
back of the hard drive, and then connect the power cable from the power supply to the back of the
hard drive.
Figure -14 [Installing a hard drive]
7. Observe the post-installation procedures.
Hard drive bracket - second optical drive bay
You can install a hard drive in the second optical drive bay. To install a hard drive into this bay, you first must
insert the hard drive to the hard drive conversion kit. After installing the hard drive into the conversion kit, you
can install it into the second optical bay.
To insert a hard drive into the hard drive conversion kit:
1. Insert the hard drive into the conversion kit bracket, making sure the screw holes in the bracket align with
the holes in the hard drive.
2. Insert four screws (two on each side) into the hard drive assembly, making sure the screws secure the hard
drive to the bracket.
Figure -15 [Installing a hard drive into the half-height bay bracket]
 Loading...


