19
To install the hard drive assembly into the second optical drive bay:
1. Remove the drive shield from the front of the second optical drive bay to prepare the bay for drive
installation:
a. Remove the screw that secures the drive shield.
b. Pull the shield off of the chassis. Store it for later use.
NOTE: Do not discard the shield. If the drive is removed in the future, you must reinstall the shield to
maintain proper system function.
Figure -16 [Removing the optical drive shield]
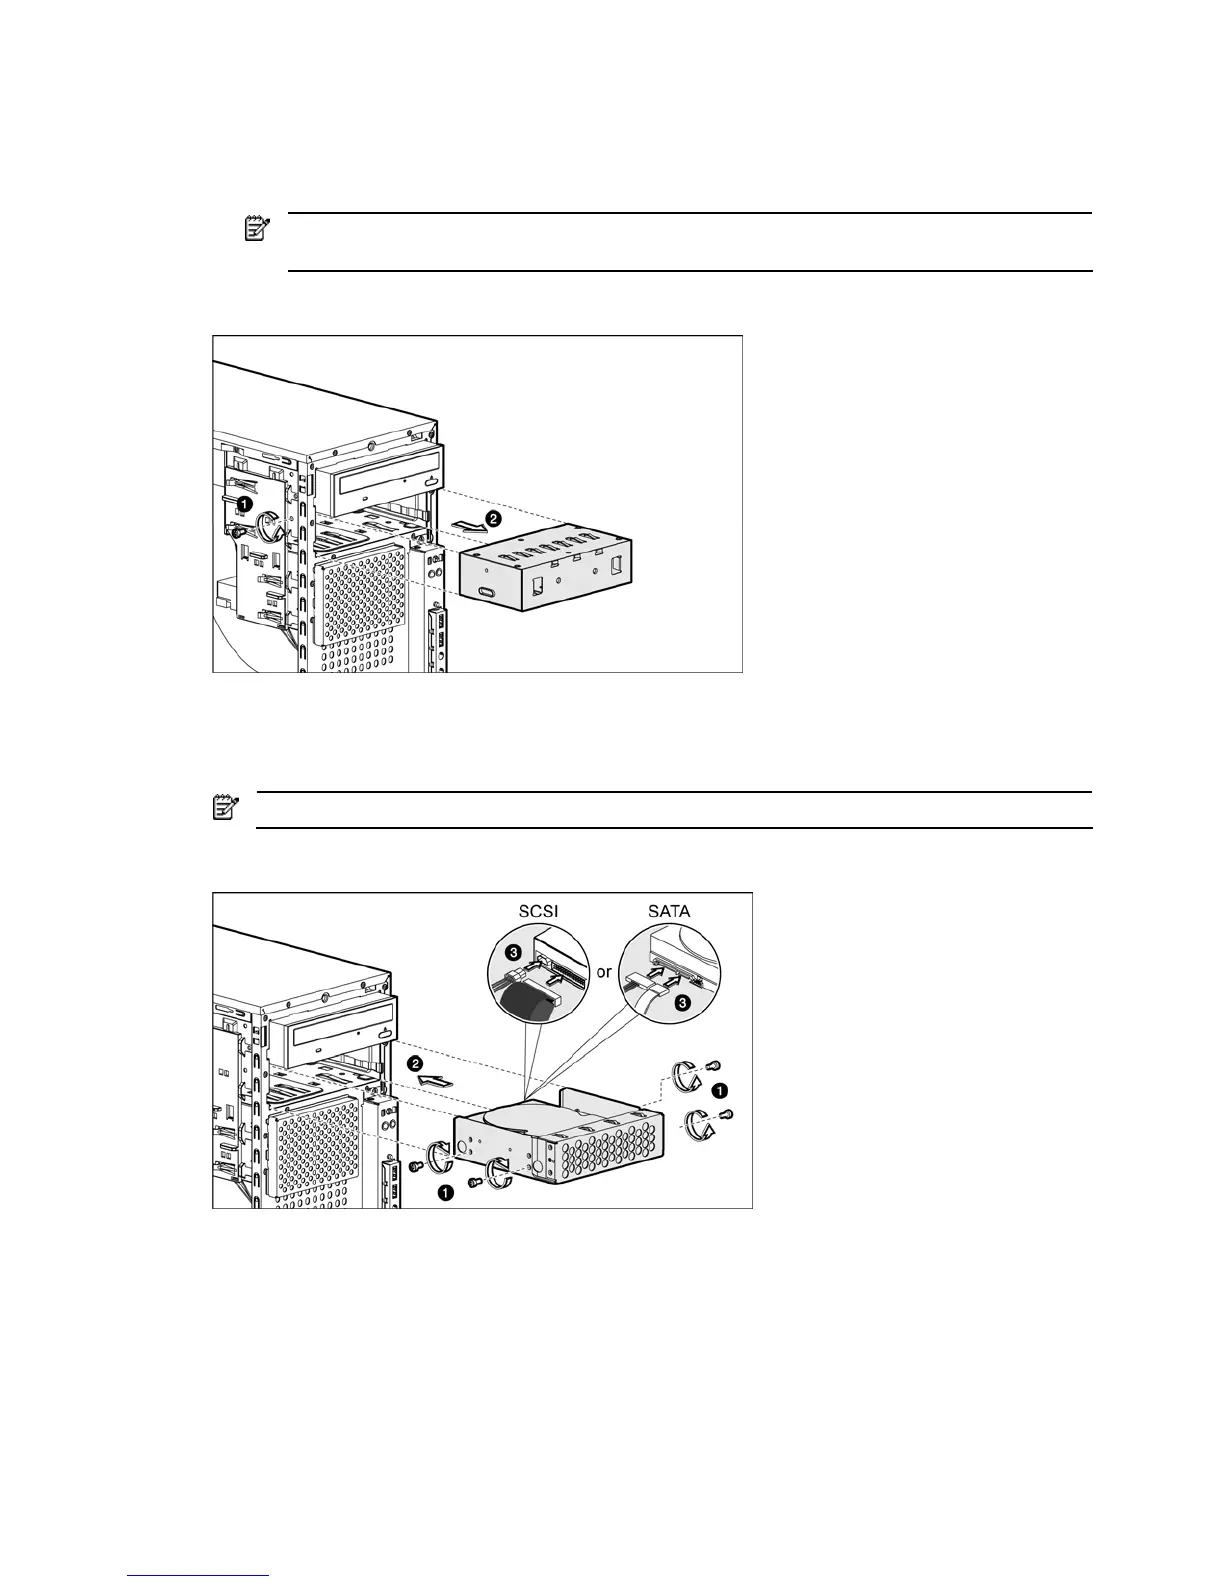
2. Insert four screws (two on each side) into the hard drive bracket. These screws secure the hard drive
assembly in the server after you install the drive assembly.
3. Slide the hard drive assembly into the bay until it clicks into place.
4. Connect the data and power cables to the back of the hard drive.
NOTE: If you are installing a SCSI hard drive, use the cable that comes with the server.
Figure -17 [Installing the hard drive assembly into the second optical drive bay]
5. Replace the front bezel.
6. Replace the access panel.
7. Observe the post-installation procedures.
 Loading...


