Do you have a question about the HP Slim 290 and is the answer not in the manual?
First step in disassembly: detach the lower case from the main housing.
Disconnect the SATA cable for the Optical Drive and the power connector for the Hard Disk Drive.
Detach the Optical Drive and the Front Bezel from the computer chassis.
Remove screws securing the ODD cage and then loosen screws to remove the HDD.
Carefully detach all cables connected to the Mainboard (MB).
Loosen six screws to remove the Mainboard from the system.
Loosen four screws to detach the Power Supply Unit (PSU) from the computer.
This document outlines the disassembly instructions for the HP Slim Desktop PC 290, a personal computer designed for general use. The instructions are primarily intended for end-of-life recyclers or treatment facilities, focusing on the removal of components and materials that require selective treatment as defined by the EU directive 2002/96/EC (WEEE).
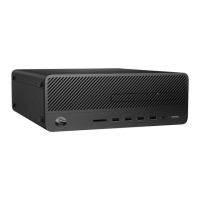
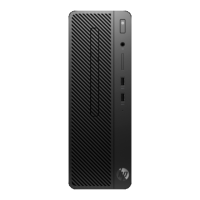
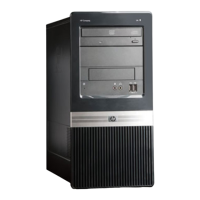
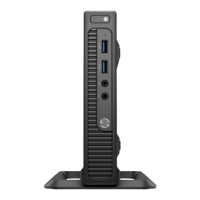
The HP Slim Desktop PC 290 serves as a standard personal computer, providing the core functionalities expected from a desktop system. It is designed to handle a range of computing tasks, from everyday productivity and internet browsing to multimedia consumption. As a desktop unit, it typically connects to external peripherals such as a monitor, keyboard, and mouse to provide a complete user experience. The internal architecture includes essential components like a Printed Circuit Board (PCB) or Printed Circuit Assembly (PCA), which forms the backbone of the system, housing the central processing unit, memory, and other integrated circuits necessary for operation. It also incorporates storage devices, such as a Hard Disk Drive (HDD), for storing operating systems, applications, and user data, and an Optical Disc Drive (ODD) for reading and writing optical media. The system relies on a Power Supply Unit (PSU) to convert AC power from a wall outlet into the DC power required by the internal components.
While the document primarily focuses on disassembly, the presence of certain components implies the typical usage features of the HP Slim Desktop PC 290. The inclusion of a PCB/PCA indicates its capability to run an operating system and various software applications, supporting tasks like word processing, spreadsheet management, email communication, and web browsing. The presence of an HDD signifies its ability to store a substantial amount of digital content, including documents, photos, videos, and music. An ODD allows for the use of CDs and DVDs, enabling software installation from physical media, data backup, and playback of movies or music. The "Slim Desktop" designation suggests a compact form factor, making it suitable for environments where space is a premium, such as small offices or home setups. The design likely prioritizes a balance between performance and a smaller footprint, offering a practical solution for users who need a reliable desktop computer without a bulky tower. The internal layout, as depicted in the disassembly steps, shows a structured arrangement of components, typical of a desktop PC, designed for efficient operation and heat dissipation. The various cables, such as SATA connectors, facilitate communication between the motherboard and storage devices, ensuring smooth data transfer.
The disassembly instructions themselves provide insight into the maintainability of the HP Slim Desktop PC 290, albeit from a recycling perspective. The process highlights that key components are accessible and removable, which is beneficial for both repair and end-of-life recycling. The use of T15 screw drivers for various components (HDD, ODD cage, main bracket, PCI cover, MB, PSU) indicates a standardized approach to fastening, simplifying the tool requirements for internal access. This standardization is a positive aspect for maintenance, as it means a single type of tool can be used for multiple tasks.
The step-by-step instructions for removing components such as the lower case, ODD, HDD, and motherboard suggest a modular design. This modularity is a crucial maintenance feature, as it allows for individual components to be replaced or upgraded without needing to replace the entire system. For instance, if the HDD fails, it can be removed and replaced. Similarly, the ability to remove the motherboard implies that major system components can be serviced or upgraded. The instructions also detail the disconnection of various cables, such as ODD SATA and HDD power connectors, and other cables on the motherboard. This organized cabling system, while requiring careful disconnection during disassembly, implies a structured internal layout that can facilitate troubleshooting and component replacement during maintenance.
The document's focus on selective treatment of items like PCBs, batteries, and mercury-containing components also underscores the importance of responsible end-of-life management, which is an extended form of maintenance for the environment. While not directly related to user-level maintenance, the design considerations for easy removal of these specific items indicate an awareness of environmental regulations and a design that supports proper recycling and disposal. The absence of mercury-containing components, capacitors with PCB/PCT, or large electrolytic capacitors (as indicated by "0" quantity in the selective treatment table) suggests a design that aims to minimize hazardous materials, which simplifies both maintenance and recycling efforts. The clear steps for accessing and detaching major internal parts suggest that, with the right tools and knowledge, users or technicians could potentially perform upgrades (e.g., adding more RAM, replacing a storage drive) or repairs. The detailed visual aids, showing the location of screws and connectors, further support the idea that the internal structure is designed to be comprehensible and accessible for those performing maintenance or disassembly.
| RAM | Up to 32 GB DDR4 |
|---|---|
| Graphics | Intel UHD Graphics (varies by model) |
| Operating System | Windows 10 Pro |
| Optical Drive | DVD-Writer |
| USB Ports | 4 x USB 3.1 Gen 1 |
| Networking | 802.11ac Wi-Fi |
| Ports | 1x HDMI, 1x VGA, 1x RJ-45, 1x headphone/microphone combo |
| Expansion Slots | 1x PCIe x16, 1x PCIe x1 |
| Power Supply | 180 W |
| Dimensions | 27.4 x 9.5 x 30.3 cm (10.79 x 3.74 x 11.93 in) |