When installing an additional expansion enclosure with the HP StoreOnce 4500 Backup system,
the storage in that enclosure will not have been pre-configured and is not ready to use until storage
has been expanded. See Expanding storage (page 62).
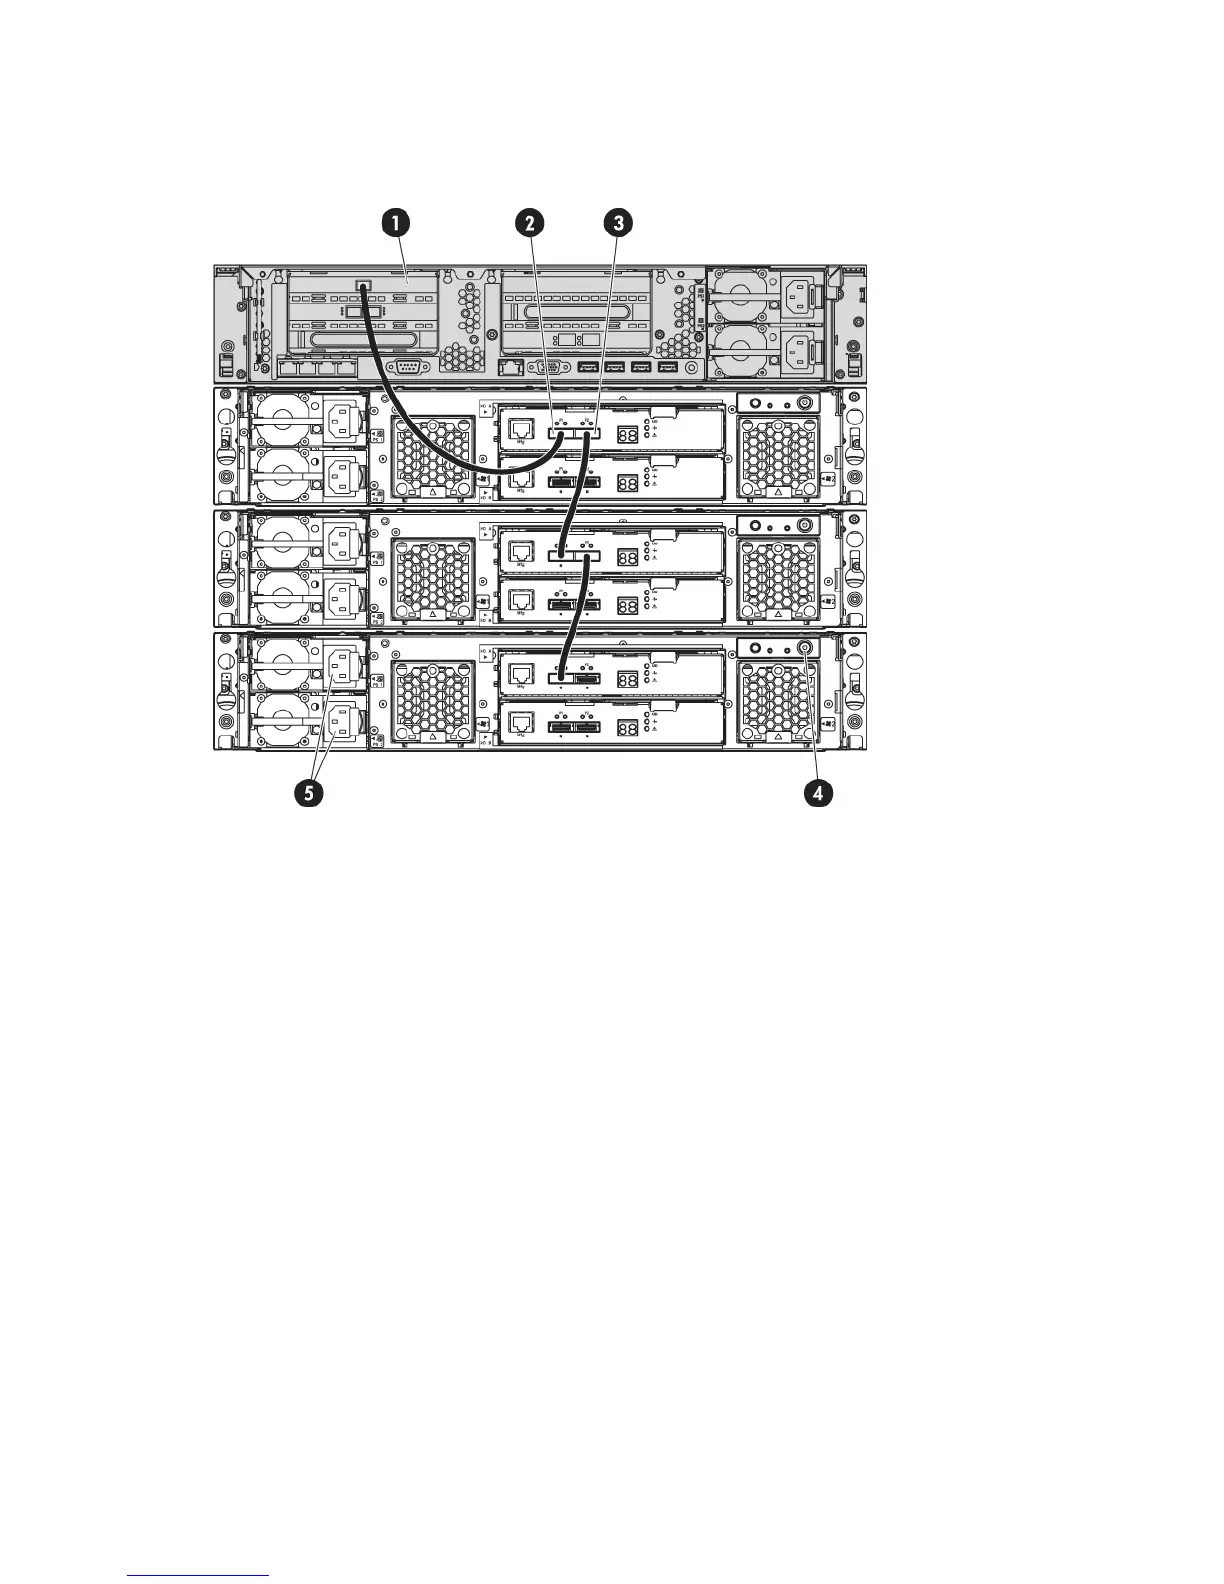
Figure 13 Cabling example for the HP StoreOnce 4500 Backup system
P1 port on expansion enclosure (Note how
subsequent enclosures may be daisy chained)
2.head server unit1.
Power on button4.P2 port on expansion enclosure (connects to
P1 on adjacent expansion enclosure)
3.
Power connectors5.
1. Connect the square HD connector on the longer HD SAS cable to the single high-density SAS
port on the RAID controller on the rear of the HP StoreOnce Backup system. Ensure that the
cable connector is plugged in the correct way on the rear of the HP StoreOnce Backup system.
This connector is square and is not keyed. Insert the connector with the blue tab at the top
and push in until the connector clicks into place.
2. Connect the mini-SAS connector on the other end of the cable to the P1 connector on the rear
of the expansion enclosure.
3. If installing more than one expansion enclosure, use the supplied 0.5m mini SAS cables to
daisy chain up to three expansion enclosures in total. The connection is from P2 on the upper
module of the first enclosure to P1 on the upper module of the next enclosure, as illustrated
below.
4. Use the supplied power cords to connect the expansion enclosure to the main power supply.
Connecting to the expansion enclosure (HP StoreOnce 4500 and 4700) 21

 Loading...