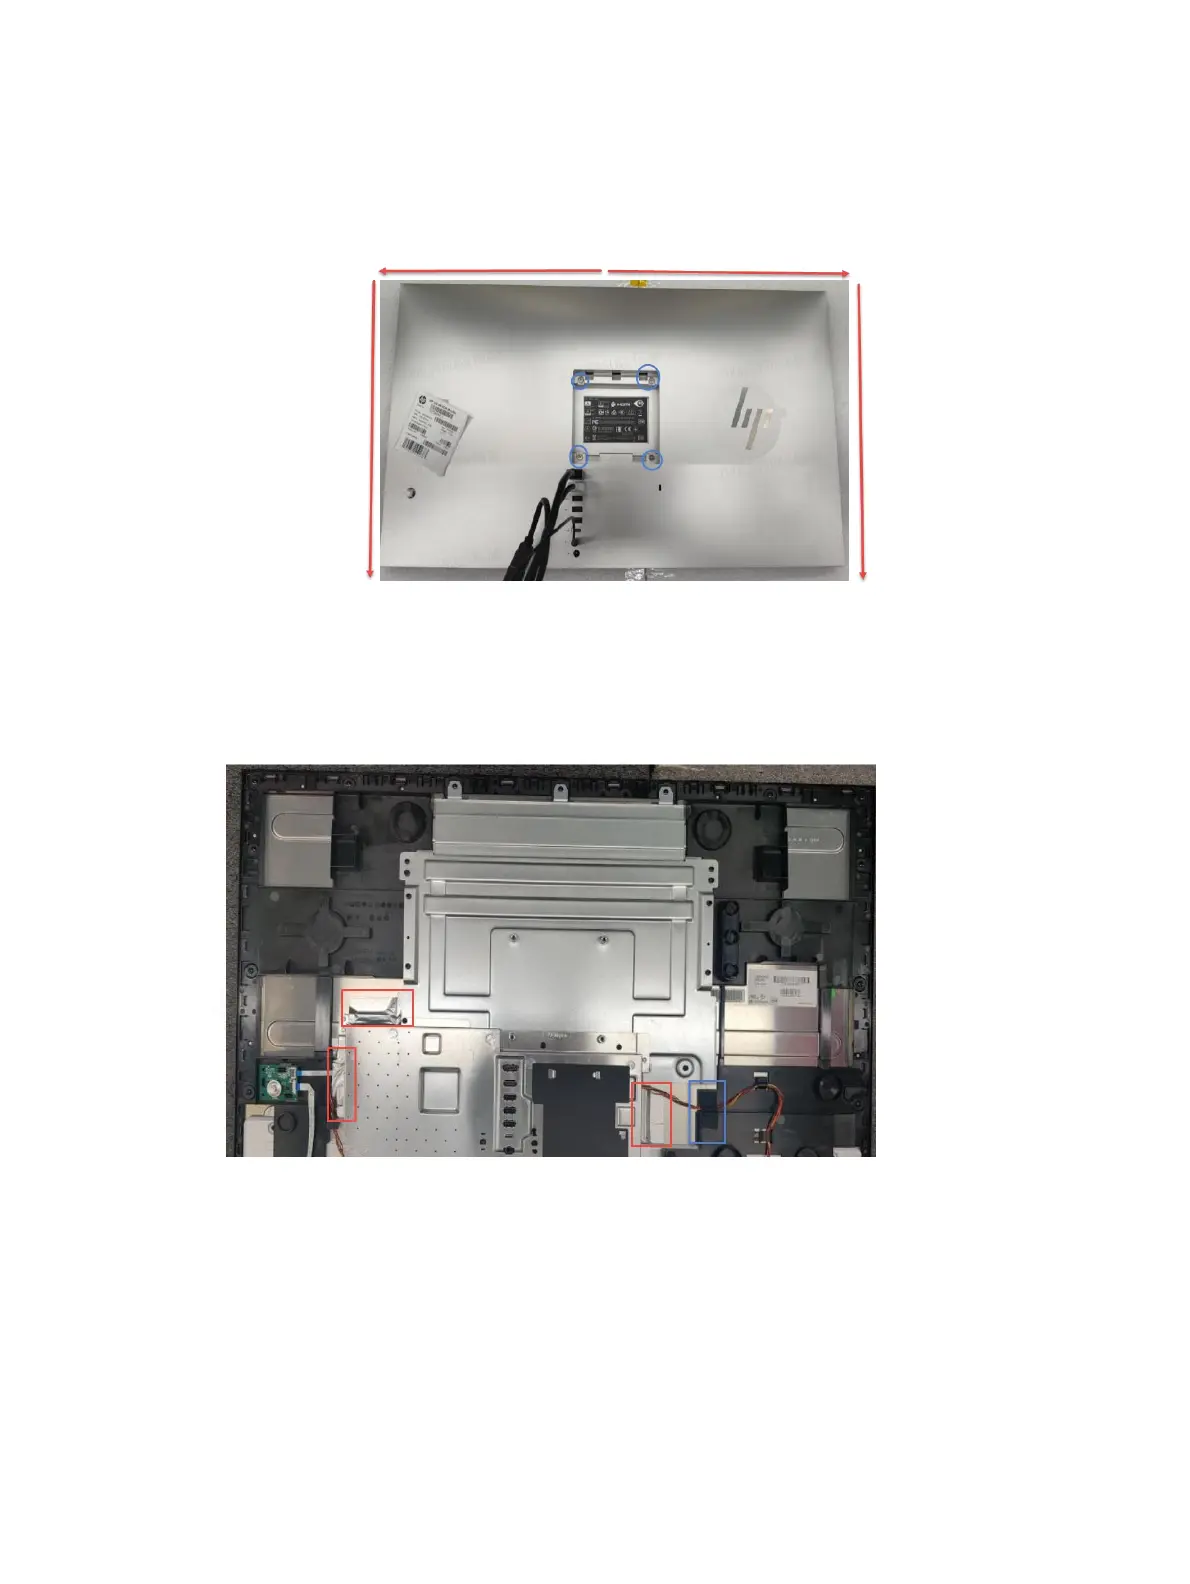
1) Remove wall mount screws and rear cover, Take the electric screwdriver and remove the 4 rear cover wall mounted
screws (as shown blue circle) and remove rear cover (as shown red arrow path ).
2) Remove aluminum tape. Tear off the 3 aluminum tape at the red square and remove black tape as shown in blue square.
3) Remove wire cable and OSD board, Power board. Pull out the backlight wire from the interface (when you take out the
backlight wire, hold down the backlight wire connector), and remove the backlight wire from the hook, as shown in the
blue square and remove OSD board, power board.