Do you have a question about the HP 24mq and is the answer not in the manual?
Provides crucial safety guidelines for using the monitor to prevent injury or equipment damage.
Outlines critical precautions and requirements for service technicians, including safety and material handling.
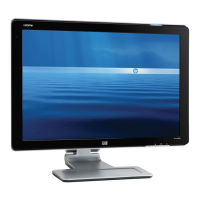
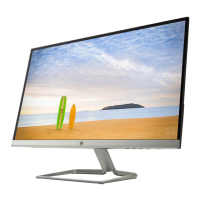
Details the monitor's screen size, resolution, panel type, viewing angles, and adjustability.
Details the function of each front component, including Menu, OSD buttons, and Power button.
Details the function of each rear component, including power connector, HDMI, VGA, and security slot.
Details the necessary steps and materials for preparing the monitor for disassembly and reassembly.
Details disconnecting tapes, removing screws, and removing the LED Board.
Explains removing mylar, screws, main board, and power board.
Details disconnecting pins from Main Board and Power Board.
Covers mainframe, screws, key board, and rear cover removal.
Describes separating the monitor panel from its bezel.
Guides on using soldering iron and hot air gun to remove and replace the HDMI connector.
Details the process of repairing the D-SUB connector using soldering iron and hot air gun.
Provides a guide to diagnose and resolve common problems like blank screen or flashing video.
Addresses specific error messages and conditions like blurred image, input signal out of range, and lockouts.
This document is a Maintenance and Service Guide for the HP 24mq monitor, providing comprehensive information for trained service personnel. It covers safety guidelines, monitor features, an illustrated parts catalog, and detailed removal and replacement procedures for various components, along with diagnostic tests and troubleshooting tips.
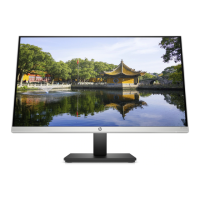
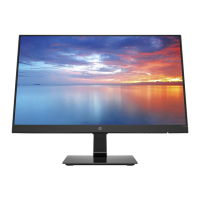
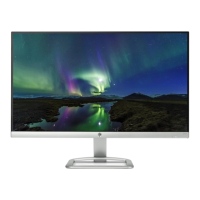
The HP 24mq monitor is designed for general use, offering a clear visual experience with its display technology. It features a nonglare IPS panel with an LED backlight, which helps reduce reflections and provides wide viewing angles. This allows for comfortable viewing from various positions, whether sitting or standing, or when moving from side to side. The monitor is equipped with tilt, pivot, and swivel capabilities, along with height adjustment, enabling users to customize the display's orientation and position for optimal ergonomics. The stand is also removable, offering flexibility for alternative mounting solutions, such as wall mounts or monitor arms, to suit different workspace setups.
For connectivity, the monitor includes a VGA video input, a common analog interface, and one HDMI (High-Definition Multimedia Interface) video input, with a cable provided for digital connectivity. It supports Plug and Play functionality, simplifying setup with compatible operating systems. A security cable slot is provided on the rear of the monitor for an optional security cable, allowing users to secure the device and deter theft. The monitor also features an On-Screen Display (OSD) for making adjustments to settings and optimizing the screen. These OSD adjustments are available in several languages, making it accessible to a broader user base. Additionally, the HP Display Assistant software is available for further fine-tuning monitor settings and activating theft deterrence features. The monitor incorporates HDCP (High-bandwidth Digital Content Protection) copy protection on all digital inputs, ensuring compatibility with protected content. An energy saver feature is included to meet requirements for reduced power consumption, contributing to energy efficiency.
Maintenance and service of the HP 24mq monitor are intended for professional service technicians in a repair center, not for end-users. The guide emphasizes important safety information, including precautions against electric shock and damage to equipment. It advises plugging the power cord into an easily accessible AC outlet and, if applicable, into a grounded 3-pin outlet. Disconnecting power by grasping the plug, not the cord, is crucial. Proper routing of cords and cables is recommended to prevent tripping hazards. The Safety & Comfort Guide, available online, provides additional information on workstation setup, posture, health, and electrical/mechanical safety. For monitor and computer protection, connecting all power cords to a surge protection device, such as a power strip or UPS with surge protection capability, is advised. Using appropriately sized furniture for monitor support is also highlighted to prevent accidents.
The service procedures require adherence to specific precautions. Technicians must be aware that the primary side of the monitor contains high voltage. The monitor complies with RoHS requirements, necessitating the use of lead-free solder wire for repairs. When replacing capacitors, it is essential to match polarity, specifications, and part numbers according to the Bill of Materials (BOM) and location. Care must be taken to insert new parts carefully to avoid short circuits. Keeping the circuit board dry is critical, as water and moisture can cause malfunctions. Lead-free solder should be used to prevent damage, and soldering should be performed quickly to avoid overheating the circuit board. The soldering iron tip must be kept clean and well-tinned. After repairs, a close inspection of the circuit board and a function test are mandatory to confirm proper operation and power supply functionality. Before returning a repaired product to the customer, an AC leakage current check on exposed metallic parts is required to ensure electrical safety.
The guide includes an illustrated parts catalog to help identify major components, such as the panel, bezel, base assembly, lens, adapter board, main board, mainframe, key board, rear cover, stand assembly, and insulating sheet, along with various screws. Information on ordering spare parts is provided, directing authorized repair centers to purchase the power board from HP and noting that capacitors and connectors are available from specific EU distributors like RS, tme, and Digi-Key. Cables can be purchased from the HP part store.
Detailed removal and replacement procedures are outlined for various components. Preparation for disassembly involves reading safety information, cleaning the work area, identifying the disassembly area, and ensuring the availability of necessary equipment such as a press fixture, working table, screwdriver, knife, gloves, cleaning cloth, ESD protection, and a scraper bar of specified dimensions. The guide provides step-by-step instructions for removing the rear cover, disconnecting cables and tapes, removing the LED board, and detaching the main board and power board. Special attention is given to the power board removal, with a warning about residual charge in capacitors even after unplugging the power supply.
Connector repair procedures for HDMI and D-SUB connectors are also detailed. These repairs are specifically for out-of-warranty cases and must be performed by professional repairers in a repair center, not by end-users. Electrostatic protection is required during component replacement. Technicians must verify that replacement connectors match specifications and part numbers. Precautions include carefully inserting new parts to avoid short circuits, preventing liquid contact with the board, using lead-free solder, working quickly to avoid overheating, and keeping the soldering iron tip clean. After repair, a thorough inspection and connection to a source device are required to confirm the main board's functionality.
A function test section ensures that all functions are working correctly after repair, covering HDMI and D-SUB tests to confirm image and sound display. The troubleshooting section provides common issues, possible causes, and recommended solutions for problems like a blank or flashing screen, the monitor being off, improper video cable connection, the system being in Auto-Sleep Mode, incompatible video cards, blurred images, "Check Video Cable" messages, "Input Signal Out of Range" messages, the monitor not entering low-power sleep state, "OSD Lockout" messages, and "Power Button Lockout" messages. Solutions range from connecting power cords and pressing power buttons to adjusting OSD settings, checking cable connections, and replacing video cards.
| Screen Size | 23.8 inches |
|---|---|
| Panel Type | IPS |
| Aspect Ratio | 16:9 |
| Refresh Rate | 60 Hz |
| Ports | 1 x HDMI 1.4, 1 x DisplayPort 1.2, 1 x VGA |
| Viewing Angle | 178° horizontal / 178° vertical |
| Contrast Ratio | 1000:1 |
| Color Gamut | 72% NTSC |
| VESA Mount | 100 x 100 mm |
| Brightness | 300 cd/m² |
| Response Time | 5 ms |
| Resolution | 2560 x 1440 |
| Weight (with stand) | 11.68 lbs |