Do you have a question about the HP V27i and is the answer not in the manual?
Crucial safety precautions and guidelines for handling the product to prevent injury.
Essential information and warnings for qualified service personnel performing maintenance.
Details on the Restriction of Hazardous Substances directive for product compliance.
Provides a general overview of the product and service levels.
Information on how to check for and perform firmware updates for the monitor.
Steps to ensure product safety before returning it to the customer after service.
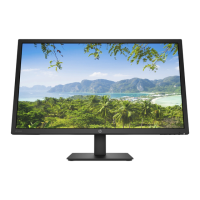
Identifies and illustrates the components located on the front of the monitor.
Identifies and illustrates the components located on the rear of the monitor.
Guidance on finding the serial and product numbers for support purposes.
Instructions and necessary equipment for preparing the monitor for disassembly.
Detailed steps for removing and replacing the monitor's power board.
Procedure for repairing or replacing the HDMI connector (P102) on the main board.
Procedure for repairing or replacing the DC connector (P103) on the main board.
Procedure for repairing or replacing the VGA connector (P101) on the main board.
This document describes the HP V27i monitor, a display device designed for general computing use. It provides comprehensive information for both end-users and service personnel, covering its features, maintenance procedures, and troubleshooting.
The primary function of the HP V27i monitor is to provide a visual display for computers and other compatible devices. It is designed to offer a clear and stable image for various applications, from everyday tasks to multimedia consumption. The monitor is equipped with multiple input options to ensure broad compatibility with different systems.
Key usage features of the HP V27i monitor include a diagonal viewable screen area, offering ample space for productivity and entertainment. It supports a standard resolution, with full-screen support for lower resolutions, and includes custom scaling to maximize image size while preserving the original aspect ratio. This ensures that content from various sources is displayed optimally. The monitor features an anti-glare panel with an LED backlight, which helps reduce reflections and provides a bright, clear image even in well-lit environments. The wide viewing angle allows for comfortable viewing from various positions, whether sitting, standing, or moving from side to side, making it suitable for collaborative work or shared viewing experiences.
The monitor offers tilt capability, allowing users to adjust the screen to their preferred ergonomic angle for improved comfort during extended use. For connectivity, it includes a VGA video input, a widely compatible analog input, and a High-Definition Multimedia Interface (HDMI) video input, which supports high-quality digital video and audio (on select models). Some models also include an audio-in jack, enabling the monitor to receive audio signals directly. The removable stand provides flexibility, allowing the monitor head to be mounted on alternative solutions, such as VESA-compatible arms or wall mounts, for customized setups.
Plug-and-play capability is supported, simplifying the setup process by allowing the operating system to automatically detect and configure the monitor without extensive manual intervention. For security, a security cable slot provision is located on the rear of the monitor, allowing for an optional security cable to deter theft. The On-Screen Display (OSD) provides a user-friendly interface for making adjustments to various settings, available in several languages for easy setup and screen optimization. These adjustments include controls for brightness, contrast, input selection, and other display parameters. The monitor also incorporates High-Bandwidth Digital Content Protection (HDCP) copy protection on all digital inputs, ensuring compatibility with protected content sources. An energy saver feature is included to meet requirements for reduced power consumption, contributing to energy efficiency.
Maintenance features are extensively detailed in the service guide, aimed at trained service personnel. The guide emphasizes important safety information and precautions that must be followed before performing any service or maintenance. This includes ensuring a dry and clean working environment, using proper safety devices and approved tools, and always disconnecting the power supply before opening the product's cabinet. Special attention is given to electrostatic discharge (ESD) safety procedures when handling modules containing electrical components. The guide also warns about products containing multiple batteries and the risks associated with disassembling or exposing them to high temperatures.
The service procedures are categorized into two levels: Level 1 for cosmetic/appearance/alignment service and Level 2 for circuit board or standard parts replacement. The guide provides detailed instructions for disassembly, starting with preparing the monitor and the work area. This involves cleaning the room, identifying the disassembly area, and ensuring all necessary equipment and materials are available, such as a press fixture, working table, screwdriver, knife, gloves, cleaning cloth, ESD protection, and a scraper bar of specific dimensions.
Specific removal and replacement procedures are outlined for various components. For instance, the process for removing the base and bracket is described, involving pushing release buttons to detach them from the stand and monitor head, respectively. Removing the rear cover requires unscrewing specific fasteners and using a knife to carefully separate the case. Instructions are also provided for removing shielding cases and cables, which involves detaching acetate tape and aluminum foil. The function key board (KB) removal is detailed, including taking it out of the front frame, removing a tab, and pulling out the function key wire. The front bezel removal involves unscrewing fasteners and detaching mylar tape and aluminum foil.
For internal components, the guide describes how to remove the mainboard (M/B) and power board (P/B) from the shielding case, which involves unscrewing fasteners at the mainboard interface and on the bottom of the shielding case, as well as removing acetate tape. Detailed instructions are provided for power board replacement, including locating the part number on the board. Connector repair procedures for HDMI, VGA, and DC connectors are also covered. These involve using a soldering iron and a desoldering pump to remove old solder, a hot air gun to melt remaining solder, lifting the old connector, placing a new component that matches the PCB footprint, and then soldering the new component in place.
After any repair, a function test is recommended to confirm that all functions are working correctly. This includes HDMI and VGA tests to verify image and sound display. The guide also includes a comprehensive troubleshooting section that lists common problems, their possible causes, and recommended solutions. This covers issues such as a blank or flashing screen, the monitor being off, improper cable connections, the system being in Sleep mode, incompatible video cards, blurred images, and various OSD-related messages like "Input Signal Out of Range," "On-Screen Menus are Locked," and "Power Button is Locked." Solutions range from connecting power cords and video cables properly to adjusting OSD settings and unlocking buttons.
Firmware updates are mentioned as being available on the HP support website, with a note that if no firmware is posted, an update is not needed. Before returning a repaired product to the customer, an AC leakage current check on exposed metallic parts is mandated to ensure electrical safety. This check is crucial to prevent potential shock hazards, and any measurements outside specified limits require further repair before the product can be returned.
The document also includes information on how to order spare parts, directing users to the HP authorized repair center for power boards and listing EU distributors for capacitors and connectors. It advises checking the HP PartSurfer website for complete and current information on supported parts. General descriptions of the monitor's service levels are provided, distinguishing between cosmetic service and circuit board/standard parts replacement. The guide also references ERP Lot5 requirements, outlining the technical competence and insurance requirements for professional repairers of electronic displays in Member States. RoHS (Restriction of Hazardous Substances) requirements are also addressed, specifying compliance for products launched after June 2006 and providing guidelines for replacement parts.
| Color gamut | 72 % |
|---|---|
| Pixel pitch | 0.311 x 0.311 mm |
| Screen shape | Flat |
| Pixel density | 81 ppi |
| Display diagonal | 27 \ |
| Display technology | LED |
| Native aspect ratio | 16:9 |
| Vertical scan range | 50 - 60 Hz |
| Maximum refresh rate | 60 Hz |
| Horizontal scan range | 30 - 80 kHz |
| Contrast ratio (typical) | 1000:1 |
| Display number of colors | - |
| Display brightness (typical) | 300 cd/m² |
| Supported graphics resolutions | 640 x 480 (VGA), 720 x 400, 800 x 600 (SVGA), 1024 x 768 (XGA), 1280 x 1024 (SXGA), 1280 x 720 (HD 720), 1280 x 800 (WXGA), 1440 x 900 (WXGA+), 1600 x 900, 1680 x 1050 (WSXGA+), 1920 x 1080 (HD 1080) |
| Certification | Australian-New Zealand MEPS; BIS; BSMI; CB; CCC; CE; CECP; CEL; C-Tick; cTUVus; EAC; Energy Star; E-standby; EUP Lot-5; EUP Lot-6; FCC; ISO 9241-307; KC/KCC; NOM NYCE; PSB; SEPA; TCO Certified; TUV Bauart; VCCI; Vietnam MEPS; WEEE; ISC; Low blue light; UkrSEPRO; South Africa MEPS; Ukraine Energy label; California Energy Commission (CEC); WW application; ICE; Mexico MEPS; TGM; Japan PC Green Label |
| Product color | Black |
| Country of origin | China |
| Market positioning | Home |
| Sustainability certificates | ENERGY STAR |
| HDMI | Yes |
| HDMI version | 1.4 |
| USB hub version | 3.2 Gen 1 (3.1 Gen 1) |
| DisplayPorts quantity | 0 |
| USB Type-A downstream ports quantity | 3 |
| Tilt angle range | -5 - 20 ° |
| Panel mounting interface | 100 x 100 mm |
| Operating temperature (T-T) | 5 - 35 °C |
| Operating relative humidity (H-H) | 20 - 80 % |
| Package type | Box |
| Package depth | 128 mm |
| Package width | 675 mm |
| Package height | 425 mm |
| Package weight | 5700 g |
| AC input voltage | 100 - 240 V |
| Power consumption (standby) | 0.5 W |
| Power consumption (typical) | 28 W |
| Cables included | AC, HDMI |
| Harmonized System (HS) code | 85285210 |
| Depth (with stand) | 200.1 mm |
|---|---|
| Height (with stand) | 447.7 mm |
| Weight (with stand) | 4500 g |
| Depth (without stand) | 47.7 mm |
| Width (without stand) | 612.2 mm |
| Height (without stand) | 367.7 mm |