EasyManuals Logo

HP Z220 Installation

HP Z220
22 pages
To Next Page IconTo Next Page
To Previous Page IconTo Previous Page
Page #7 background imageLoading...
Page #7 background image
Step 1—Preparing for component installation
NOTE: Computer models vary. All illustrations are examples only.
Accessing the internal components of the computer
1. If you need help preparing the computer for this installation, consult the removal and replacement
procedures in the service guide for your computer at
http://www.hp.com/support/manuals.
2. Power down the computer, and then disconnect the power cord.
3. Power down all external devices, and then disconnect them from the computer.
4. Remove the side access panel.
Step 2—Installing the DX115 case into the optical
drive bay
See the steps for the applicable computer model in the following sections.
CAUTION: Insert or remove the carrier (with a disk drive) only when the workstation is shut down.
Other procedures may result in system hangs, data loss, or even drive damage. The component
supplier’s user guide describes a procedure for inserting or removing the carrier (with drive) while the
workstation is booted and then powering the drive via the power switch on the enclosure. Microsoft
Windows XP and Windows Vista do not support this action.
NOTE: The CRU Dataport DX115 does not fit in all optical drive bays. It is longer than most optical
drives. Install the CRU Dataport DX115 in the optical bay which best fits your computer configuration.
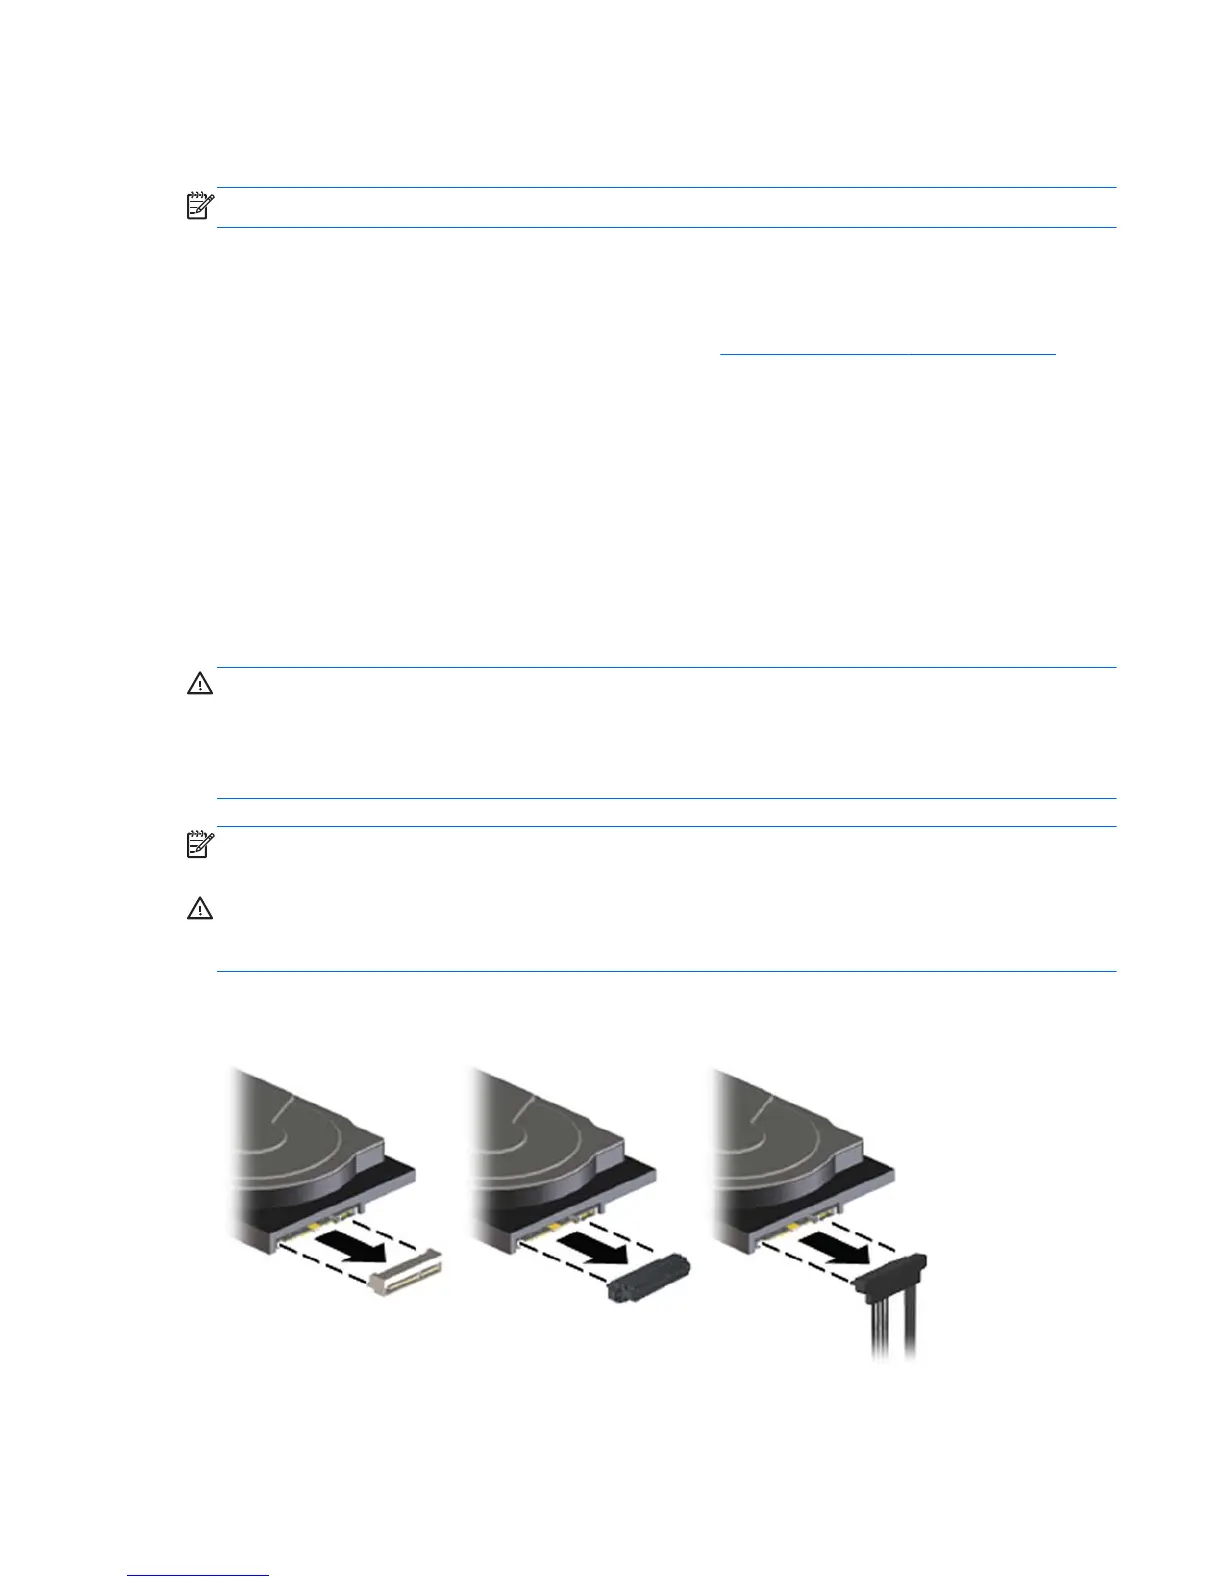
CAUTION: HP computer SAS disk drives are configured with a SAS-to-SATA adapter or cable. To
ensure proper connection, remove the adapter or cable before continuing with installation, as shown in
the following figure.
Figure 1 Removing the SAS to SATA adapter or cable
ENWW
Step 1—Preparing for component installation
3

Other manuals for HP Z220

Questions and Answers:

Question and Answer IconNeed help?

Do you have a question about the HP Z220 and is the answer not in the manual?

HP Z220 Specifications

General IconGeneral
Bus typeDMI
SteppingE1
FSB ParityNo
Processor cache8 MB
Processor cores4
Processor modelE3-1225V2
System bus rate5 GT/s
Processor seriesIntel Xeon E3-1200 v2
Processor socketLGA 1155 (Socket H2)
Processor codenameIvy Bridge
Processor frequency3.2 GHz
Processor cache typeSmart Cache
Processor lithography22 nm
Processor manufacturerIntel
Processor front side bus- MHz
PCI Express slots version3.0
Processor boost frequency3.6 GHz
Processor operating modes64-bit
ECC supported by processorYes
PCI Express configurations1x16+1x4, 1x8+3x4, 2x8+1x4
Thermal Design Power (TDP)77 W
Number of processors installed1
CPU multiplier (bus/core ratio)32
Memory types supported by processorDDR3-SDRAM
Memory clock speeds supported by processor1333, 1600 MHz
Memory bandwidth supported by processor (max)25.6 GB/s
Maximum internal memory supported by processor32 GB
Audio systemHD
Product typeWorkstation
Motherboard chipsetIntel PCH C216
Memory slots4x DIMM
Internal memory4 GB
Memory channelsDual-channel
Memory clock speed1600 MHz
Memory layout (slots x size)2 x 2 GB
HDD speed7200 RPM
HDD capacity1000 GB
HDD interfaceSATA
Optical drive typeDVD Super Multi
Graphics cardHD Graphics P4000
Rack mounting-
Networking featuresGigabit Ethernet (10/100/1000)
PS/2 ports quantity2
Serial ports quantity0
USB 2.0 ports quantity9
Chassis typeMinitower
Country of originChina
Number of 3.5\" bays3
Operating system installedWindows 7 Professional
Power supply400 W
On-board graphics card modelIntel® HD Graphics P4000
On-board graphics card familyIntel® HD Graphics
On-board graphics card base frequency650 MHz
On-board graphics card dynamic frequency (max)1250 MHz
Processor ARK ID65733
Intel TSX-NI version0.00
Supported instruction setsAVX
Intel Identity Protection Technology version1.00
Weight and Dimensions IconWeight and Dimensions
Depth445 mm
Width178 mm
Height447 mm
Weight10400 g

Related product manuals