−
12
−
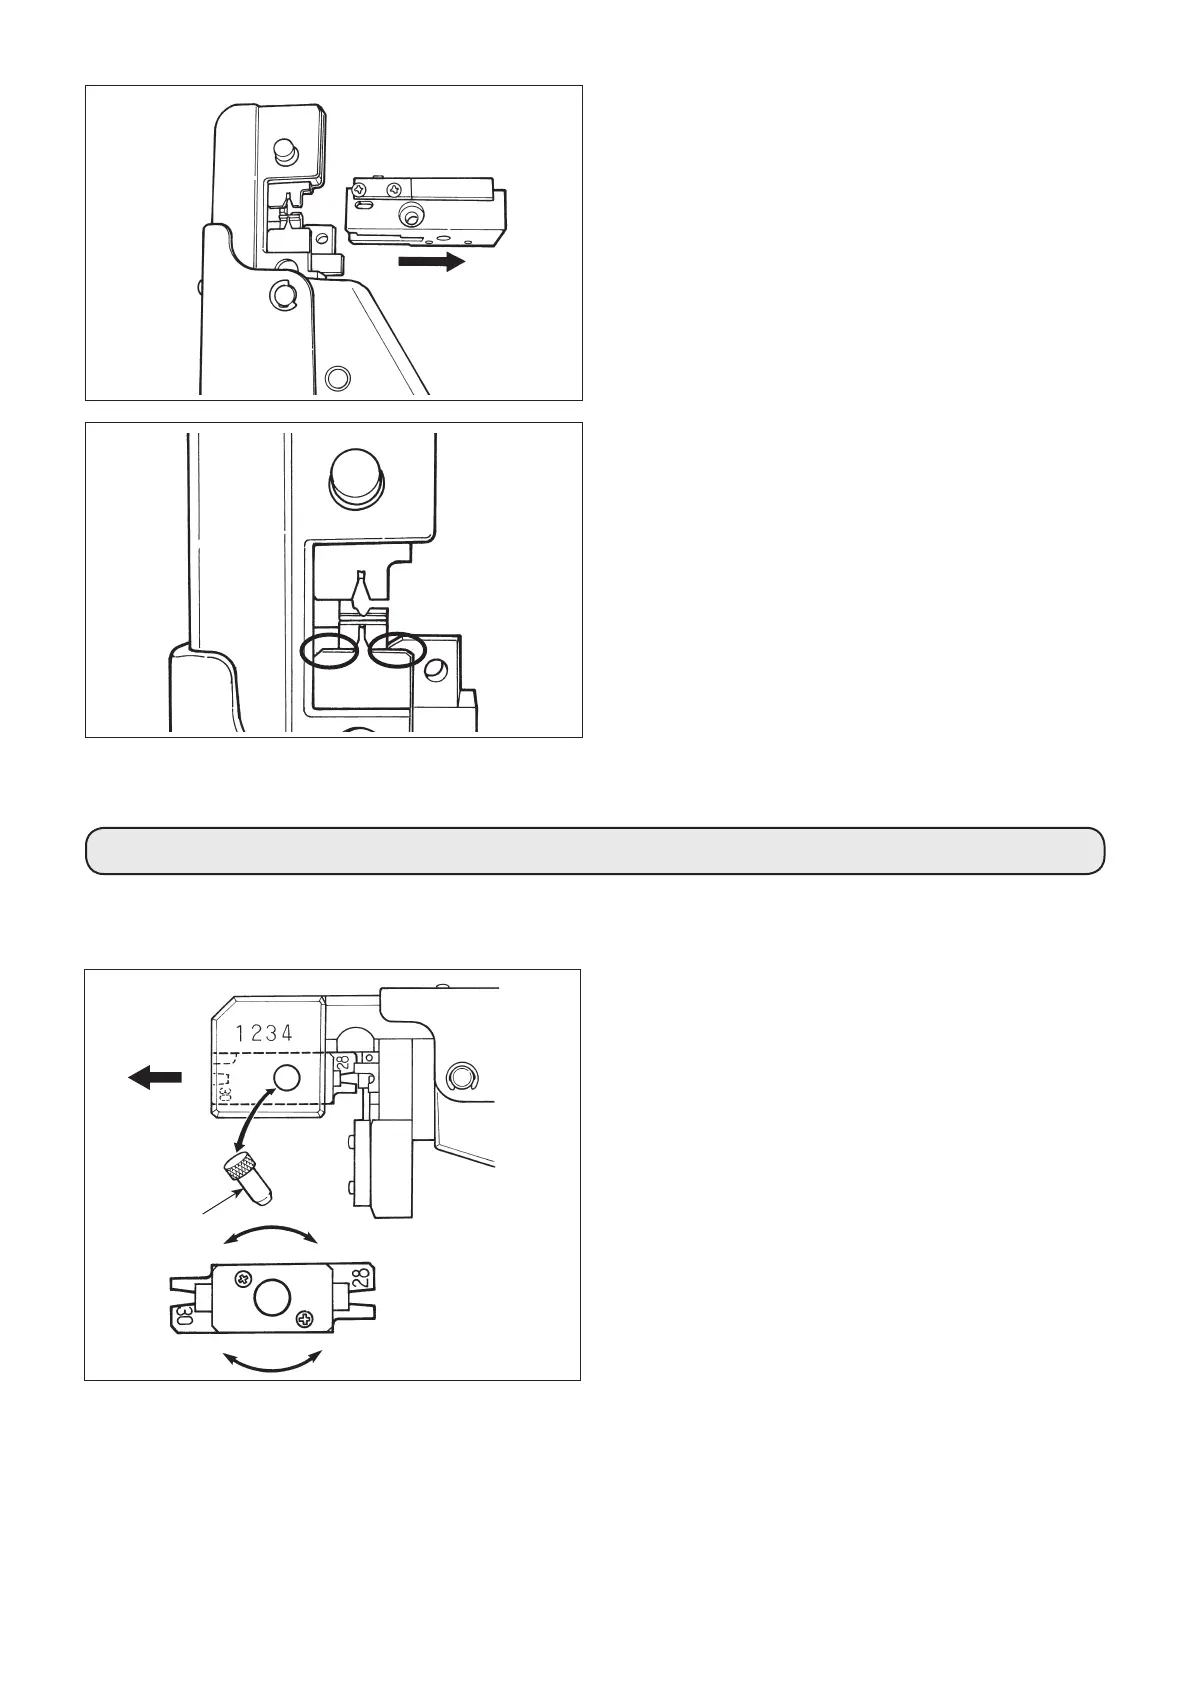
6. クリンパの交換方法 /
Replacing the crimper
手動圧着工具は 、 ご使用になるケーブルサイズにより 、 クリンパを交換してご使用ください 。( アンビルは共用です 。)
Crimp side of the tool can rotated as shown on the illustration below to t the wire gage used. Anvil side is stationary and can not be
removed.
抜き差しピン /
Release pin
180
˚
回転させる /
Turnthecrimperby180˚
1)
圧着
工具ヘッド部にある抜き差しピンを引き抜いてく
ださい 。
2) 矢印方向にクリンパを引き抜いてください 。
3) クリンパを 180
˚
回転させ 、 ご使用になるケーブル
サイズの刻印表示が見えるように取り付け 、 抜き差し
ピンを差し込んでください 。
( 注意 ) 工具によってはクリンパを交換する場合もあります。
1) Withdraw the releasing pin.
2) Withdraw the crimper in the direction shown by the arrow.
3) Rotate the crimper 180° and re-insert in the tool, showing
the marking of the applicable wire gage used. Re-insert the
releasing pin.
(Caution)
Some crimpers used in this tool may be non-rotating.
Replacement procedure will not require rotating 180°.
2) 端子ガイドを矢印の向きに沿って引き抜いてくださ
い。
2) Pull out the contact guide following the direction of the ar-
row.
3) 丸印を付けたところにキャリアカスがたまっているよ
うであれば、取り除いてください。
キャリアカスの除去が終わったら分解したときと逆に
組み立ててください。組立後は必ず圧着品質確認して
ください。
3) If carriers and carrier chips gather in the circled parts, re-
move them.
After completion of removal of carriers and carrier chips,
assemble the manual crimping tool by reversing the disas-
sembly procedure.
Be sure to check the crimping quality after reassembly.