11
How to Connect
(CONT.)
On
Auto On
Trigger
WARNING: The six (6) recessed switches labeled “Bridged” on the back of the multi-channel
amplier are factory pre-set in the left, Non-Bridged position. They are recessed and pre-set for
a very important reason – Because improper use can damage the amplier.
Bridging is NOT used to create a mono signal from a stereo signal. Typical use of the multi-
channel amplier does NOT require Bridging of channels. If Bridging is improperly used, it
could result in permanent damage to the amplier, your volume controls and your speakers.
DO NOT change the Bridge switches without FIRST contacting HTD at 1-866-483-2834 or
support@HTD.com
Damage resulting from improper use of Bridging may not be covered by the HTD Warranty.
Amplier Settings (cont.)
Bridge Switch: Since you are not bridging the two channels, make sure the Bridge Switch is off
(far left position). See the owner’s manual for the amplier for instructions on bridging adjacent
channels to achieve even higher power when necessary.
Caution: Incorrect use of “Bridging” can cause damage to the amplier. Contact HTD Sup-
port for help with Bridging. (See Box Below)
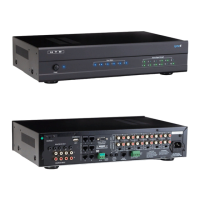
On - Auto On - Trigger Switch: Setting this switch to “Trigger” is best when using
the Lync with an HTD multi-channel amplier. A mono 3.5mm patch cable should
be connected from the Trigger Out on the Lync to the Trigger In on the multi-chan-
nel amplier. The “trigger” is only active when a LyncPad is powered on which
means the multi-channel amplier is only active when a LyncPad is on. When
all LyncPads are off, the multi-channel amplier will automatically return to sleep
mode.
Lync6 Trigger Connection:
NOTE: MAKE SURE BOTH THE AMPLIFIER AND CONTROLLER ARE “OFF”. DO NOT CONNECT OR DISCON-
NECT THIS CABLE WITH THE AMPLIFIER OR CONTROLLER “ON”.
Connect the included 3.5mm mono cable from the Trigger Output on the Lync Controller to the Trigger Input on the
DMA-1240 or DMA-1275 and then set the three position switch next to the trigger input on the amplier to the “Trig-
ger” position.
Lync12 Trigger Connection:
NOTE: MAKE SURE BOTH THE AMPLIFIER AND CONTROLLER ARE “OFF”. DO NOT CONNECT OR DISCON-
NECT THIS CABLE WITH THE AMPLIFIER OR CONTROLLER “ON”.
Connect the included 3.5mm mono cable from the Trigger Output on the Lync Controller to the Trigger Input on the
rst DMA-1240 or DMA-1275. Connect the included 2.5mm to 3.5mm mono cable from the trigger output on the same
DMA-1240 or DMA-1275 amplier to the trigger input on the second DMA-1240 or DMA-1275 amplier. Set the three
position switch next to the trigger input on both ampliers to the “Trigger” position.