18
6
Powering On the System
1. Turn on the AC switch between the SUN2000 and the power grid.
2. Set DC SWITCH 1 at the bottom of the SUN2000 chassis to ON. When you hear a click
sound, the switch is ON.
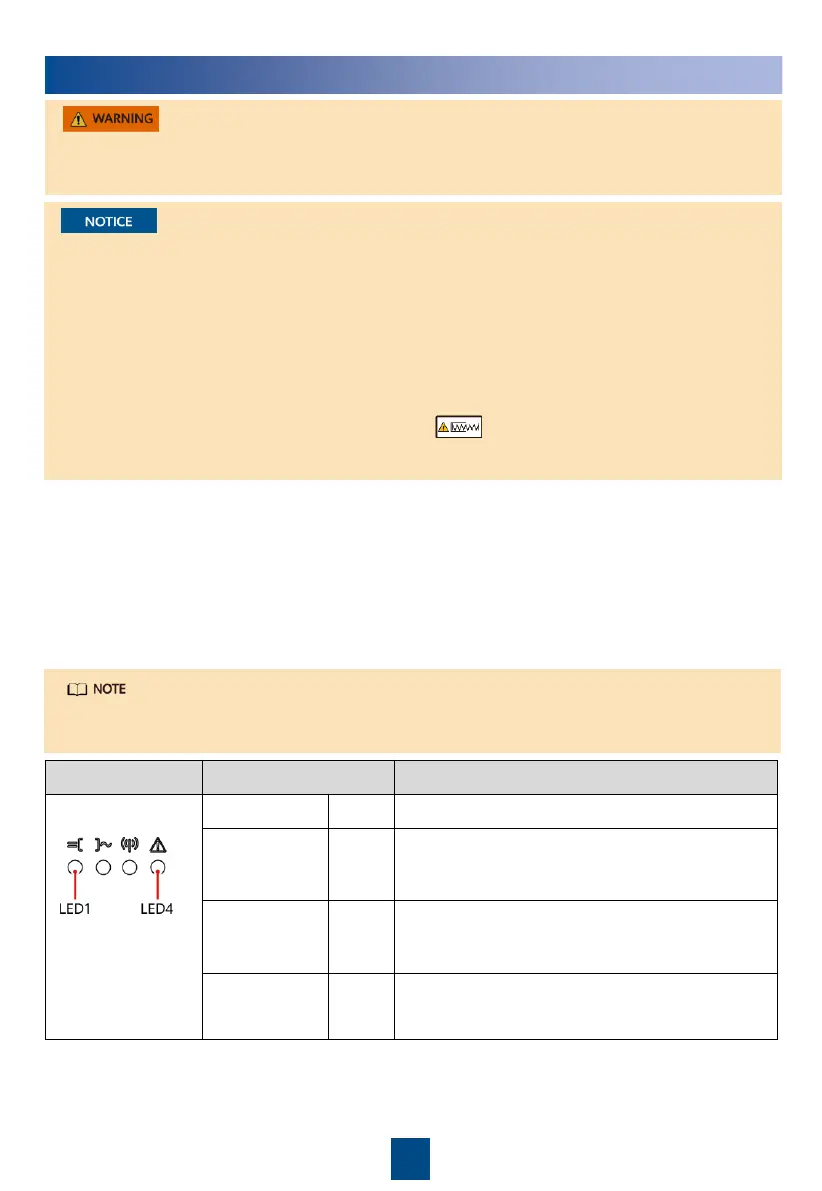
3. Check the status of LED 1.
• If it is steady green, set DC SWITCH 2 and DC SWITCH 3 to ON.
• Wait one minute after power-on, if LED 1 is off, do not turn on other DC switches. At the
same time, turn off DC SWITCH 1 and check whether the input power cables are
correctly connected.
4. Observe the LED indicators to check the SUN2000 operating status.
• Blinking at short intervals (on for 0.2s and then off for 0.2s).
• Blinking at long intervals (on for 1s and then off for 1s).
• When powering on the system, you must switch on DC SWITCH 1 first, and then switch on DC
SWITCH 2 and DC SWITCH 3 after LED 1 is steady on. Huawei shall not be held liable for
damages caused by failing to follow this sequence.
• Before turning on the AC switch between the SUN2000 and the power grid, use a multimeter
to check that the AC voltage is within the specified range.
• The DC switches support automatic disconnection. Reverse polarity or improper PV module
configuration will trigger automatic disconnection of DC switches. In this case, do not forcibly
turn on the switches before the faults are fixed. Otherwise, damages caused by the forced
switch-on will not be covered under any warranty.
• When the handle of the DC switch points to the icon, the spring of the DC switch is in
released state and the switch is not completely connected. In this case, automatic
disconnection may fail. You need to set the DC switch to the ON position.
When LED2 is steady green (meaning that the inverter is grid-tied), do not turn on any DC
switch. Otherwise, the inverter may be damaged because the insulation resistance is not
detected.
 Loading...