15
WARNING: Do not overtighten the cable clamp. overtightening the cable clamp
may cut the cable and cause brake failure.
Check the brake for proper operation by spinning the wheel, and applying the brake a
few times.
If the brake does not operate properly, repeat the procedure.
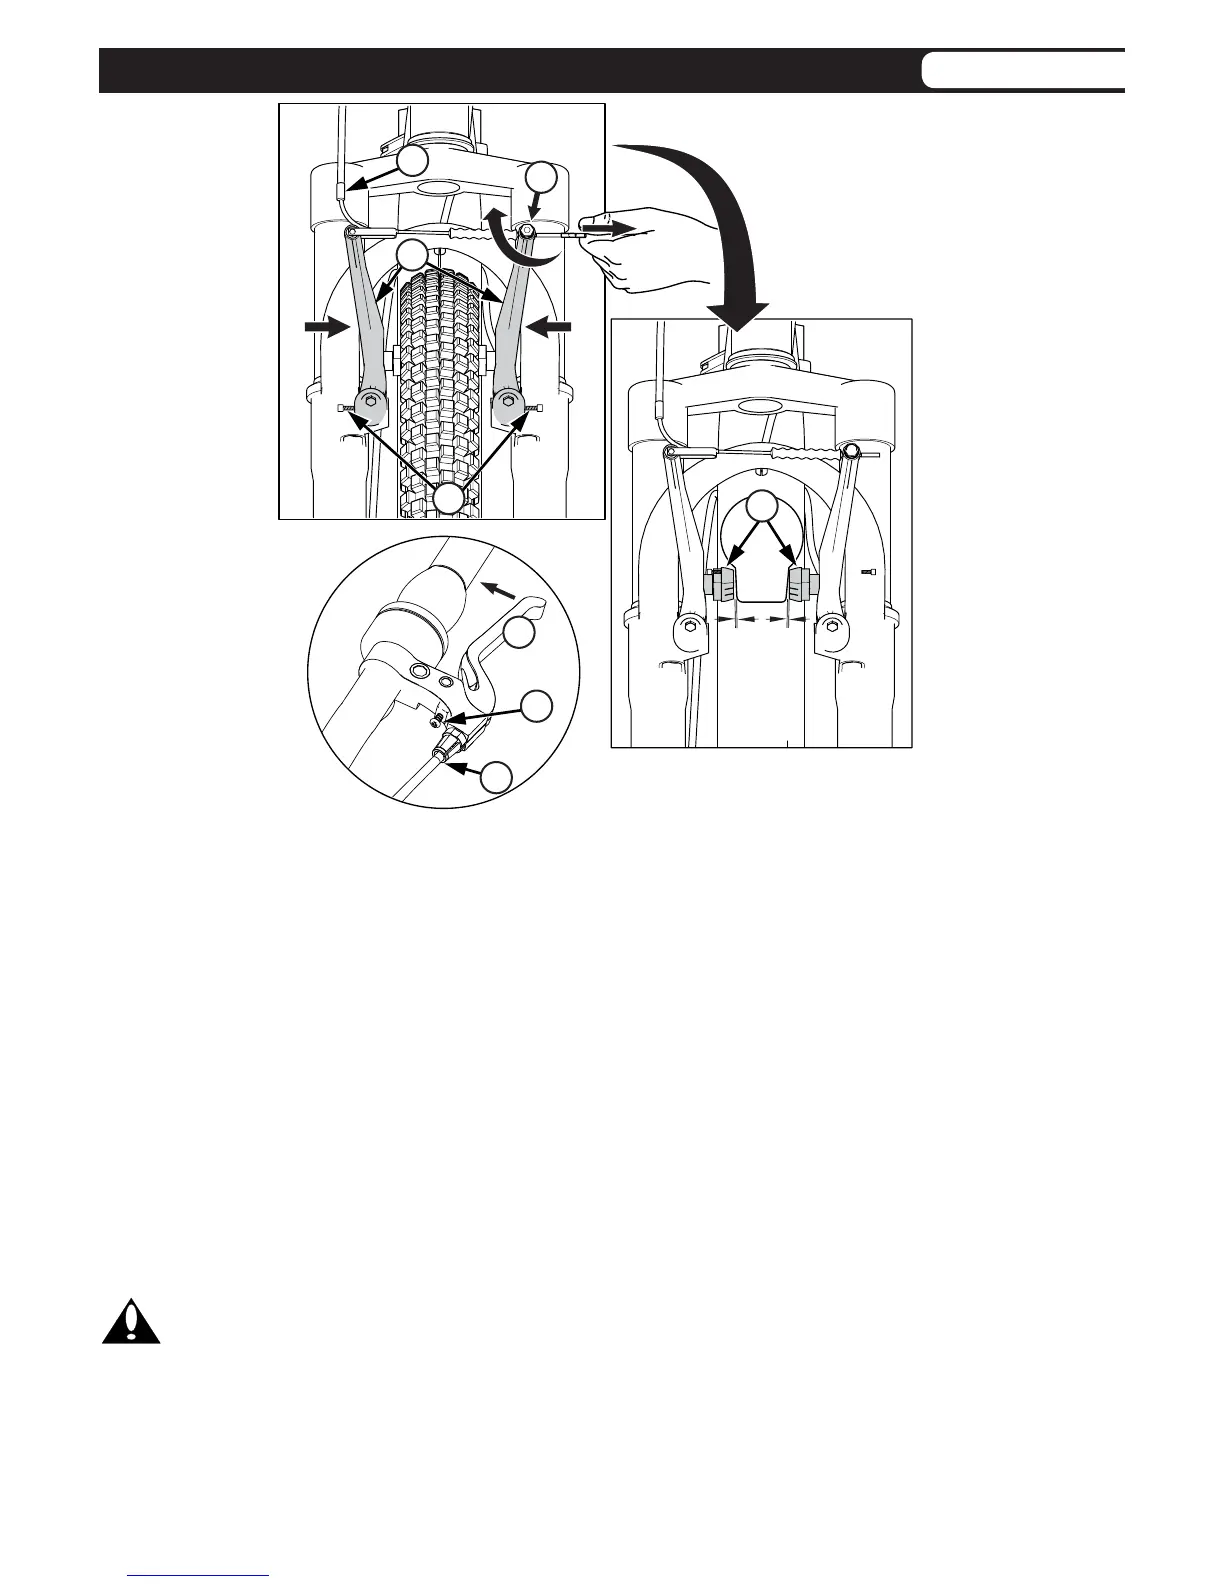
1/16” 1/16”
C
A
B
E
F
G
H
D
Step One: Put the brake shoes the correct distance from the rim:
1. If needed, adjust Brake Levers (G) to a comfortable distance from the grip using
the Adjustment Screw (H). Turning the screw IN brings it closer to the grip.
2. Make sure brake line Sheaths (A, B) are seated correctly.
3. Position each Brake Shoe 1/16 inch away from the rim:
4. Turn the caliper brake adjusting Screws (D) in or out to make the adjustment.
5. If the brake shoes cannot be positioned the correct distance from the rim, hold both
Brake Shoes against the rim and loosen the cable clamp Screw (E)
6. Squeese the Brake Arms (F) together and pull or loosen the cable wire slightly.
7. Tighten the cable clamp Screw.
Step Two: Check the tightness of the cable clamp:
Squeeze the brake lever with fi rm pressure. Make sure the cable does not move in
the cable clamp.
Brake Setup - continued
• Assembly