EasyManua.ls Logo

Humanscale Liberty Task User Manual

Humanscale Liberty Task
2 pages
To Next Page IconTo Next Page
Page #1 background imageLoading...
Page #1 background image
Operation #
Back Pin Replacement
Model #
All
Page
1/2
Process Description
Back Pin Replacment
Work Content - Verify – TQC
Repeat for other side.4
Pull Pin from opposing side with fingers or if
sticky, pliers work well. While removing Pin
pinch the back frame and the lower back
together to keep the holes aligned.
2
Insert new pin into back and tap in gently using
a mallet. The pin should slide in easily. ** Once
seated a good firm tap should be given to the
pin to insure that it is in completely.
3
* If changing pins on more then ten chairs a
special tool can be requested from the factory
that must be returned upon job completion.
** If pin is not going in easily see page two of
instructions.
Drive the back pin out of the chair from the
inside using a punch/Allen key and a mallet. *
1
DescriptionStep
Date
12/22/05
Rev #
1
Drive Pin
from here
Question and Answer IconNeed help?

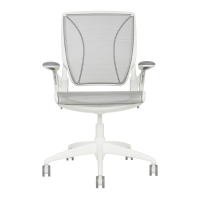
Do you have a question about the Humanscale Liberty Task and is the answer not in the manual?

Humanscale Liberty Task Specifications

General IconGeneral
CategoryTask Chair
ManufacturerHumanscale
Weight Capacity300 lbs
Base MaterialAluminum
Depth25"
Warranty15 years
ArmrestsAdjustable
Seat MaterialLeather
Backrest MaterialMesh
MaterialMesh
Adjustable FeaturesSeat height
SustainabilityGREENGUARD certified
Seat Height Range16" - 21.5"

Summary

Back Pin Replacement Procedure

Step 1: Drive Back Pin Out

Remove the back pin from the chair using a punch/Allen key and mallet. A special tool is available for over ten chairs.

Step 2: Remove Opposing Pin

Pull the pin from the opposite side, pinching the frame to align holes during removal.

Step 3: Insert New Pin

Gently tap the new pin into place with a mallet. Ensure full seating with a firm tap.

Step 4: Repeat for Other Side

Perform the same pin replacement procedure on the opposite side of the chair.

Back Spring Installation

Step 1: Install Spring and Bullet

Insert the spring into its pocket and secure it with the specified silver bullet.

Step 2: Repeat Spring Installation

Carry out the spring and bullet installation for the other side of the chair.

Step 3: Align and Insert Back Pins

Position the back frame correctly and insert the back pins into their designated slots.

Step 4: Seat Back Pins

Tap the back pins firmly into place with a mallet to ensure complete insertion.

Related product manuals