vi
MC)
such
duct.
nce.
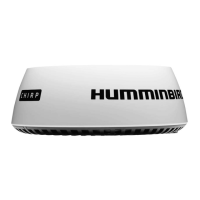
HF
et
ed
to
te
sure
best
nited
Thank You i
Important Information i
Introduction 1
1. Installation Preparation 2
1. Review the Box Contents . . . . . . . . . . . . . . . . . . . . . . . . . . . . . . . . . . . . . . . . . . . . . . . . . . . . . . . . . . . . . . . . . 2
2. Determine the Cable Requirements. . . . . . . . . . . . . . . . . . . . . . . . . . . . . . . . . . . . . . . . . . . . . . . . . . . . . . . . . 3
3. Create a Schematic Diagram . . . . . . . . . . . . . . . . . . . . . . . . . . . . . . . . . . . . . . . . . . . . . . . . . . . . . . . . . . . . . . 3
4. Clear the Mounting Holes . . . . . . . . . . . . . . . . . . . . . . . . . . . . . . . . . . . . . . . . . . . . . . . . . . . . . . . . . . . . . . . . 4
2. Choose the Mounting Location 5
3. Test Route the Cables 11
4. Install the Scanner 12
1. Prepare the Mounting Location . . . . . . . . . . . . . . . . . . . . . . . . . . . . . . . . . . . . . . . . . . . . . . . . . . . . . . . . . . . 12
2. Connect the Power and Data Cables to the Radar Scanner . . . . . . . . . . . . . . . . . . . . . . . . . . . . . . . . . . . . . 13
3. Install the Radar Scanner . . . . . . . . . . . . . . . . . . . . . . . . . . . . . . . . . . . . . . . . . . . . . . . . . . . . . . . . . . . . . . . . 15
5. Route the Cables 17
1. Route the Power and Data Cables . . . . . . . . . . . . . . . . . . . . . . . . . . . . . . . . . . . . . . . . . . . . . . . . . . . . . . . . . 17
6. Connect to Power and Ethernet 18
1. Determine Your Fuse and Thermal Breaker Requirement . . . . . . . . . . . . . . . . . . . . . . . . . . . . . . . . . . . . . . . 18
2. Connect to Power . . . . . . . . . . . . . . . . . . . . . . . . . . . . . . . . . . . . . . . . . . . . . . . . . . . . . . . . . . . . . . . . . . . . . . 19
3. Connect to the Control Head . . . . . . . . . . . . . . . . . . . . . . . . . . . . . . . . . . . . . . . . . . . . . . . . . . . . . . . . . . . . . 20
7. Test the Installation 22
Mechanical Checks. . . . . . . . . . . . . . . . . . . . . . . . . . . . . . . . . . . . . . . . . . . . . . . . . . . . . . . . . . . . . . . . . . . . . . . 22
Power On the Control Head . . . . . . . . . . . . . . . . . . . . . . . . . . . . . . . . . . . . . . . . . . . . . . . . . . . . . . . . . . . . . . . . 22
Two Year Limited Warranty & Service Policy 23
Maintenance 26
Troubleshooting 27
Specifications 28
Contact Humminbird 34
Table of Contents
CHIRP_Radar_Install_Manual_532523-1EN_A.qxp_Layout 1 8/11/16 10:48 AM Page vi
 Loading...