EasyManua.ls Logo

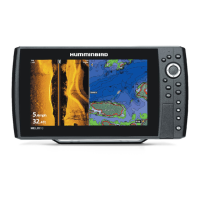
Humminbird HELIX 10 User Manual

Humminbird HELIX 10
191 pages
To Next Page IconTo Next Page
Page #1 background imageLoading...
Page #1 background image
HELIX 9, HELIX 10, and HELIX 12
Operations Guide
532400-2EN_A

Table of Contents

Other manuals for Humminbird HELIX 10

Questions and Answers:

Humminbird HELIX 10 Specifications

General IconGeneral
BacklightLED
Mount TypeGimbal Mount
GPS ReceiverInternal
Power Input10-20 VDC
NetworkingEthernet
Water RatingIPX7
Display Size10.1 inches
Sonar TypeCHIRP, Down Imaging, Side Imaging
Sonar Frequencies Supported200 kHz, 455 kHz, 800 kHz
Target Separation2.5 inches
Power Output500 Watts (RMS)
Depth CapabilityUp to 1500 feet
SpeedYes
GPSYes
Max Depth1500 feet
TransducerIncluded
TemperatureYes

Summary

Getting Started

Quick Setup

Initial setup menu for language, depth, water type, and transducer.

Set Alarms

Turn on Alarms and Adjust Settings

Procedure to activate and adjust various alarm settings.

Sonar Overview

Set Up Sonar

Set up an Accessory Transducer

How to select and configure a connected accessory transducer.

Adjust the Noise Filter

Reducing interference on sonar views.

Change the Max Depth

Setting the maximum depth for sonar display.

Select Frequencies for the 2D View

Choosing transducer beams for the traditional 2D sonar display.

Select an Imaging Frequency

Choosing frequency for Down/Side Imaging views.

Set Up CHIRP (HELIX CHIRP GPS models only)

Enabling or disabling CHIRP sonar mode.

Adjust CHIRP Frequencies

Selecting CHIRP beam frequencies and spectrums.

Display a Sonar View On-Screen

Display a Sonar View

How to display 2D Sonar, Sonar Zoom, or Split Sonar views.

Customize the Sonar View

Showing/hiding information like depth lines, color bar, RTS Window.

Adjust Sonar Display Settings

Filter Surface Clutter

Reducing noise at the top of the sonar display.

Change the SwitchFire Mode

Selecting Clear or Max mode for sonar return display.

Turn on/off Fish ID+ Settings

Enabling Fish ID+ to display fish symbols and alarms.

Adjust the Fish ID Sensitivity

Adjusting sensitivity for detecting fish with Fish ID+.

Turn on the Fish ID Alarm

Setting up an on-screen alert for fish detection.

Adjust Settings While You Fish

Adjust the Sensitivity

Adjusting overall sonar sensitivity for detail and clutter.

Adjust the Sensitivity for all Sonar Frequencies

Fine-tuning sensitivity across all sonar frequencies.

Adjust Beam Sensitivity

Adjusting sensitivity for individual sonar beams/frequencies.

Compare Sonar Beams (Split Sonar View)

Display the Split Sonar View

How to view and compare different sonar beams side-by-side.

Navigation in Sonar Views

Display a Down Imaging View On-Screen

Display a Down Imaging View

How to display the Down Imaging sonar view.

Customize the Down Imaging View

Showing/hiding depth lines and temperature graph.

Adjust Settings While You Fish (Down Imaging X-Press Menu)

Enhance the Down Imaging View

Adjusting sensitivity, contrast, and sharpness for Down Imaging.

Set the Upper/Lower Range

Adjusting the depth range for Down Imaging display.

Navigation in Down Imaging Views

Display a Side Imaging View On-Screen

Display a Side Imaging View

How to display the Side Imaging sonar view.

Customize the Side Imaging View

Showing or hiding range lines on the Side Imaging view.

Adjust Settings While You Fish (Side Imaging X-Press Menu)

Adjust Sensitivity

Adjusting sensitivity for detail and clutter in Side Imaging.

Enhance the Side Imaging View

Adjusting sensitivity, contrast, and sharpness for Side Imaging.

Adjust the Side Imaging Range

Setting the deepest range displayed in Side Imaging views.

Navigation in Side Imaging Views

Turn on/off SI Navigation

Controlling the display of boat icon direction during navigation.

Mark a Waypoint

Marking waypoints within the Side Imaging view.

Navigate to a Position

Starting navigation to cursor or saved positions.

Manage Screen Snapshots and Recordings

Take Screen Snapshots

How to capture the current screen view.

Stop Recording

Ending the sonar recording process.

Chart Overview

Select a Chart Source

Choosing the map source for chart views.

Display a Chart View or Bird’s Eye View

How to display standard chart or bird's eye views.

Change the Chart Source

Manually selecting the map source from installed cards.

Set up Humminbird LakeMaster

Enabling LakeMaster features after card installation.

Set the Water Level Offset

Adjusting map display based on current water levels.

Set up Navionics

Enabling Navionics features after card installation.

Customize the Bird’s Eye View

Customize the Chart View

Display Humminbird LakeMaster Contour Lines and Depth Ranges

Change the Chart Orientation and Motion Mode

Navigation Overview

Navigation Alarms Overview

Turn on Alarms and Adjust Settings

Activating and adjusting Off Course, Arrival, and Drift alarms.

Man Overboard (MOB) Navigation

Activate Man Overboard Navigation

Initiating MOB mode to mark and navigate to the overboard point.

Cancel Man Overboard Navigation

Procedure to stop active Man Overboard navigation.

Waypoints

Mark Waypoints

How to mark waypoints at boat or cursor positions.

Edit a Waypoint

Editing waypoint name, icon, and position.

Navigate to a Waypoint or Position

Starting navigation to a selected waypoint or position.

Routes

Create a Route and Start Navigation

Connecting waypoints to form a navigable route.

Save the Current Route

Saving a created route for future use.

Start Navigation on a Saved Route

Initiating navigation using a previously saved route.

Tracks

Search

Manage Your Navigation Data

Open the Waypoint Management Dialog Box

Accessing the main menu for managing navigation items.

Manage Waypoints

Open the Waypoint Submenu

Accessing the menu of actions for a selected waypoint.

Edit a Saved Waypoint

Modifying the properties of an existing waypoint.

Create a New Waypoint

Adding a new waypoint with custom settings.

Delete a Waypoint

Removing waypoints from the system.

Manage Routes

Open the Route Submenu

Accessing the menu of actions for a selected route.

Travel a Saved Route

Starting navigation along a saved route.

Edit a Saved Route

Modifying a saved route's name and visibility.

Create a New Route

Creating a new route by selecting waypoints.

Delete a Route

Removing a route from the system.

Manage Tracks

Open the Track Submenu

Accessing the menu of actions for a selected track.

Delete a Saved Track

Removing saved tracks from the system.

Manage Groups

Open the Group Submenu

Accessing the menu of actions for a selected group.

Delete a Group

Removing a group and its contents.

Search and Organize

Import/Export Navigation Data

Import Navigation Data

Importing waypoints, routes, and tracks from an SD card.

Export ALL Navigation Items

Exporting all navigation data to an SD card.

Delete all Navigation Data and Reset

Formatting navigation data directories and resetting.

AutoChart Live Overview

PLAN YOUR MAP

Tips for planning areas to map and recording strategies.

Prepare the Control Head for Mapping

Set the Map Source

Selecting the chart source for mapping.

Confirm the 2D Transducer and Turn off Additional Transducers

Ensuring only one 2D transducer is active for mapping.

Confirm Digital Depth and GPS Fix

Verifying digital depth and GPS signal for mapping.

Record Your Custom Map

Starting an AutoChart Live Recording

Initiating the custom map recording process.

Stop Recording

Display/Hide Your Custom Map

Adjust the Map Display Settings

Open the AutoChart Live Menu

Accessing the menu for AutoChart Live settings.

Manage Your Control Head

Select an Installed GPS Receiver

Choosing the active GPS receiver if multiple are installed.

Update Software

Update the Control Head Software

Downloading and installing software updates.

Troubleshooting

Control Head Doesn’t Power Up

Troubleshooting steps for power issues.

Control Head Doesn’t Detect the Connected Transducer

Steps to resolve transducer detection problems.

Control Head Doesn’t Detect a Connected Accessory

Troubleshooting steps for accessory detection issues.

Display Problems

Common display issues and their solutions.

Finding the Cause of Noise

Identifying sources of electrical noise and interference.

Related product manuals