EasyManua.ls Logo

Humminbird Ice Helix User Manual

Humminbird Ice Helix
16 pages
To Next Page IconTo Next Page
Page #1 background imageLoading...
Page #1 background image
1
532686-1_A
ICE HELIX® PORTABLE CONVERSION KIT Installation Guide
Installation Overview
Follow the instructions in this installation guide to install the ICE HELIX® control head in the portable
shuttle and install the ICE transducer. We encourage you to read this guide before starting the
installation, so you may understand the installation requirements.
Technical Support: If you find that any items are missing from your installation kit, visit our Web site
at humminbird.com or call Humminbird® Technical Support at 1-800-633-1468.
Supplies: In addition to the installation kit, you will need a Phillips-head screwdriver, flat-head
screwdriver, awl, hammer, and pliers.
WARNING! Always make sure that conditions are safe before walking on the ice.
WARNING! Do NOT use power tools to secure the hardware. We encourage you to read the
installation instructions so you may understand the installation requirements.
NOTE: Product supplies and features are subject to change without notice. This guide was written
in English and may have been translated to another language. Humminbird is not responsible for
incorrect translations or discrepancies between documents.
Installation Preparation
Portable Conversion Kit
You must first un-install the control head from its fixed mounting position before performing the
portable installation instructions described in this guide.
1. Disconnect the cables from the control head installed on your boat.
2. Loosen the gimbal knobs and slide the control head out of the gimbal bracket.
Charging the Battery
You should fully charge your battery before using it for the first time to ensure peak performance.
NOTE: Portable Conversion Kits do not include a battery or battery charger.
1. Charge the battery according to the battery manufacturer’s specifications.
2. Slide the battery terminal adapter over each spade terminal.
CAUTION! Do not pull on the battery or charger cables when you are trying to connect them
or disconnect them from the battery terminals. Push or pull gently on the spade terminals
instead. If the connector feels tight, use a slight wiggling motion to slide the spade connector
into place on the terminal.
Testing the Transducer
Prior to installation, test the transducer to make sure that no damage occurred during shipping.
1. Connect the power cable to the control head and the battery terminal adapter (see Connecting
Power).
2. Connect the transducer cable to the control head (see Installing the Transducer).
3. Lower the transducer into the ice hole.
4. Power On: Press the POWER key. While the Title screen is shown on the display, press the
MENU key. Select Normal mode, and press the RIGHT cursor key to start Normal mode.
Handling the Spade Terminals
Question and Answer IconNeed help?

Do you have a question about the Humminbird Ice Helix and is the answer not in the manual?

Humminbird Ice Helix Specifications

General IconGeneral
Temperature AlarmYes
Display Size7 inches
Display Pixel Matrix800 x 480 pixels
Depth-SoundingUp to 1500 feet
Target Separation2.5 inches
TemperatureYes
GPSYes
Power Input10-20V DC
Frequency83/200 kHz
Power Output500W RMS
Battery12V DC

Summary

Installation Overview and Preparation

Technical Support Contact

Contact information for technical assistance and missing items.

Required Installation Supplies

List of necessary tools and supplies for the installation process.

Safety Warnings and Notes

Crucial safety precautions and important product notes for installation.

Portable Conversion Kit Preparation

Steps to un-install the control head from its fixed mounting position.

Battery Charging Instructions

Guidance for fully charging the battery before first use to ensure peak performance.

Transducer Pre-installation Testing

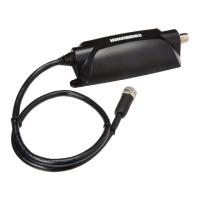
Procedure to test the transducer for shipping damage prior to installation.

ICE HELIX Portable Shuttle Assembly

Assembling the Portable Base

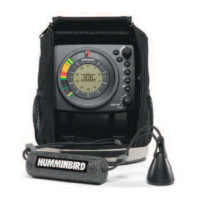
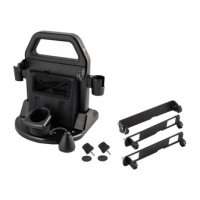
Steps to assemble the portable shuttle base, including riser blocks.

Routing the Cables in the Base

Routing Cables and Tie-Down Straps

Procedure to route power and transducer cables and attach battery tie-down straps.

Assembling the Cable Tray

Assembling and Securing the Cable Tray

Instructions for assembling the cable tray to secure and protect control head cables.

Mounting the Control Head

Mounting the Control Head to Gimbal

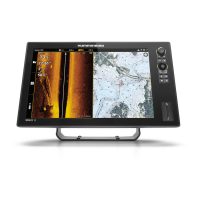
Steps for installing the control head onto the gimbal bracket arms.

Installing the Battery

Securing the Battery in the Well

Instructions for placing and securing the battery in the portable case.

Installing the Transducer

Attaching Float and Positioning Transducer

Steps to attach the transducer float and position it correctly in the ice hole.

Connecting Power and Setting Up Ice Fishing

Connecting Power to Battery

Procedure for connecting the power cable to the battery terminals.

Configuring Control Head for Ice Fishing

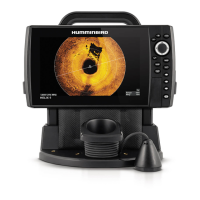
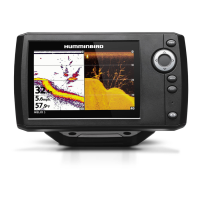
Guide to powering on and setting up the control head for ice fishing mode.

Stowing the Ice Transducer

Instructions for properly storing the transducer and disconnecting power.

Related product manuals