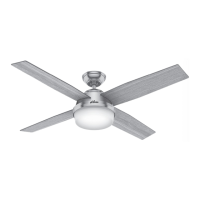
9
Ceiling Bracket Hanging Fan Wiring Blades Light Remote Trouble Shooting
Preparing the Remote Control
Using the Remote Control Cradle
The remote control is already
paired for use.
For your convenience, a
remote function card is
packed in with your remote.
To access the battery compartment, remove the
small Phillips head screw that secures the battery
door to the transmitter assembly. The battery
should be installed with the positive (+) side up.
Replace with a CR2032 battery when necessary.
The remote transmitter should already be paired
to the receiver and ready to use.
Note: If your need to pair your remote, turn fan
power off and back on at the wall switch. Within
3 minutes, press and hold both the Fan Off button
and the High button for 4 seconds to pair the
remote. To prevent faulty operation, please
ensure all other ceiling fans within range are
turned off at the wall switch while pairing.
To turn on fan, press a fan speed
button. Speeds range from off (0)
to high (3). Quickly press the Light
button to turn the lights off and on.
Fan Off
Light On/Off
Fan Medium
Fan High
Fan Low
Battery Door
Phillips Head
Screw
ON
Turn Power
To install the transmitter cradle, remove the two
screws holding the switch cover plate. Do not remove
the cover plate. Orient the cradle by lining up the two
mounting holes with those on the cover plate. Insert
and tighten the screws. Do not over tighten.
Note: For rocker-style cover plates, break off the
tabs by pushing outward.
Switch Cover
Plate
Rocker Style
Plate
Removed Tabs
 Loading...