41343-01 7/1/2002
STEP 8 - INSTALLING LIGHT FIXTURE
Figure 8a - Removing Plug Button and
Switch Housing Cap
Lower
Switch
Housing
Plug Button
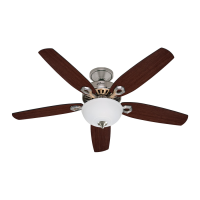
Your fan may include a light fixture.
Information for wiring and installing
all included Hunter light fixtures fol-
lows.
Note: If you purchased a fan without
a light fixture, you may purchase an
accessory light kit separately. For best
performance and beauty, use only
Hunter-brand light kits, Type A-Z.
Hunter light kits are designed, tested,
and UL approved for all Hunter fans,
and are available at most Hunter
dealers. To install the light kit, follow
the instructions included with the kit.
If you are not installing a light fixture,
turn to OPERATING YOUR HUNTER
FAN for additional instructions.
Switch
Housing
Cap
WARNING
• To avoid possible electrical
shock, before installing
light fixtures, disconnect
power by turning off the
circuit breakers both to the
outlet box and to its asso-
ciated wall switch location.
If you cannot lock the cir-
cuit breakers in the off po-
sition, securely fasten a
prominent warning device,
such as a tag, to the service
panel.
• Connect house wiring to
the fan before attaching
the light fixture to the fan.
• All wiring must be in accor-
dance with national and lo-
cal electrical codes and ANSI/
NFPA 70. If you are unfamil-
iar with wiring, you should
use a qualified electrician.