nt
r
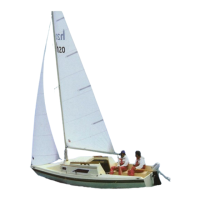
• Sails and Ri
in
12.
total slack in the sheet. The sheet that is not bein
used
— t
e
az
s
eet — s
ou
a
so
e attac
e
to t
e c
ew
the spinnaker , led
orward
n
ront o
the headsta
n
th
n
k
n th
th
r
i
th
t —
t
i
the shrouds and lifelines — to another turnin
block
positioned
ust
orward o
the stern pulpit. Then take that
sheet and lead it to a winch, with the slack in the sheet.
Now
ou are read
to hoist the spinnaker. Start b
headin
o
to a square run. Leave the mainsail
ull
ut durin
the hoistin
procedure as it will blanket
the spinnaker and keep it from fillin
until
ou are
read
or it to be set. A
ood place to raise the sail
is
rom the leeward side,
ust ahead o
the boom.
nce it is full
hoisted, slowl
head up to
our desired
ourse and pull in the sheet until the sail sets. Make
sure
ou have at least two turns o
the sheet around the
w
n
.
Now
ou are o
and sailin
with
our cruisin
spinnaker.
12.9 The Arch
As is customar
on Hunters, the traveler is overhead, on
a stainless-steel arch, to kee
the cock
it clear of the
bstruction and the boom clear o
our head. The helms-
man can easil
ad
ust the mainsheet traveler and the
ib
sheets, althou
h the mainsheet itself is at the companion-
wa
as illustrated above. The setup allows short handed
sailin
when there are onl
a couple of people in the
oc
p
t or w
t
an autop
ot
o
n
t
e steer
n
.
For instructions on foldin
the arch for transport or ser-
vice please follow the followin
instructions:
Ar
h in
t
ll
ti
n n
t
n
t
l li
t
Notes: Read all of the installation instructions before begin-
ning.
This
ob requires two people, it is important that the
arch be supported until firml
attached to the deck.
o avo
n
ur
ur
n
t
e
nsta
at
on process, or
ent
the arch prior to be
innin
the installation
m
m
r t
h
k
ll
r
h n
t
lt
ft
r th
initi
l
seatrial and ti
hten as necessar
T
l Li
t f
r
r
h in
t
ll
ti
n
rill and 3
8” drill bit, to clear sealant
rom holes.
/8” drive ratche
” extensio
/16” deep and re
ular socket.
/16” wrenc
hillips head screwdriver
lar
e: P4
aulk
un, and sealant
3M-5200
‘Never Seize” bolt lub
z
r kni
wire strippers
crimps
ra
s, and acetone, or lacquer thinner for clean-up
12.10 Protectin
Your Ri
in
Without care
ul inspection and proper maintenance, the
ri
in
is sub
ect to fati
ue, wear, discoloration, and
therefore, product failure. Remember: re
ular inspection
and cleanin
will increase the li
e o
our investment and
secure
our ri
in
. We su
est the followin
Alwa
s rinse
our ri
in
with fresh water after sail-
in
, especiall
salt-water sailin
.
alt can create corro-
sion pits, causin
cracks and deterioration.
lean with a water-soluble chlorine-free deter
ent.
Nonabrasive cleansers are best
or hard white vin
l
t
l
.
Inspect ri
in
for stains. Rust stains ma
indicate
stress cracks or corrosion. Remove stains with s
nthetic
r brass pads. Never use steel wool pads
Look for broken wires- a si
n of fati
ue in ri
in
.
eplace standin
ri
in
i
wires are broken
ever mix stainless steel and
alvanized metals on
able, fittin
s, pins, cotter ke
s, etc. If mixin
dissimilar
metals, electric currents ma
conduct between metal
ausin
rapid deterioration
tore ri
in
in a dr
place. Never store in a plastic
ba
, which can cause corrosion.
2.10.1 Sail Car
unli
ht is a sail’s worst enem
, so
over the mainsail
w
en not
n use. An ultraviolet
uard, fitted down the
leech o
a roller headsail will protect the exposed part
from the weatherin
effect of the sun and from dirt and
r
t.
ew, can
e prevente
stor
n
sa
s
r
an
hand washin
twice a season.
heck all sails re
ularl
for chafe, particularl
where the
chafe on deck fittin
s
r ri
in
, at reef points, batten sleeves and the foot o
the headsail.
ail batten pockets should be inspected on
a re
ular basis.
To stow the mainsail, start at the leech and
lake it onto
the boom, le
t and ri
ht, in about 18-in.
46 cm
olds,
while pullin
the leech aft. Secure with a sail tie and con-
tin
t
th
l
. L
h t
th
m with
il ti
r
h
k