Do you have a question about the Hunter I-40 and is the answer not in the manual?
Instructions for increasing the sprinkler arc by turning the adjustment wrench clockwise.
Instructions for decreasing the sprinkler arc by turning the adjustment wrench counterclockwise.
Instructions for adjusting the sprinkler radius using the nozzle-retainer/range-adjustment screw.
Adjusting the precipitation rate by replacing the existing nozzle with a larger or smaller one.
Procedure for installing a new nozzle into the sprinkler socket.
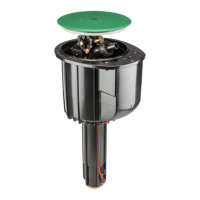
Internal device preventing damage to the gear drive if the sprinkler is turned by vandals.
Internal device that re-aligns the arc when turned by vandals, returning to the set pattern.
Table detailing pressure, radius, flow, and precipitation rate for various nozzles.
Table detailing performance data for high-speed nozzles.
Table detailing performance data for dual opposing nozzles.
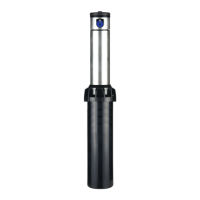
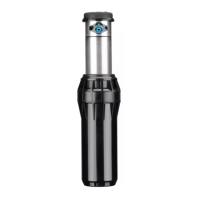
The Hunter I-40 Gear-Driven Sprinkler is a robust and versatile irrigation device designed for efficient water distribution in various landscape settings. This institutional series sprinkler offers a range of adjustable features, allowing users to fine-tune its performance to specific site requirements, ensuring optimal coverage and water conservation.
The I-40 sprinkler operates on a gear-driven mechanism, which ensures smooth and consistent rotation for even water application. Its primary function is to deliver water over a specified arc or a full 360-degree circle, effectively irrigating lawns, gardens, and other planted areas. The gear-driven design contributes to its durability and quiet operation, making it suitable for both residential and commercial applications.
A key feature of this sprinkler is its adjustable arc, which allows users to set the watering pattern from a narrow sector to a full circle. This adjustability is crucial for avoiding irrigation of non-target areas such as sidewalks, driveways, or buildings, thereby minimizing water waste and potential damage. The sprinkler is also designed with a radius adjustment capability, enabling users to control the distance the water travels, further enhancing its precision.
The I-40 incorporates advanced internal mechanisms to enhance its reliability and user-friendliness. It features a non-strippable backdrive, an internal device that prevents damage to the gear drive even if the nozzle turret is forcibly turned by vandals. This feature significantly increases the sprinkler's durability, especially in public or high-traffic areas. Additionally, the sprinkler includes an auto arc return function. If the nozzle turret is turned out of its originally set arc by external forces, this mechanism automatically re-aligns the arc by taking the shortest path back to the programmed pattern. This prevents the sprinkler from watering non-irrigated areas, contributing to water efficiency and maintaining the intended irrigation design.
The I-40 sprinkler is designed for ease of use, with several features that simplify installation, adjustment, and operation.
The sprinkler comes preset to approximately 180 degrees but can be adjusted with water on or off, though initial adjustment before installation is recommended. To increase the arc:
To decrease the arc:
To adjust the radius, insert the hex end of the Hunter wrench into the nozzle-retainer/range-adjustment screw. Turning the screw clockwise will decrease the radius by deflecting the stream of water, while turning it counter-clockwise will increase the radius.
For areas that are excessively wet or dry, the precipitation rate can be adjusted by replacing the existing nozzle. A larger nozzle will increase the rate of precipitation, and a smaller nozzle will decrease it.
The I-40 sprinkler is designed for minimal maintenance, thanks to its durable construction and self-protecting features. The non-strippable backdrive and auto arc return mechanisms significantly reduce the likelihood of damage from external forces, thereby extending the sprinkler's lifespan and reducing the need for repairs.
Regular inspection of the nozzles is recommended to ensure they are free from debris that could obstruct water flow or alter the spray pattern. If a nozzle becomes clogged or damaged, it can be easily replaced using the steps outlined for nozzle installation. The ability to adjust the precipitation rate by simply swapping nozzles also contributes to easy maintenance, allowing users to adapt the sprinkler's performance to changing landscape needs or environmental conditions without complex adjustments.
Overall, the Hunter I-40 Gear-Driven Sprinkler is a reliable, adjustable, and durable irrigation solution, offering precise water delivery and robust protection against common issues, making it an excellent choice for maintaining healthy and vibrant landscapes.
| Model | I-40 |
|---|---|
| Category | Irrigation System |
| Riser Height | 4 inches |
| Warranty | 5 years |
| Inlet | 1 inch NPT |
| Material | Plastic |
| Spray Pattern | Adjustable Arc; Full Circle |
| Trajectory | 25° standard; 11° low angle |