7
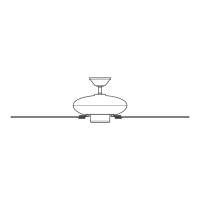
Ceiling Bracket Downrod Hanging Fan Wiring Canopy Blades Operation Troubleshooting
Installing the Canopy
Lubrication
IMPORTANT
IMPORTANT
Your canopy comes pre-assembled. Uninstall the canopy screws using a #1 Phillips-head screwdriver and separate the two halves of the
canopy before continuing to step 1.
DO NOT TURN FAN ON UNTIL LUBRICATION HAS BEEN ADDED. TO OPERATE THE FAN WITHOUT OIL OR WITH LOW OIL WILL VOID
YOUR WARRANTY.
Assemble canopy halves around pipe, and loosely
install the canopy assembly screws. Slide canopy up
close to ceiling.
Tighten the canopy assembly screws using
a #2 Phillips-head screwdriver.
Tighten the canopy set screw using a #1
Phillips-head screwdriver.
1 3 4
STEP
STEP
STEP
Remove cap if present. Cut the tip off the end of the tube.
Place the tube into the oil hole and gently squeeze the tube to empty the oil
into the fan’s reservoir.
NOTE: To avoid overowing during lling, add a third of the oil from the tube
at a time. Pause for 30 seconds between each third to allow the oil to settle
in the fan. Be sure to add all of the oil in the tube to the fan.
1 2
STEP
STEP
Your fan has been shipped without oil in the motor. A tube of high grade SAE 10 non-detergent oil is packaged in the hardware bag.
The bearings in your Hunter Original Ceiling Fan are submerged in oil, which lubricates all bearing surfaces as the fan operates. We recommend periodically checking the oil to
ensure the correct level is maintained. This unique lubrication system is one reason why your Hunter Original Ceiling Fan will last a lifetime.
Note:
Your Original Hunter’s Unique Lubricating System
Canopy
Set Screw
Oil Bottle
Oil Bottle
Oil Hole
Canopy
Assembly Screw
Canopy
Assembly Screw
 Loading...


