6
©2010 Hunter Fan Co. 44086-01 20101102
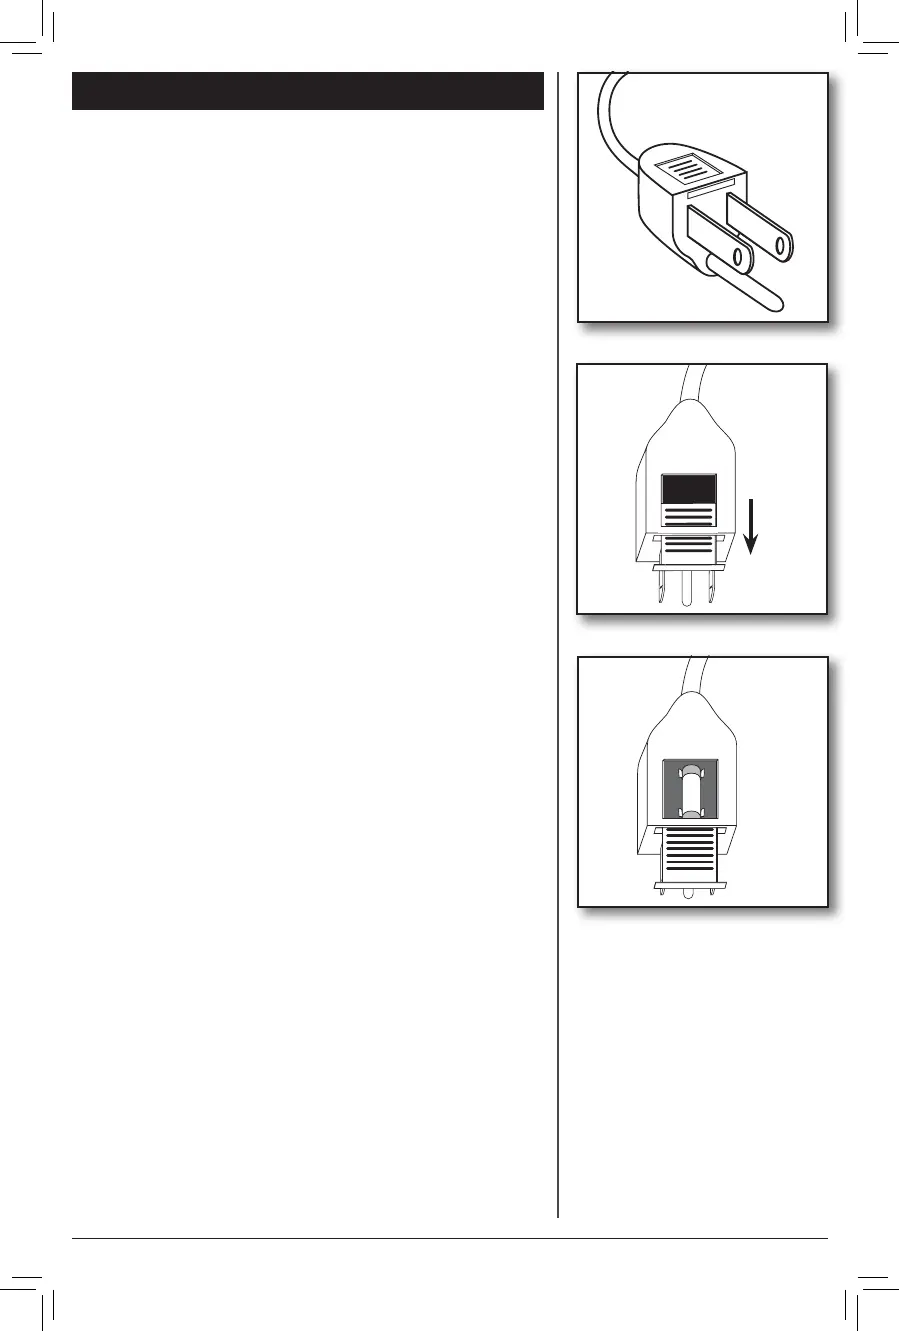
Figure 1.
This plug is a safety feature. It contains a safety device
(fuse) that should not be removed. Discard product if the
attachment plug is damaged. To reduce the risk of fire,
electric shock and personal injury, DO NOT remove,
replace, repair or tamper with the originally supplied
plug. If the Fan does not function properly, it may be due
to the safety device incorporated in this plug.
If the fuse fails, it is generally due to a short circuit or
circuit overload. Replace the fuse as per the instructions
below. If the replacement fuse fails, immediately
unplug the unit and contact our technical support
department for assistance.
Fuse Replacement:
1. To replace the fuse, first turn the unit it off and unplug
it from the wall. Locate the door on top of the plug.
Figure 1.
2. Slide the door on top of the plug towards the blades.
Figure 2.
3. Carefully remove the fuse from the clips holding it on
the top and bottom. Figure 3.
Warning! Electrical Hazard! Only replace with a
fuse type and rating matching what was removed from
the product.
4. Gently push the fuse back into the pins that will hold
it in place.
Note: If the fuse is not seated properly, the unit will not
function.
5. Slide the Door back over the fuse box in the plug.
6. Plug the fan back in and resume use.
FUSED PLUG
Figure 2.
Figure 3.