Install Wheel Kit
NOTICE Wheel kit is not intended for over-the-road use.
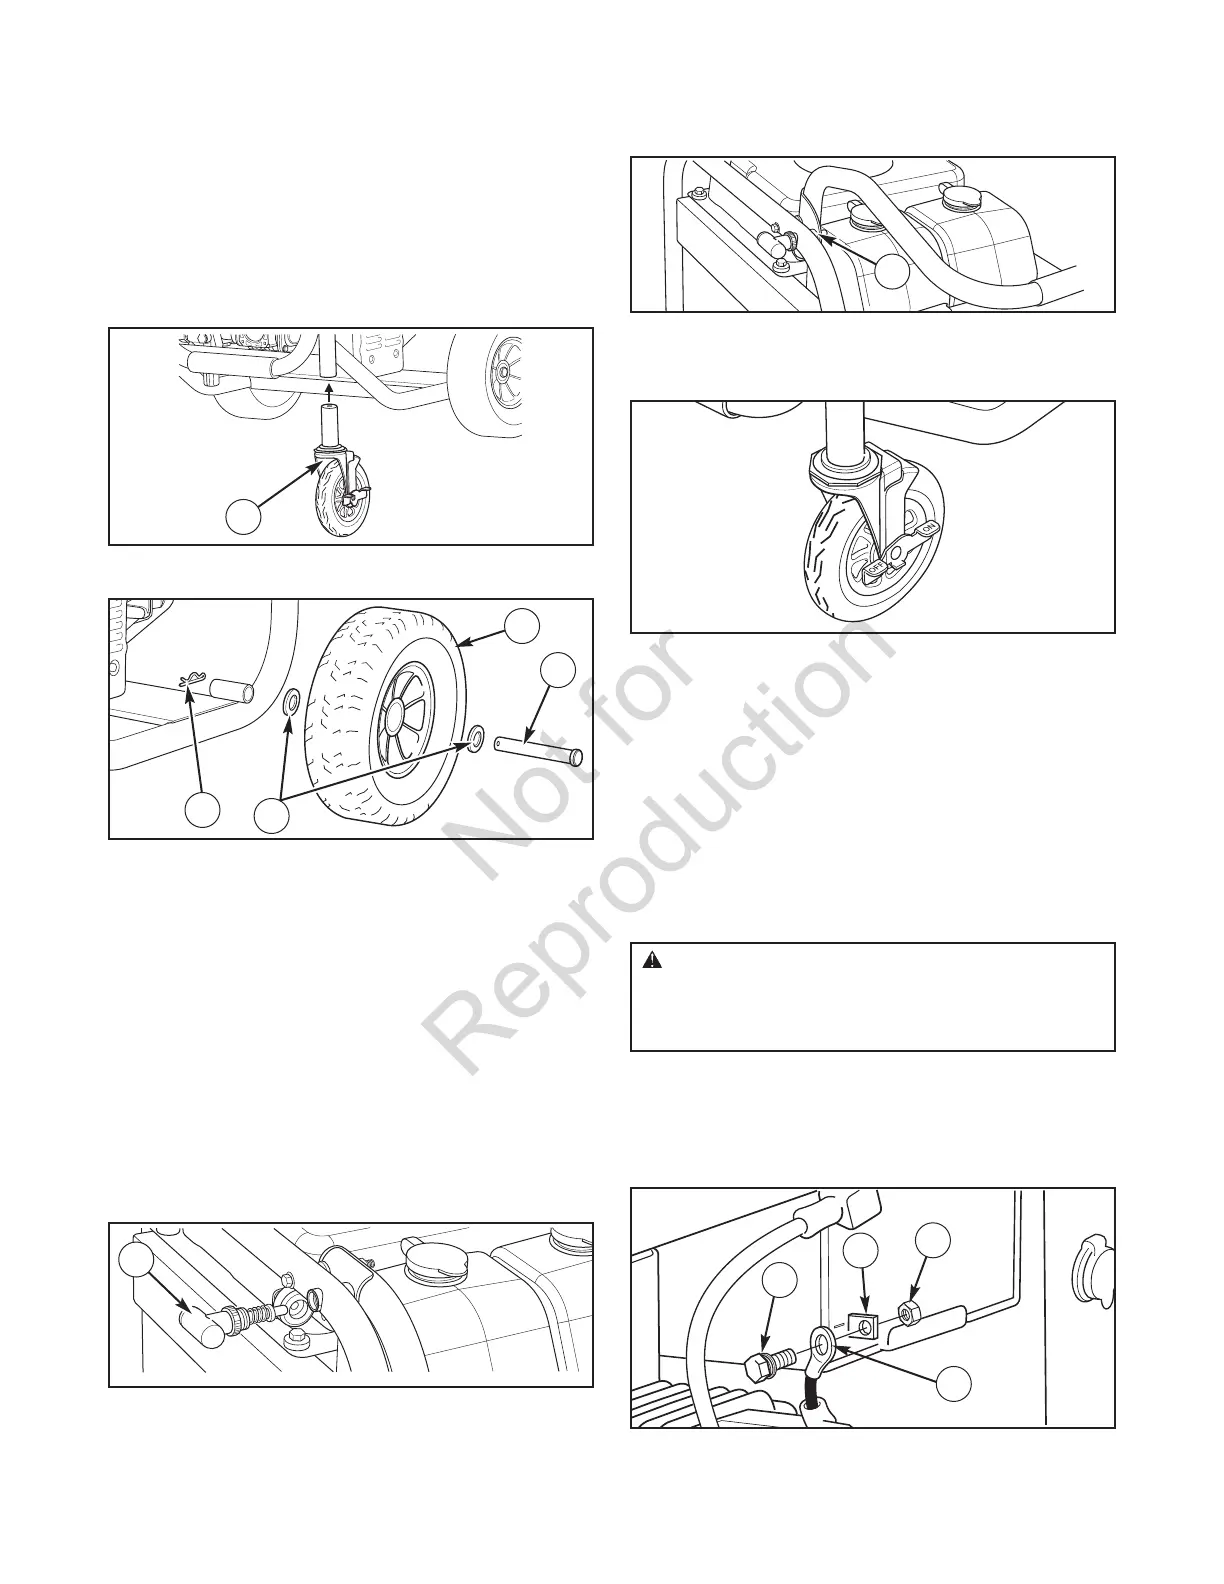
Install the wheel kit as follows:
1. Lift corner of pressure washer and slide caster wheels
up into bottom of tubing on each underside of pressure
washer frame.
2. Using a 19 mm wrench, turn nut (A) under collar of
caster wheels to tighten.
3. Slide flat washer (B), wheel (C) and another flat washer
(B) over axle stud (D).
NOTICE Be sure to install wheel with raised hub inboard.
4. Lift corner of pressure washer slightly and slide axle stud
through mounting bracket on pressure washer frame.
5. Insert retaining pin (E) through hole on axle stud.
6. Repeat steps 3 through 5 to secure second wheel.
Moving Pressure Washer
The pressure washer is equipped with a handle that locks
into three different positions for your convenience. With the
handle in the upright position, it makes it easy to push or
pull your pressure washer to the desired location. With the
handle in the middle position, you can tilt the pressure
washer back. The handle also folds down flat for storage.
1. Screw handle pin (F) into bracket on left side of frame
(viewing pressure washer from engine end).
2. Pull handle pin out and lift handle to desired position.
3. Release handle pin and make sure latch (G) locks into
place.
4. Place lock levers on caster wheels in the “Off” postion
to unlock wheels and move pressure washer to desired
location.
NOTICE Always face pressure washer and push or pull to
desired location. When moving pressure washer on an incline,
always make sure you are uphill from pressure washer.
5. Place lock levers on caster wheels in the “On” postion
to lock wheels and keep pressure washer from moving.
Attach Negative Battery Cable
Your unit is equipped with electric start capability but can be
started manually. If you choose not to use the electric start
feature, you do not need to connect the negative battery cable.
The sealed battery on the pressure washer is pre–installed
except for the negative (black) battery cable.
To install:
1. Cut off tie wrap securing loose end of negative (black)
cable.
2. Using 8 mm wrenches, remove screw (H) and nut (J)
on negative battery terminal (—) (K).
3. Slide negative battery cable (L) over screw.
8 www.usa.husqvarna.com
F
G
WARNING Battery posts, terminals and related
accessories contain lead and lead compounds - chemicals
known to the State of California to cause cancer and
reproductive harm. Wash hands after handling.
H
L
J
K
B
E
C
D
A
 Loading...