112479_0510 5-7
Battery Removal & Installation
It is recommended that battery removal and installation be
performed by a trained Hustler
®
Zeon technician.
However, if battery removal and installation is to be
performed by someone other than a trained Hustler
®
Zeon
technician, use the following procedures for safe battery
handling.
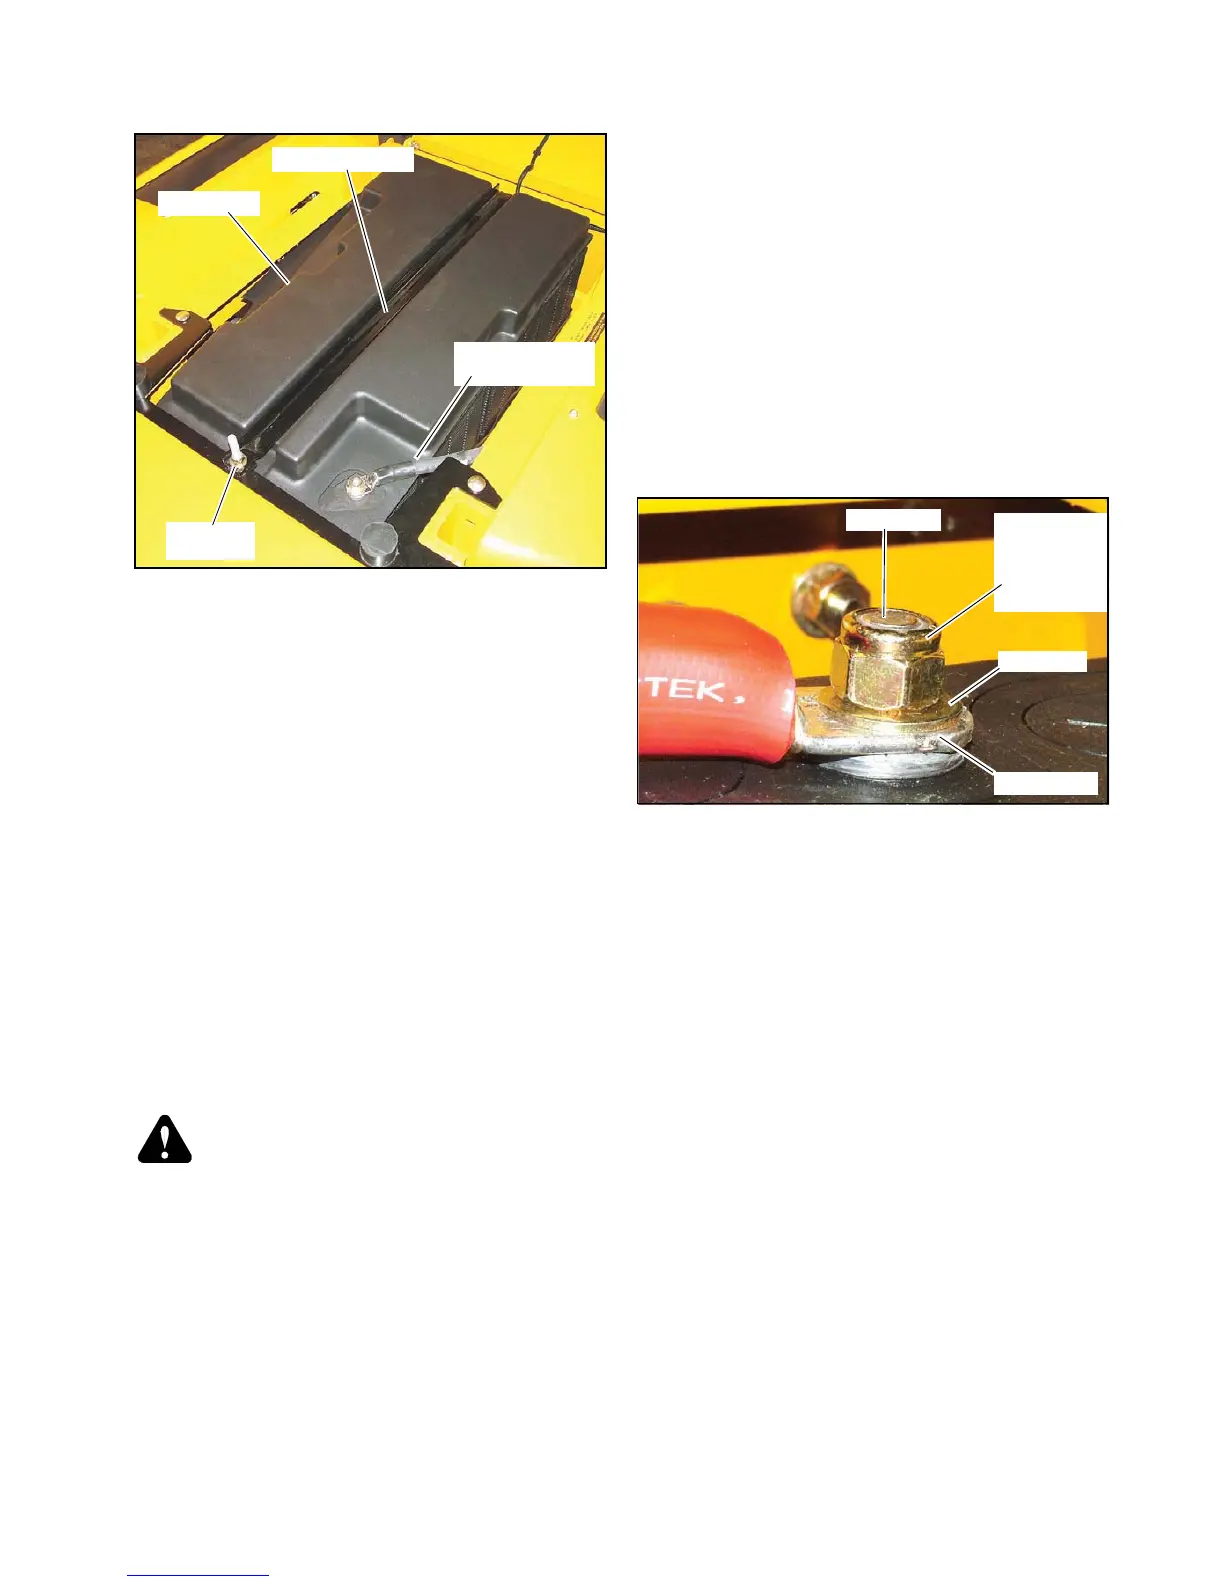
Disconnecting the Batteries
Always remove the negative (black) battery cable first. The
Zeon is designed with the battery electrically isolated from the
mower frame. Caution should still be used to prevent tools from
touching both a battery terminal and the frame.
Remove the nut that holds the cable to the terminal. Place the
cable down in the battery compartment beside the battery pack
so that the connector cannot come in contact with a battery
terminal.
IMPORTANT: Allow five (5) minutes for the controller
capacitors to dissipate their stored energy before you attempt
any additional service tasks.
Connecting the Batteries
WARNING: When the negative (black) battery cable
is reconnected to the negative battery terminal a spark
will flash as energy rushes to the control capacitors.
Make sure all battery cell caps (covers) are securely in
place and the work area is well ventilated before
attempting to connect the cable. Keep fingers back
from the contact point as the spark is very hot.
Attach the cable connector to the battery terminal and install
mounting hardware per Fig. 5-8. Torque battery terminal nut to
120 in.-lbs. (13.6 Nm). Do not over tighten as this could damage
the battery.
Battery Storage
To maximize battery life it is best to fully charge batteries
shortly after each use.
IMPORTANT: If the mower is to be stored for longer than 30
days the batteries should be isolated from the vehicle controls
by using the charging adapter that is supplied with the machine.
Check the batteries water level and replenish if necessary before
storing.
The Hustler
®
Zeon charger is designed to remain plugged into
the vehicle and turned on during storage. If the charger remains
on and connected it will automatically maintain the charge level
of the battery pack.
All batteries self discharge over time.
If the mower can not remain connected to plugged in and
turned on charger then it is required that the battery pack
be charged for a minimum of 16 hours every 30 days.
Failure to maintain the battery charge level will void the
battery warranty.
Charging adapter
To connect the charging adapter to the batteries and charging
port use the following procedures:
1. Remove the seat pan lock down nut and raise the seat
pan.
2. Remove the battery hold down and battery cover.
Fig. 5-10
3. Unplug the tractor harness four prong connector from the
charging port connector. Fig. 5-10
4. Disconnect the negative (black) battery cable from the
negative battery terminal on the rear battery (rear right
battery terminal). Fig. 5-10
5. Disconnect the positive (red) battery cable from the
positive battery terminal on the front battery (front left
battery terminal). Fig. 5-10
6. Connect the charging adapter black wire to the negative
battery terminal. Then, connect the red wire to the
positive battery terminal. Fig. 5-11
7. Connect the charging adapter to the charger port
connector. Fig. 5-12
8. Re-install the battery cover and battery hold down.
Fig. 5-11
9. Close seat pan and re-install seat pan hardware.
To disconnect the charging adapter from the batteries and
charging port use the following procedures:
1. Remove the seat pan lock down nut and raise the seat
Fig. 5-7
 Loading...