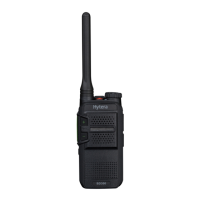
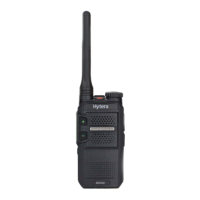
This document serves as a user manual for the Hytera BD61X Digital Portable Radio, a communication device designed for various operational environments. The manual provides comprehensive instructions on the radio's functions, step-by-step procedures for use, and essential safety information. It is applicable to BD61X models where 'X' can represent 2, 5, 6, or 8.
Function Description
The BD61X Digital Portable Radio is a robust communication tool that supports both digital and analog channels, offering flexibility in different communication setups. Its core function is to facilitate two-way radio communication, enabling users to initiate and receive calls.
Call Services:
The radio supports several types of calls on digital channels:
- Private Call: Allows an individual user to communicate directly with another individual user.
- Group Call: Enables an individual user within a group to communicate with all other members of that group.
- All Call: (Dealer-enabled) Permits an individual user to broadcast a message to all other users on the current channel.
On analog channels without signaling, the radio allows initiation of calls to all other users on the current channel, with operations similar to digital channels.
Supplementary Features:
The BD61X radio is equipped with several features to enhance its functionality and user experience:
- Power Level Adjustment: Users can set the transmit (TX) power level to High or Low. A high power level strengthens the TX signal, while a low power level conserves battery power.
- Scan: This feature allows the radio to monitor activities on other channels, helping users keep track of their group members. When enabled, the radio searches the preset scan list for the current channel and stays on a channel once activity is detected. If a channel is configured with Scan, the radio automatically initiates scanning when switching to that channel.
- Emergency: Designed for critical situations, this feature allows users to request help from companions or a control center. With the highest priority, an emergency call can be initiated to a preset contact. If "Alarm w/Call to Follow" is enabled, users can speak into the microphone during an emergency call without needing to press the PTT key.
- VOX (Voice Operated Transmit): This feature enables voice transmission without pressing the PTT key. The radio automatically transmits when the volume of the user's voice reaches a preset level. The sensitivity of the microphone transmission can be configured by a dealer. VOX can be used with a compatible earpiece by toggling a switch on the earpiece to VOX and inserting it into the radio. If a channel is configured with VOX, the feature automatically activates when switching to that channel. To disable, the earpiece switch should be toggled back to PTT.
- Talk Around: This feature allows users to continue communication in Direct Mode Operation (DMO) when the repeater malfunctions or the radio is out of the repeater's coverage, enabling a change between DMO and repeater mode.
- Busy Channel Lockout: Prevents users from transmitting on a channel that is already in use. The radio will beep if the PTT key is pressed while the channel is occupied. This feature is enabled by default.
- TOT (Time-Out Timer): Automatically stops voice transmission and causes the radio to beep if the preset period (default 60 seconds) expires. Releasing the PTT key stops the beeping, and users must wait a certain period before initiating another call. This prevents extended channel occupation and potential radio damage from overheating. This feature is enabled by default.
- Keypad Lock: Allows users to lock the keypad or knobs to prevent unintended operations when the radio is not in use.
- Battery Save: Automatically puts the radio into Battery Save mode if no carrier is detected or no transmission occurs within a specified period. This feature is enabled by default.
- Adjust Squelch Level: Enables adjustment of the squelch threshold required for the radio to unmute. A higher squelch level demands a stronger signal for unmuting. Squelch levels include Low, Normal, and Tight.
- Monitor: Allows the radio to receive more signals or weak signals, aiding in recognizing faint voices in the speaker.
- Scrambler: Inverts the frequency spectrum of transmitted audio signals. Only a receiving radio with the same scrambler setting can restore the audio, ensuring communication privacy and preventing eavesdropping. If a channel is configured with Scrambler, the radio automatically enables the feature when switching to that channel.
- CTCSS/CDCSS: Ensures that the radio plays voice only when the received Continuous Tone-Coded Squelch System (CTCSS) or Continuous Digital-Coded Squelch System (CDCSS) matches the transmitted CTCSS/CDCSS. This feature needs to be enabled by a dealer.
Usage Features
The BD61X radio is designed for ease of use with intuitive controls and indicators.
Basic Operations:
- Turning On/Off and Volume Adjustment: The On-Off/Volume Control knob is used to power the radio on or off (indicated by a click) and to adjust the volume clockwise (increase) or counterclockwise (decrease).
- Zone Selection: A zone groups channels within the same operational area. The radio supports up to three zones, each with up to 16 channels. Zones are selected using preprogrammed Zone Up or Zone Down keys.
- Channel Selection: Channels are selected by rotating the Channel Selector knob. The "Channel Notify" feature, if enabled, automatically announces the current channel upon power-on and when changing channels.
Battery Management:
- Charging: The battery should be charged before initial use. Charging can be done with either a standalone battery or the radio with the battery attached. It is recommended to power off the radio during charging. The charger's LED indicator shows the charging status: red for charging, orange for 85% or more charged, and green for fully charged or no battery present.
- Attaching/Removing Battery: The battery is attached by pushing the battery latch, removing the cover, inserting the top of the battery into the slot, and pressing the bottom until it's secure. The cover is then replaced, and the latch pushed down. To remove, the radio must be off, and the battery latch lifted.
- Checking Battery Power: Pressing and holding the preprogrammed "Battery Power Indicator" key provides battery status through LED indicators and alert tones: green (three beeps) for high, orange (two beeps) for medium, and red (one beep) for low. A continuous low battery tone indicates the battery is below the threshold and needs recharging or replacement.
Accessories:
- Antenna: Attached by aligning the threaded end with the connector and tightening clockwise. Users are cautioned not to hold the radio by the antenna or swing it, as this can affect performance and shorten its lifespan.
- Belt Clip: Attached by removing screws from the back of the radio, aligning the clip's screw holes, and tightening the screws.
- Audio Accessory: Attached by rotating the accessory connector cover counterclockwise, plugging in the accessory, and tightening the screw clockwise.
LED Indicator Status:
The LED indicator provides visual cues about the radio's status:
- Flashes green: Radio is turning on.
- Glows green: Radio is receiving.
- Glows red: Radio is transmitting.
- Flashes orange slowly: Radio is scanning.
- Glows orange: Indicates call hang time, a period after a call where no voice is transmitted or received, during which the user can press and hold the PTT key to speak.
Maintenance Features
Proper care and cleaning are essential to ensure optimal performance and a long service life for the BD61X Digital Portable Radio.
Product Care:
- Avoid Physical Damage: Do not pierce or scrape the product.
- Environmental Protection: Keep the product away from corrosive substances.
- Handling: Do not hold the radio by the antenna or earpiece cable.
- Accessory Port: Always close the accessory connector cover when no accessory is in use to protect the port.
Product Cleaning:
- Preparation: Always turn off the product and remove the battery before cleaning.
- Dust and Particles: Regularly clean dust and fine particles from the product surface and charging piece using a clean, dry, lint-free cloth or a brush.
- Surface Cleaning: For keys, knobs, and the front case, use a neutral cleanser and a non-woven fabric after long-term use.
- Avoid Harsh Chemicals: Do not use chemical preparations such as stain removers, alcohol, sprays, or oil preparations, as these can damage the surface case.
- Drying: Ensure the product is completely dry before use.
Troubleshooting:
The manual includes a troubleshooting section to help users diagnose and resolve common issues, such as the radio not turning on, weak or intermittent voice reception, inability to communicate with group members, or unwanted noise on the channel. Solutions range from reattaching the battery, recharging, cleaning contacts, adjusting volume, checking antenna connection, verifying frequencies, to moving closer to other members or away from interference sources. For persistent issues, users are advised to contact their dealer or Hytera for technical support.