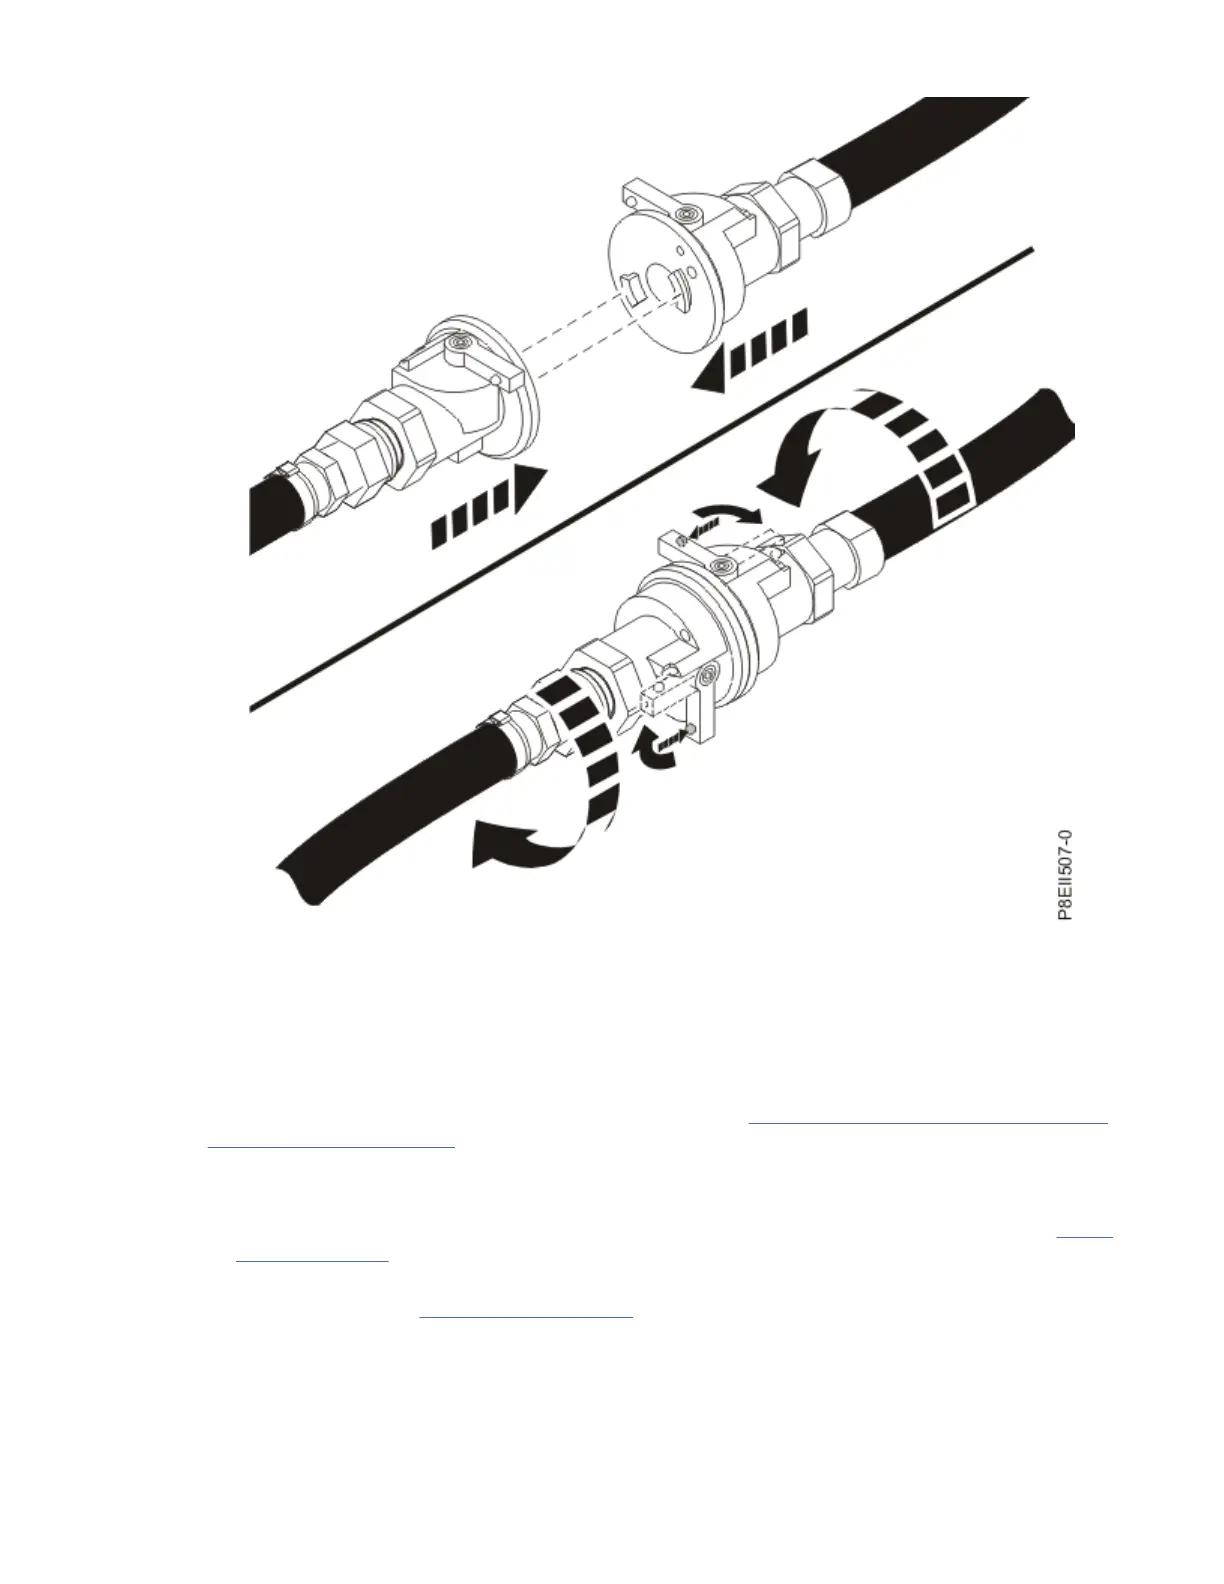
Figure 109. Coupling the hoses
27. Rotate the rack hose bracket down and secure the hook-and-loop strap around each hose.
28. With the rear door closed and latched, move to the front of the rack. Use a leveler wrench to raise the
right front leveler approximately 3 mm (0.12 in.) or until the rear door opens and closes freely.
Periodically check that the rear door swings freely. If necessary, adjust the height of the right-front
leveler until the rear door does swing freely.
29. Attach the hoses and ll the heat exchanger with water. See “Water cooling system specication and
requirements” on page 159 for information about routing and attaching the hoses and lling the heat
exchanger.
30. After you attach the hoses and ll the heat exchanger with water, complete the following steps:
a. Install the inner hose access panel on the inside bottom of the heat exchanger, as shown in Figure
110 on page 153.
b. Install the outer hose access panel on the outside bottom of the heat exchanger. Add two M6
screws, as shown in Figure 111 on page 154. Use a torque screwdriver to tighten the screws to
2.5 Nm ± 0.2 Nm (22.1 inch lbs ± 1.8 inch lbs).
c. (Optional) Secure the outer hose access panel to the heat exchanger with two M4 screws. Use a
torque screwdriver to tighten the screws to 2.5 Nm ± 0.2 Nm (22.1 inch lbs ± 1.8 inch lbs).
d. Reconnect power to the rack and all components; then, close and latch the heat exchanger.
152
Power Systems: Racks and rack features
 Loading...