even after you remove the drives, power supply units, secondary expander
modules, canisters, fans, and cover, the enclosure weighs 43 kg (95 lbs).
Procedure
Sliding the expansion enclosure out of the rack
Note: You can accomplish most service actions when the expansion enclosure is
fully extended from the rack on its slide rails.
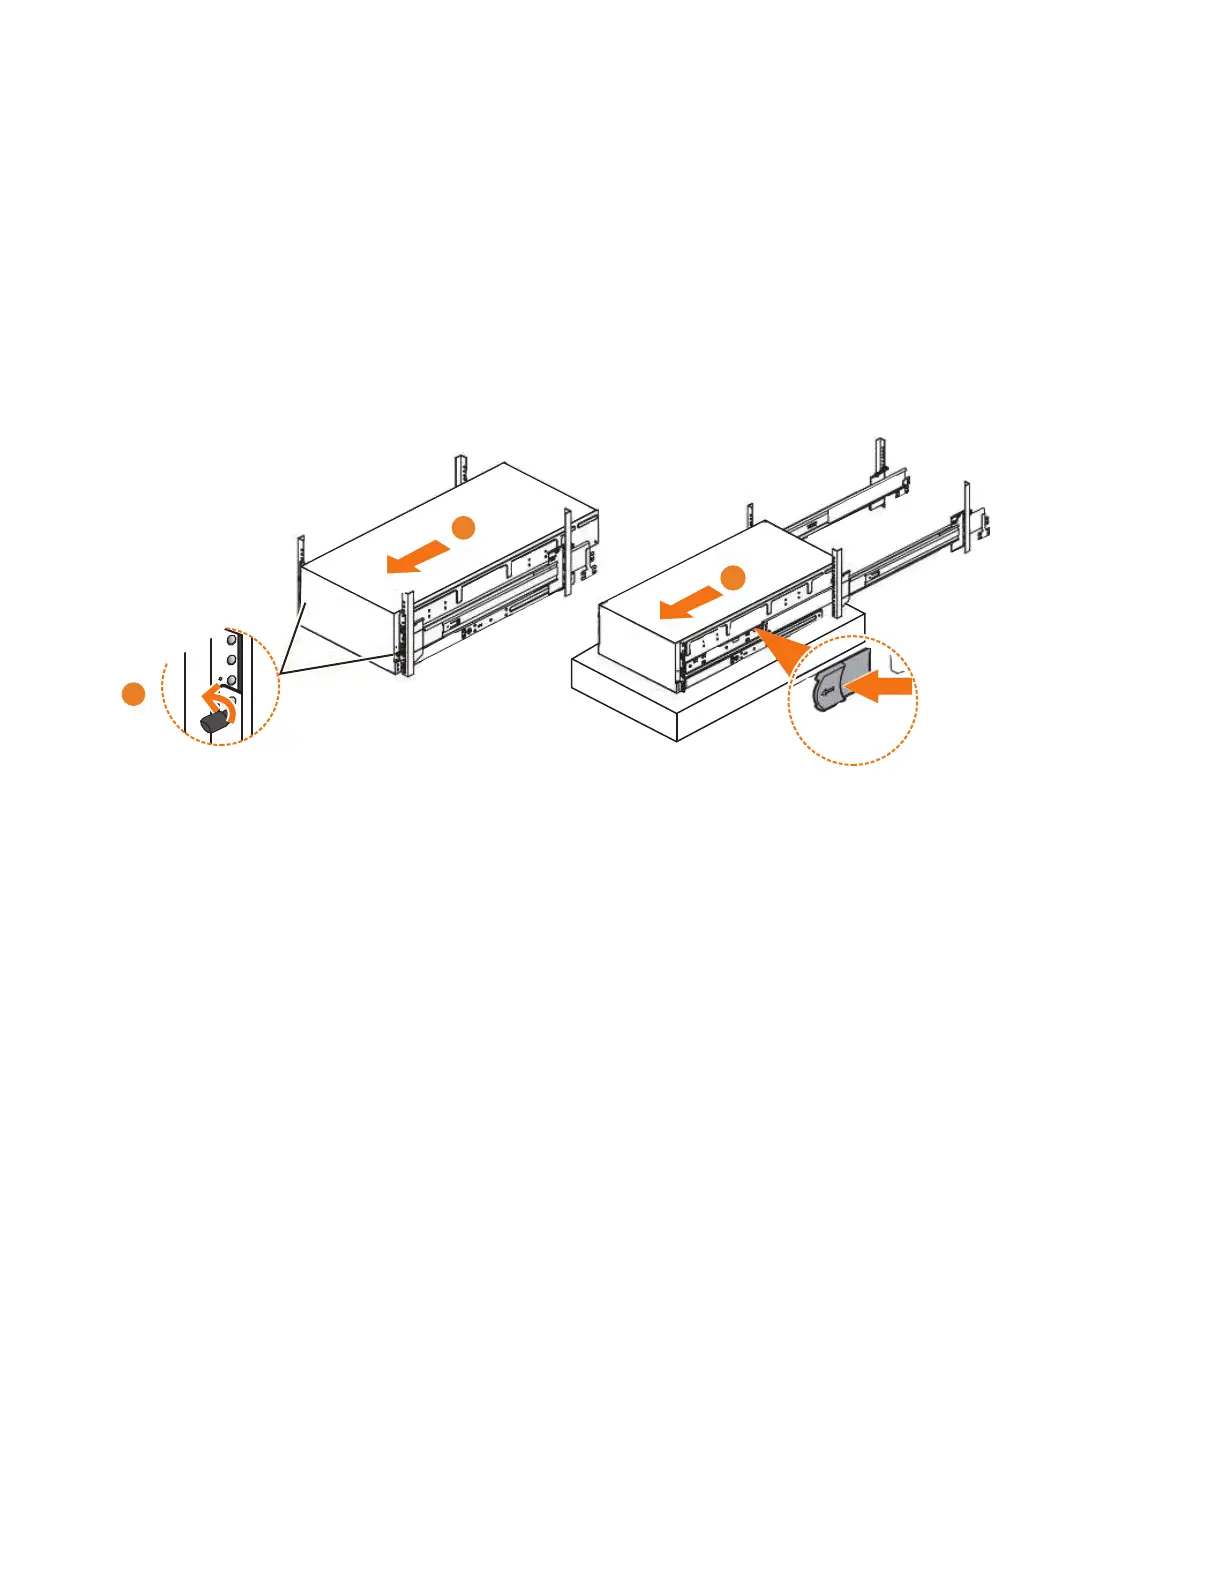
1. Loosen the locking thumb screws (▌1▐) on the front of the enclosure, as shown
in Figure 85.
2. Carefully slide the enclosure forward out of the rack (▌2▐), as shown in
Figure 85.
3. Locate the left and right blue release tabs near the front of the enclosure. Pull
both release tabs forward to unlock the drawer mechanism (▌3▐ in Figure 85).
4. Slide the enclosure and inner rail member out of the rack (▌4▐ in Figure 85).
For safety, ensure that a mechanical lift or other mechanism is available to
support the weight of the enclosure.
Removing the expansion enclosure from the rack
Note: Continue the procedure (step 5 through step 7 on page 103) only if you
must completely remove the expansion enclosure from the rack to complete a
service procedure.
5. Power down the expansion enclosure and disconnect all power cords.
6. Remove all of the following parts from the enclosure, as described in the
following procedures:
v “Removing the top cover: 2077-92F” on page 48
v “Removing the fascia: 2077-92F” on page 85 (for the PSU fascia) and
“Removing a power supply: 2077-92F” on page 103
v “Removing a drive: 2077-92F” on page 105
v “Removing a secondary expander module: 2077-92F” on page 108
v “Removing an expansion canister: 2077-92F” on page 113 and “Removing
and installing a SAS cable: 2077-92F” on page 88
v “Removing a fan module: 2077-92F” on page 115
Figure 85. Removing the 2077-92F enclosure from the rack
102 Storwize V5000 Gen2: Quick Installation Guide
 Loading...


