components, see “Installing the shipping brackets” for instructions on installing
the shipping brackets if you plan to relocate the rack with the server installed.
Installing the shipping brackets
This topic provides information on how to install the shipping bracket to keep the
server secure when transporting the server to a new location.
About this task
Note: These instructions apply to both the 4U and the 8U server models. Only the
4U is shown in the illustrations.
If you plan to transport the rack to another location with the server installed, you
must install the shipping brackets that are provided in the shipping bracket kit.
The shipping brackets secure the server into the rack. Mounting screws are also
provided in the shipping bracket kit.
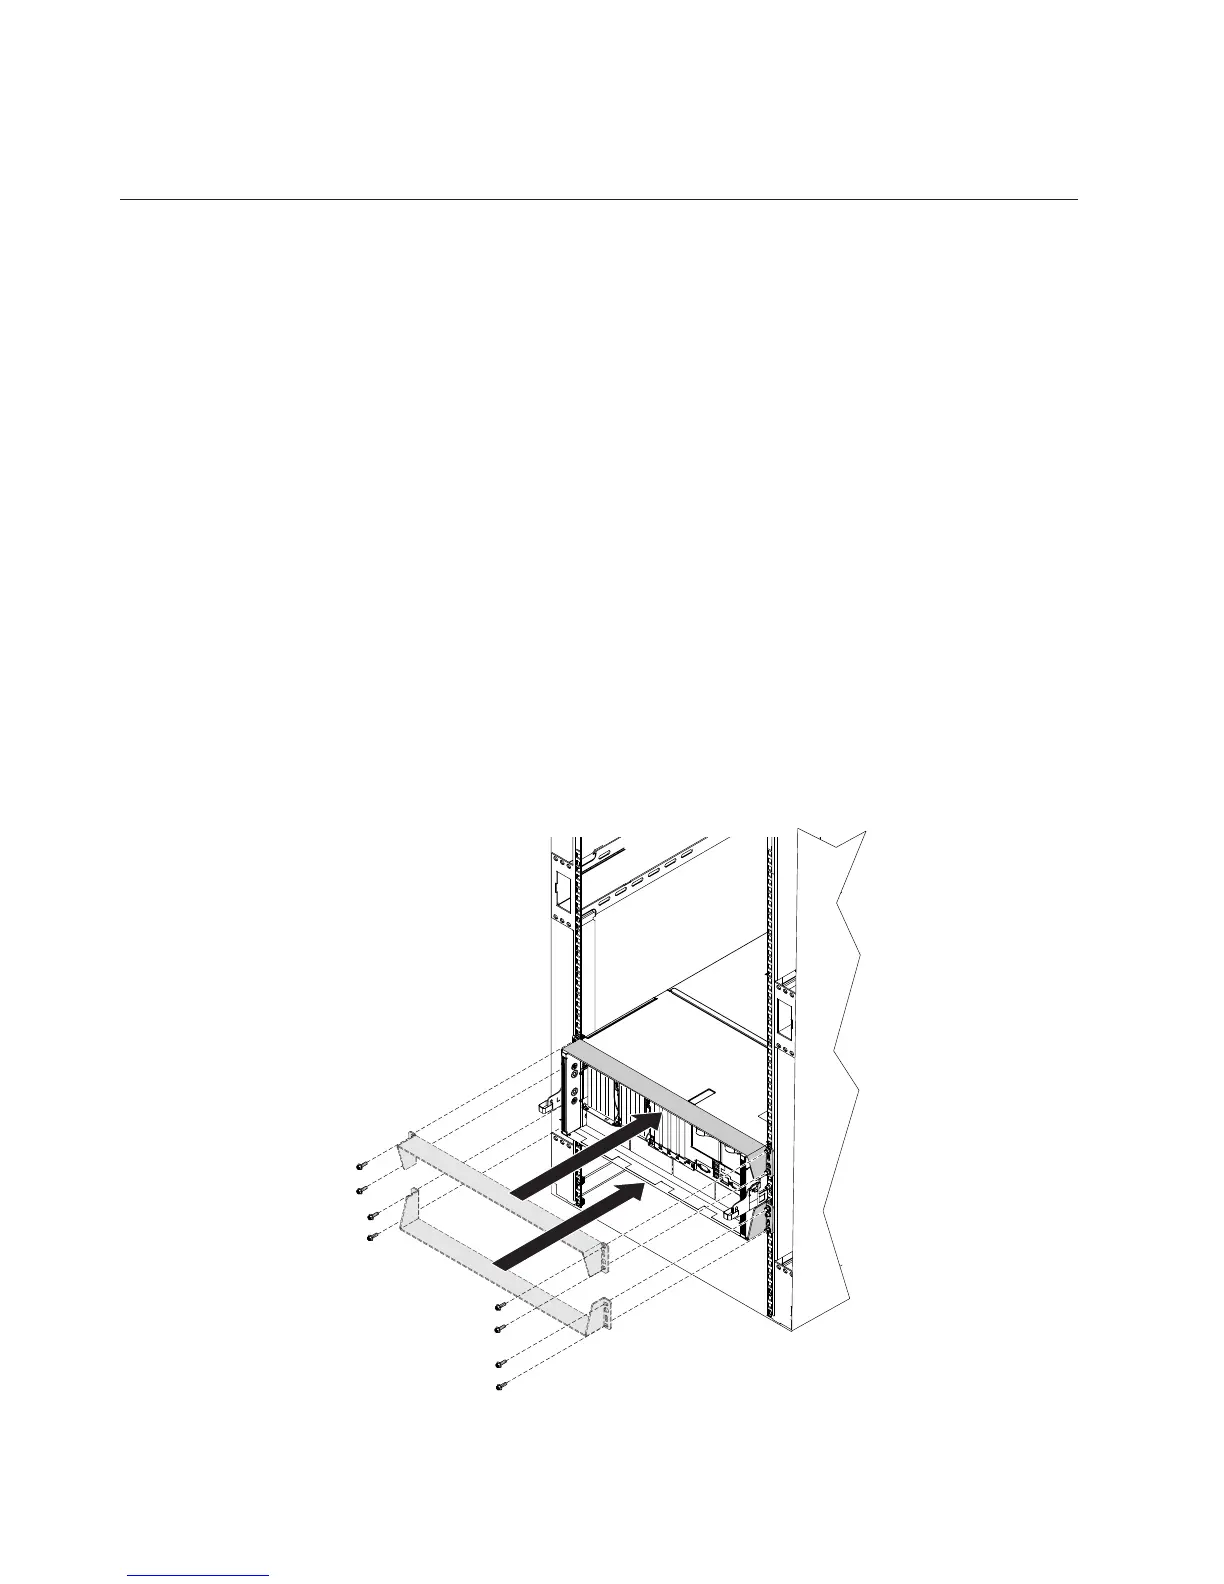
To install the shipping brackets on the rack, complete the following steps:
1. Facing the rear of the server, align the top rear shipping bracket to the top of
the server; then, slide the shipping bracket forward against the rack.
2. Install four M5 hex head screws from the shipping bracket kit in the top rear
shipping bracket, two screws on the right side and two screws on the left side.
Note: Do not tighten the M5 hex head screws. You will be instructed later to
tighten the screws.
3. Align the bottom rear shipping bracket to the bottom of the server; then, slide
the shipping bracket forward against the rack.
4. Install four M5 hex head screws from the shipping bracket kit in the bottom
shipping bracket, two screws on the right side and two screws on the left side.
14 System x3850 X6 and x3950 X6 Types 3837 and 3839: Rack Installation Instructions
 Loading...


