7. Reinstall all components. See the server documentation for instructions on
installing the individual components for the server. After installation of all
components, see “Installing the shipping brackets” on page 14 for instructions
on how to install the shipping brackets if you plan to transport the rack to
another location with the server installed.
Fastening the server in the rack
This topic provides information about how to fasten the server in the rack to keep
it secure in a vibration-prone area.
About this task
Note: These instructions apply to both the 4U and the 8U server models. Only the
4U is shown in the illustrations.
If the server is installed in a vibration prone area, you can optionally fasten the
server to the rack to keep it secure after the server is installed in the rack.
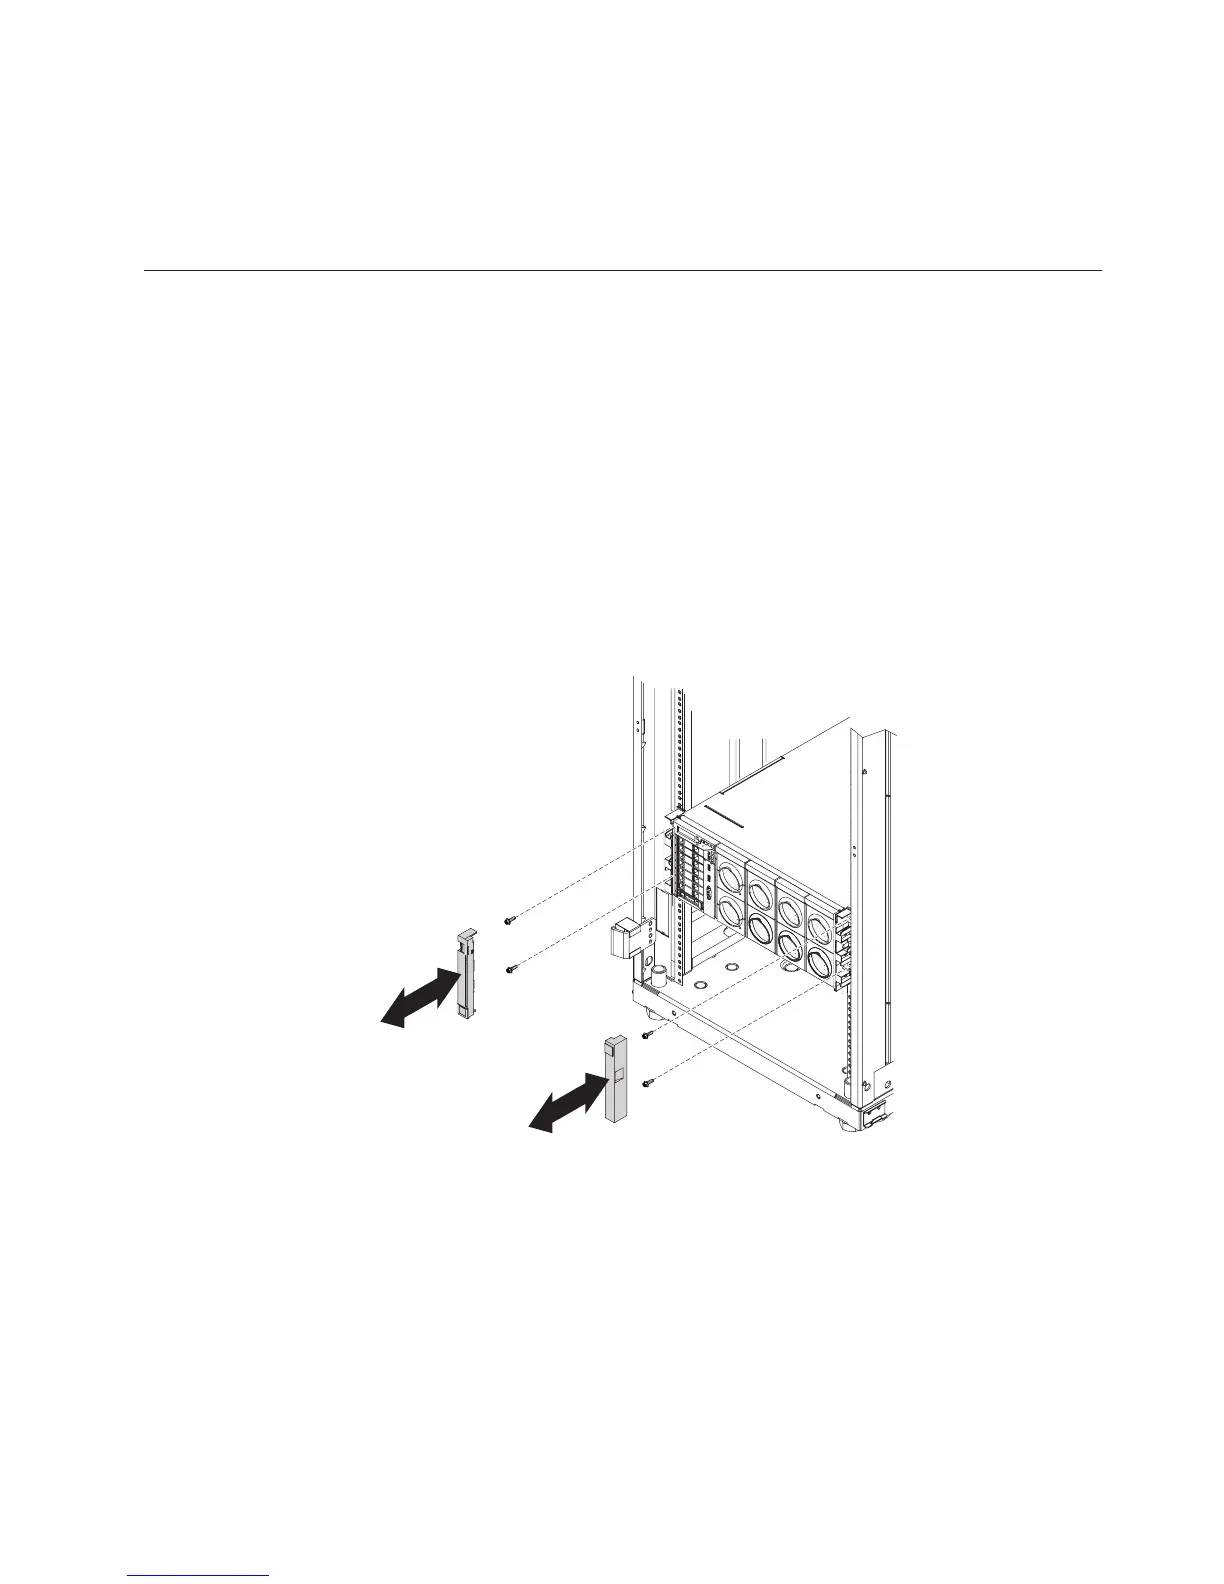
To fasten the server to the rack, complete the following steps:
1. Remove the plastic trim bezels from the left and right sides of the server.
2. Install four M5 hex head screws through the front of the server (two screws on
each side).
Notes:
v The four M5 hex head screws that are installed through the front of the
server are in the rail kit box.
v Do not tighten the M5 hex head screws completely.
3. After all of the screws are installed, tighten all of the screws.
4. Reinstall the plastic trim bezels on both sides of the server.
5. Reinstall all components. See the server documentation for instructions on
installing the individual components for the server. After installation of all
Chapter 3. Rack installation 13
 Loading...


