12
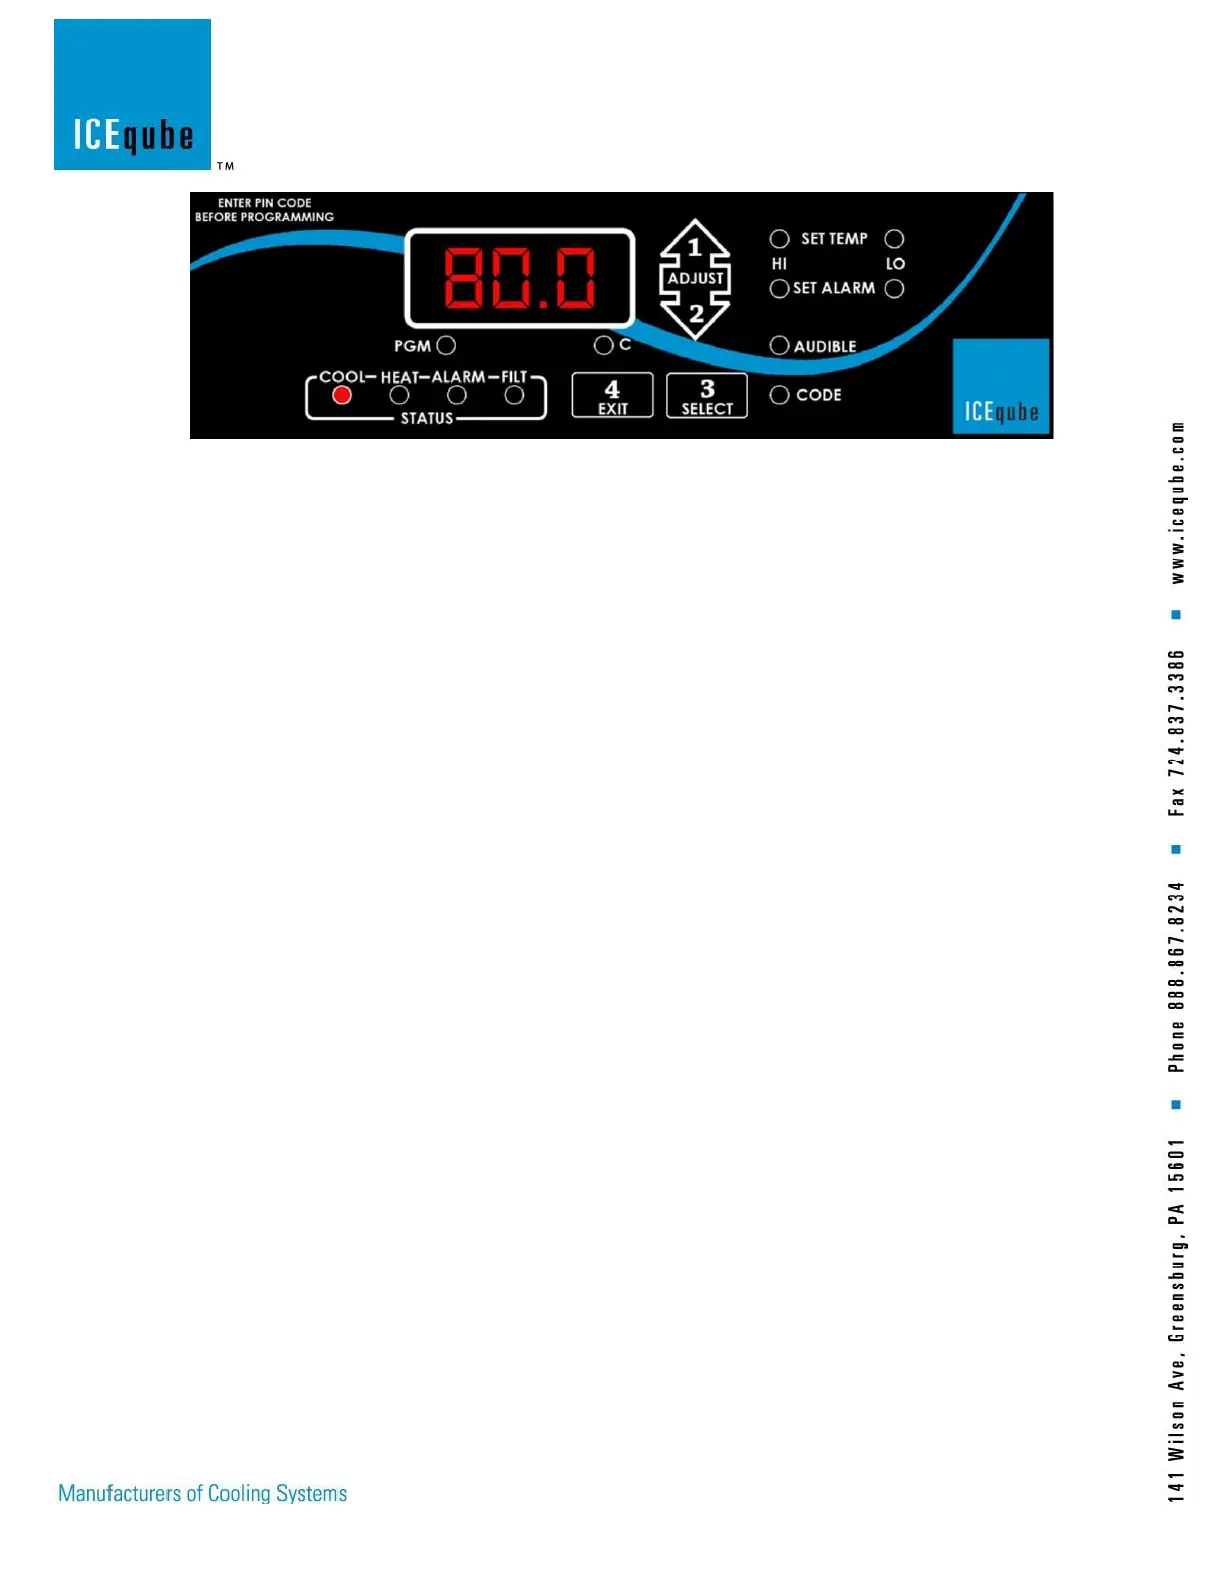
Figure 7: Standard Controller
To change the factory default settings, enter the programming code sequence below:
“1 Adjust-up” arrow
“2 Adjust-down” arrow
“3 Select”
“4 Exit”
After pressing the above sequence the program LED should illuminate along with three alternating flashing boxes
on the display face, indicating the code was accepted. If no selection is made within 1 minute, the controller returns
to the normal operating mode.
Note: Pressing the “4 Exit” button at any time while in the programming mode returns the controller to the
normal operating mode.
Press “3” to continue programming. The set temperature “HI” LED illuminates with the display indicating the
“Cooling On” Set-point. The compressor will begin operation at this temperature and will remain operating until the
enclosure temperature decreases approximately 7°F (4°C). Press “1” or “2” until the desired set-point is displayed.
The range for this adjustment is 70° to 126°F (21° to 52°C). When the adjustment is complete, press “3” to
continue.
The set temperature “LO” LED is on with the display indicating the optional “Heating On” set-point. The heating
system will begin operation at this temperature and remain operating until the enclosure temperature increases
approximately 7°F (4°C). Press “1” or “2” until the desired set point is displayed within a range of 0°F to 63°F (-
17.8°C to +17°C).
Notes: Heat is only available with Ordinary Location Units
Notes: Review alarm settings if the “Cool On” or “Heat on” set-points have been changed.
Press “3” to continue. The set alarm “HI” LED is on with the display indicating the high temperature alarm set-
point. The alarm will activate at this temperature and will automatically reset at 2°F (1°C) below this temperature.
Press “1” or “2” to change the alarm set-point within a range of 8°F (4°C) above the set temperature “HI” set-point,
to 131°F (55°C).
Press “3” to continue. The set alarm “LO” LED is on with the display indicating the low temperature alarm set
point. The alarm will activate at this temperature and will automatically reset at 2°F (1°C) above this temperature.
Press “1” or “2” to change the alarm set-point within a range of 8°F (4°C) above the set temperature “LO” set-point,
to -20°F (-29°C).
Press “3” to continue. The “Alarm” LED will flash and the display will show “ALL” indicating the “ALL” alarm
on/off status. Press “3” and the display will show either “ON” or “OFF”, indicating current alarm status. Press “1”
or “2” to toggle the mode as desired. If the “OFF” mode is selected, no alarms will activate and the audible on/off
select and POA, Power Off Alarm, functions are skipped.